5 Steps: How to Password Protect a Word Document Easily

How to Password Protect a Word Document: Easy Step-by-Step Guide

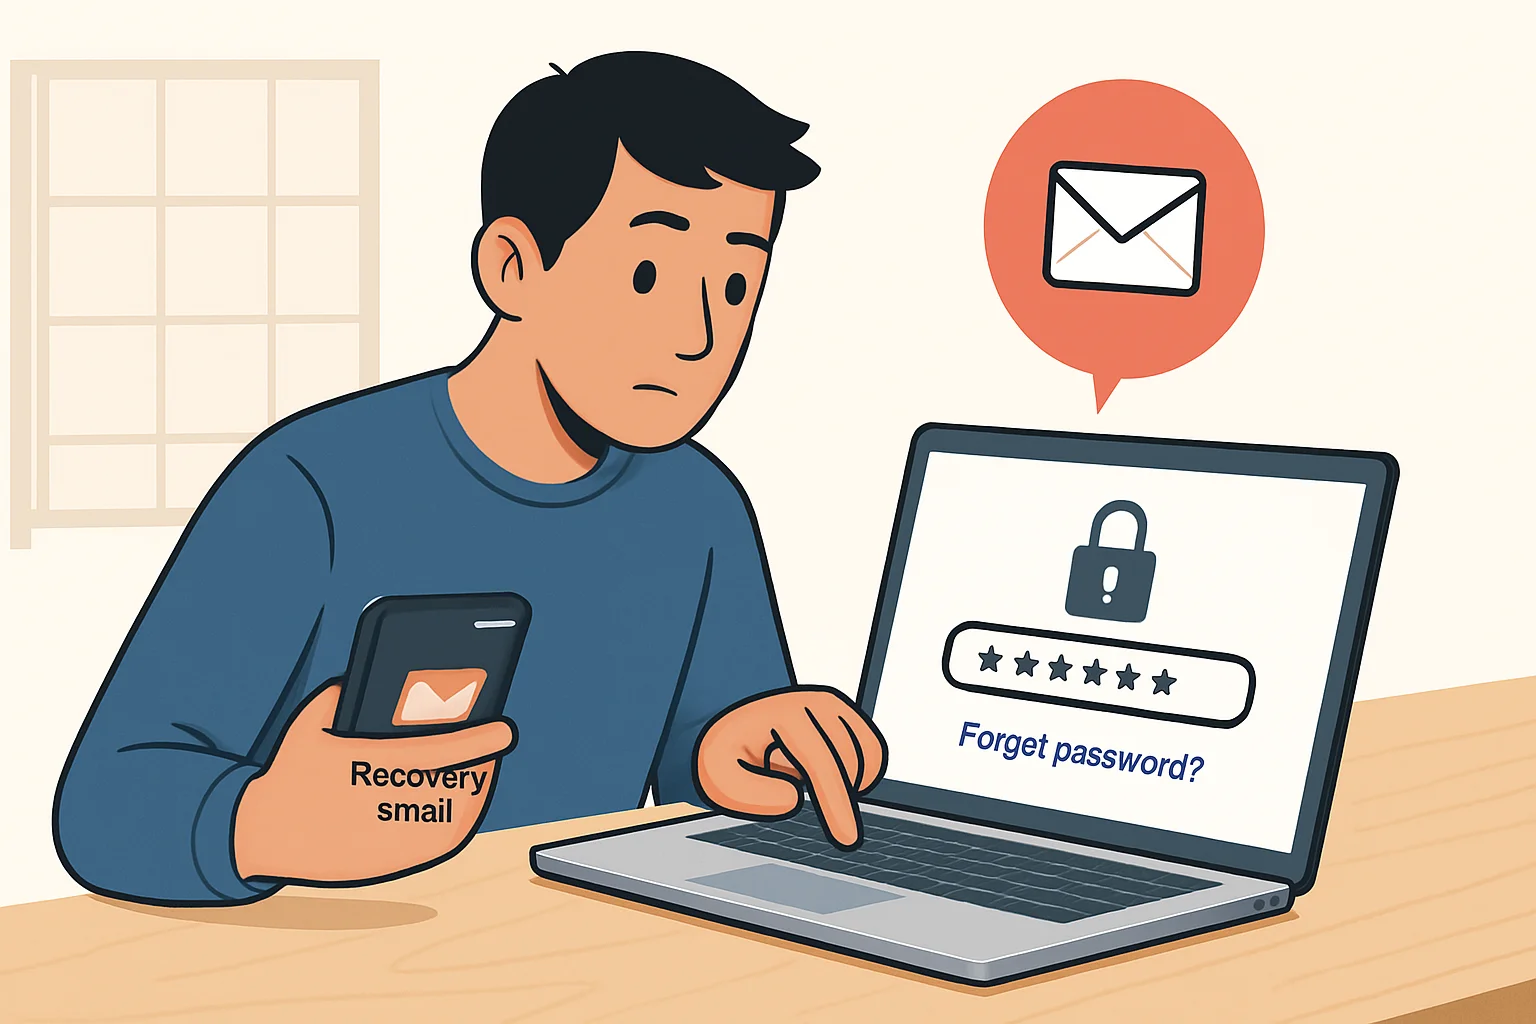
Keeping files safe is more important than ever. Whether you are creating business reports, personal notes, contracts, or financial records, there’s always a risk that someone might access them without your permission. Learning how to password protect a Word document is one of the simplest ways to keep your private information safe.

The best part? It’s simple and needs no tech skills. This guide will walk you through every step for both Windows and Mac, so you can secure your files in less than a minute.

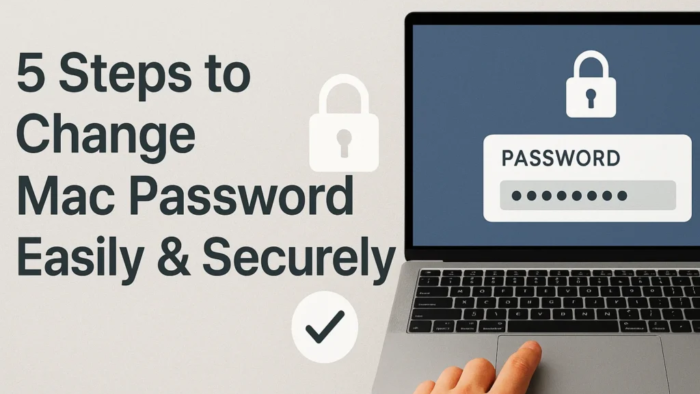
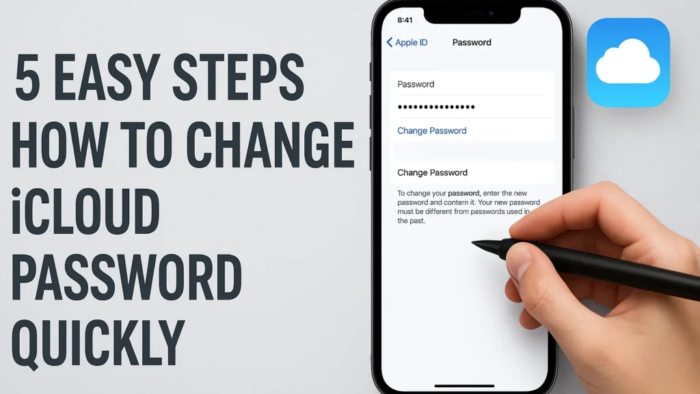
For more details, explore my previous blog on this topic : Change Mac password

Step 1: Open Your Document

The first step in how to password protect a Word document is simply opening the file you want to protect.

  • On your computer, launch Microsoft Word.
  • Open the document you want to lock.
  • Click File in the top-left corner of the screen.

Step 2: Access the “Protect Document” Option

how to password protect a Word document

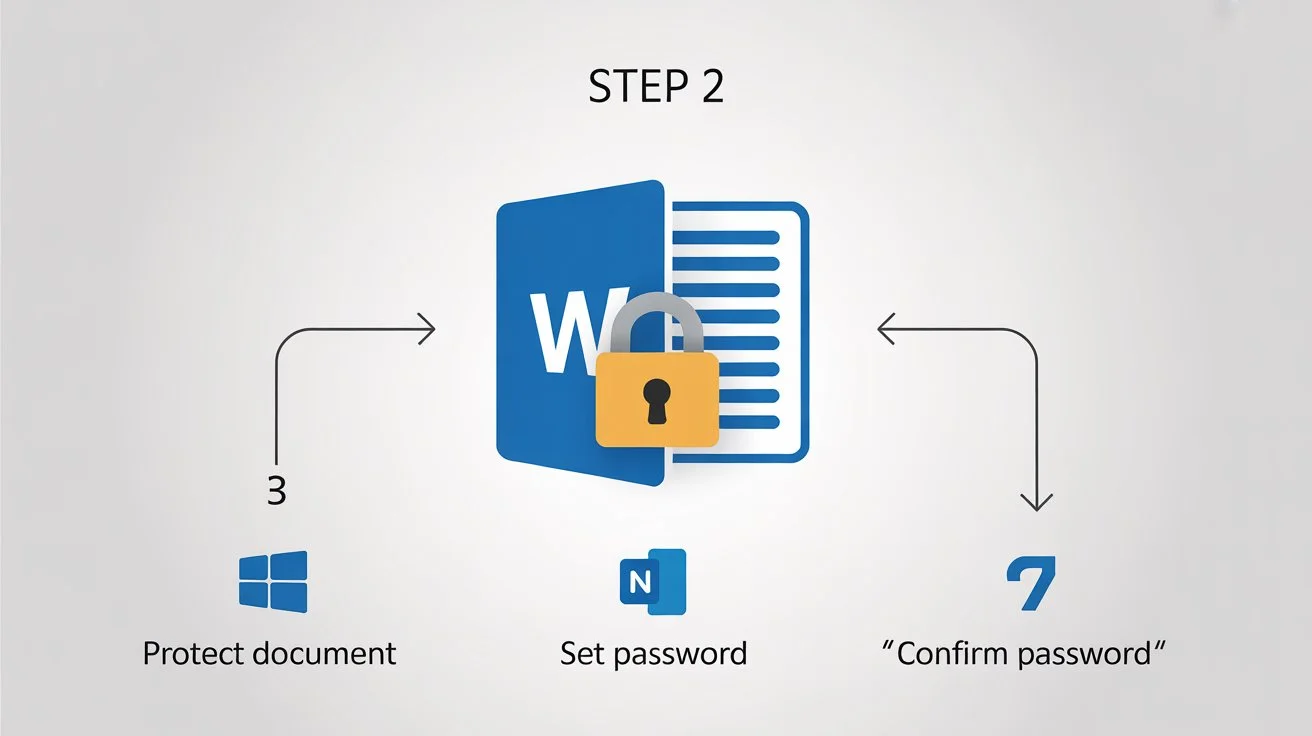
Once your file is open, go to security settings to learn how to password protect a Word document.

For Windows Users:

  • Go to File > Info > Protect Document.
  • Choose Encrypt with Password.

For Mac Users:

  • Go to File > Set Password.
  • Click Password… to continue.

Step 3: Set a Strong Password

how to password protect a Word document

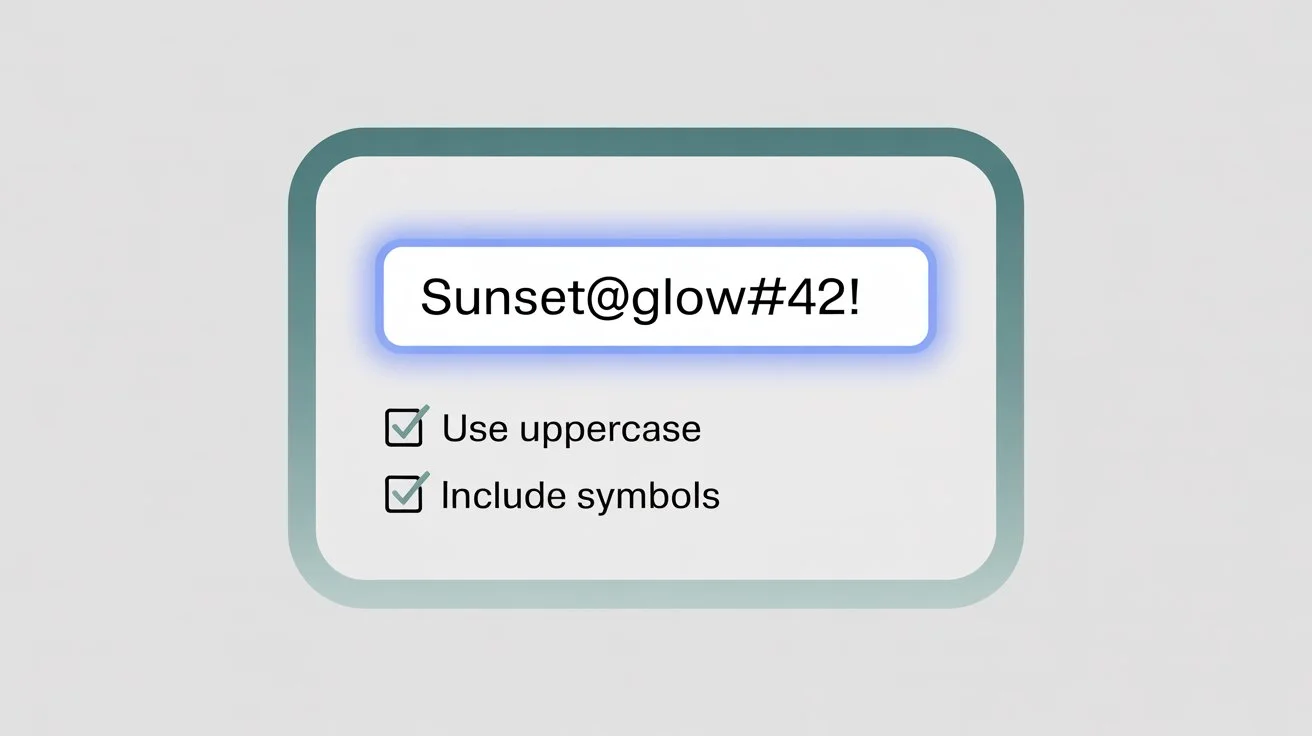
A pop-up window will appear asking you to type a password. This is where you create the lock for your document.

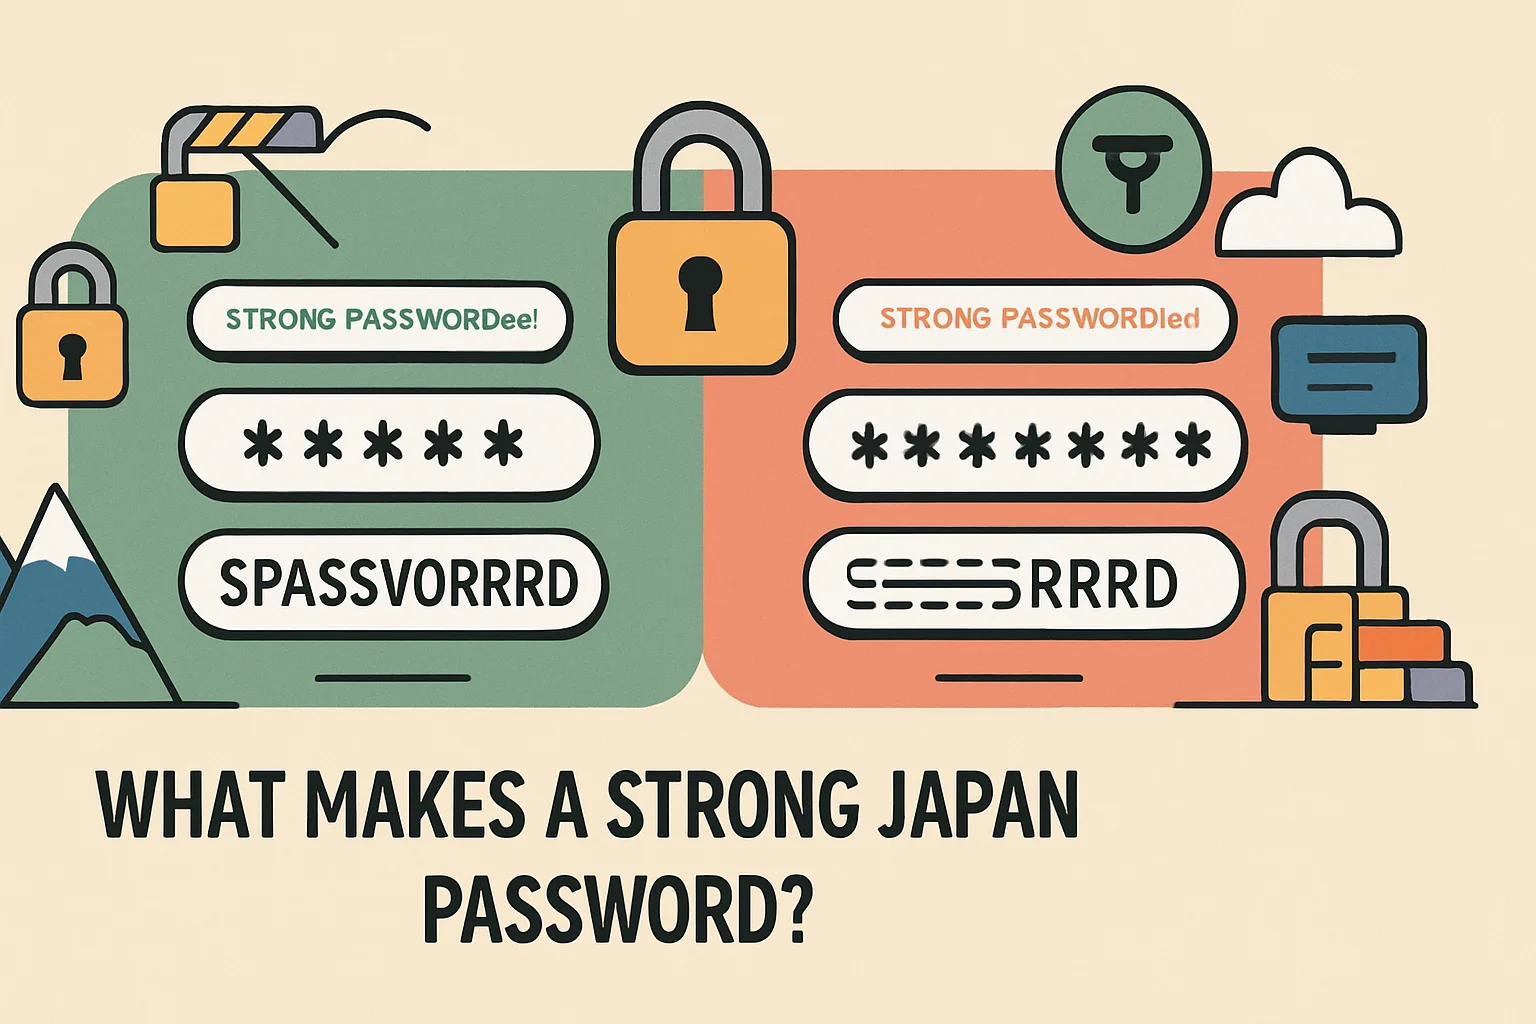
Tips for a strong password:

  • Use at least 12 characters.
  • Combine uppercase letters, lowercase letters, numbers, and symbols. Example: Sunset@Glow #42!
  • Avoid common passwords like “password123” or your name.

Once you type your password, click OK.

Important: If you forget your password, Microsoft cannot recover it. Always store it in a safe place.

Step 4: Confirm Your Password

The fourth step in how to password protect a Word document is confirming that you typed the password correctly.

  • Re-enter the exact same password.
  • Click OK again.

This ensures there are no typing mistakes.

Step 5: Save Your Document

Your document will only be secure after you save it.

  • Press Ctrl + S (Windows) or Command + S (Mac).
  • Close the file and reopen it to check that the password prompt appears.

Optional: Restrict Editing Without Locking the File

how to password protect a Word document

Sometimes you may want people to view your file but not make changes. You can do this without blocking access completely.

For Windows:

  • Go to File, then Info, Protect Document, and Restrict Editing.
  • Check: Allow only this type of editing.
  • Select No changes (Read only) from the dropdown.
  • Click “Yes, Start Protection” and set a password.

Extra Tips for Successful Protection

When you learn how to password protect a Word document, it’s also important to follow these extra safety tips:

  • Test Protection: Close and open the file again to test the password.
  • Avoid sharing passwords via text or email: Use secure apps like Signal or password managers instead.
  • Update your passwords yearly: Especially for sensitive documents.

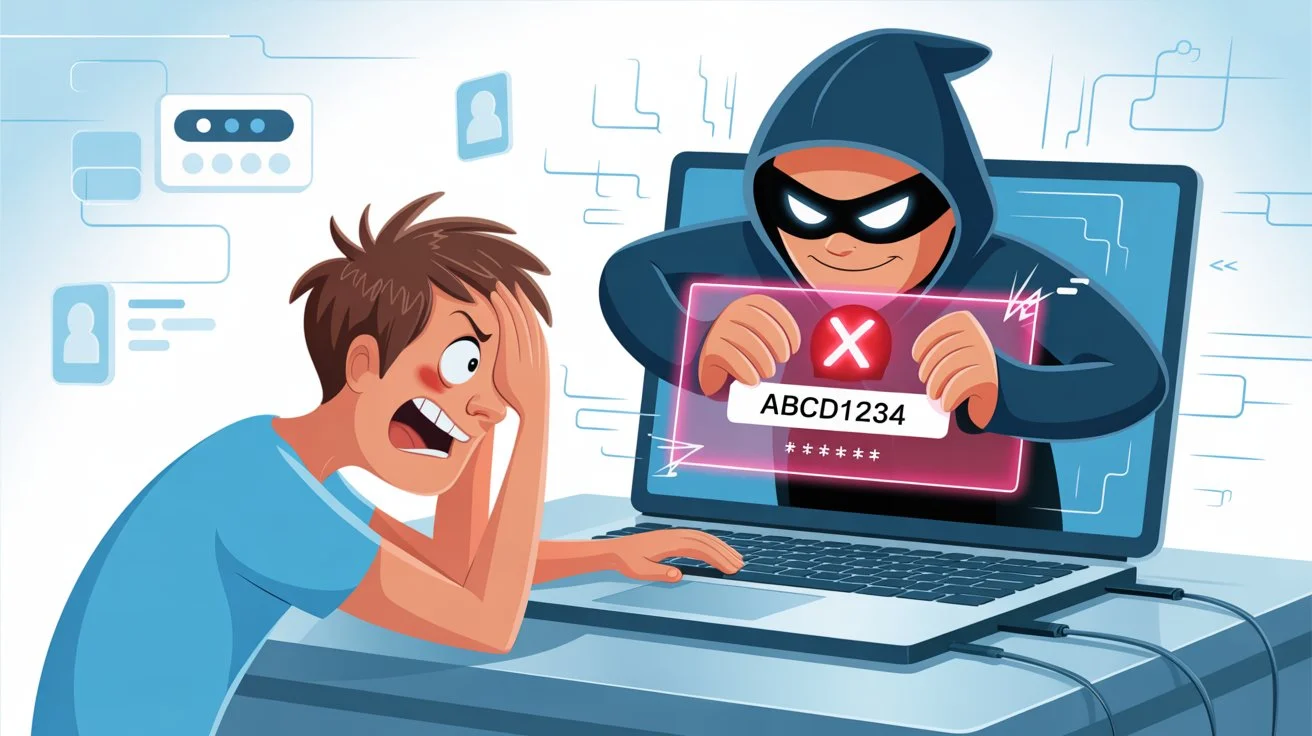
What If You Forget Your Password?

If you forget the password, recovering the file is hard. Here’s what you can try:

  • Use any password hints you created during setup.
  • Try older passwords you have used before.
  • Consider professional recovery tools like PassFab for Word (paid option—use with caution).

Benefits of Using Password Protection in Word

how to password protect a Word document

The main benefit of learning how to password protect a Word document is keeping your information private. With password encryption, even if someone gets access to your file, they won’t be able to read or edit it without your permission. Microsoft Word uses AES-128 encryption, which is highly secure and could take years to break using brute-force attacks.

Common Questions About Password Protecting Word Documents

Q1: Does this method work for all versions of Word?

Yes. The steps are similar in Word 2010, 2013, 2016, 2019, 2021, and Microsoft 365.

Q2: Can I do this on a mobile device?

Yes. On Android or iOS, open your document, tap the menu (•••), choose Protect, then Encrypt, and set a password.

Q3: Can I set two passwords?

One password opens the file; another limits editing.

Q4: Can I remove a password later?

Yes. Repeat the steps in how to password protect a Word document, delete the password field, and save your file.

Why You Should Start Protecting Your Word Files Today

Once you know how to password protect a Word document, you can safeguard everything from personal journals to company contracts. This simple habit can prevent identity theft, data leaks, and unwanted changes to your files.

In just five steps, you can lock your file and have peace of mind knowing only trusted people can open or edit it.

Final Words

Learning how to password protect a Word document takes less than a minute, but the protection lasts for years. Whether you’re working on confidential business files or private personal notes, this security step is worth it. Start protecting your important documents today—you’ll thank yourself later.

5 Steps to Change Mac Password Easily & Securely

How to Change Mac Password: Keep Your Computer Safe & Secure

Your Mac password is like the main key to your digital home. If someone knows it, they can open the door to your files, photos, emails, and private details. That’s why it’s smart to change Mac password regularly. A fresh, strong password keeps your data safe and gives you peace of mind.

In this guide, you’ll learn why changing your password matters, how to do it step by step, and tips for creating a strong password. Everything is explained in simple English, so anyone can follow along—no tech skills needed!

For more details, explore my previous blog on this topic : How do I change my Facebook password

Why Changing Your Password Matters

Every time you change Mac password, you’re adding an extra layer of security. If you’ve shared your password before, used it on public Wi-Fi, or think someone may have guessed it, updating it is the best move.

Reasons to change include:

  • Someone else might know your current password.
  • You haven’t updated it in a long time.
  • You suspect suspicious activity on your Mac.
  • You want to keep hackers away.

A strong, unique password protects your files and makes it harder for cybercriminals to access your personal data.

How to Change Mac Password: Step-by-Step Guide

change Mac password

Changing your Mac password is quick and simple. Follow these steps:

1. Open System Settings

  • Click the Apple icon in the top-left corner.
  • Open System Settings (or System Preferences on older macOS).

2. Go to Users & Groups

  • In the sidebar, click Users & Groups.
  • 🔒 You’ll need your current password to make changes.

3. Select Your Account

  • Click your username on the left side.

4. Click “Change Password.”

  • A pop-up will appear.
  • Enter your current password.
  • Type your new password twice to confirm.
  • Add a password hint (optional but helpful).

5. Save Changes

  • Click Change Password.
  • Done! You’ve successfully updated your password.

💡 Pro Tip: Log out and sign back in to test your new password immediately.

Forgot Your Password? Reset It with Apple ID

change Mac password

If you forgot your old password, use your Apple ID to change Mac password:

  1. On the login screen, type the wrong password three times.
  1. Click the ? icon and select Reset using Apple ID.
  1. Enter your Apple ID credentials.
  1. Follow the steps on screen to set a new password.

⚠️ Note: This only works if your Apple ID is linked to your Mac user account.

Create a Strong Password: Easy Tips

change Mac password

If you’re going to change Mac password, make sure the new one is strong and hard to guess:

  1. Mix it up—use uppercase letters, lowercase letters, numbers, and symbols. Example: Sunset at the Beach! 42
  1. Avoid personal info—no birthdays, pet names, or obvious words.
  1. Tip: Use at least 12 characters.
  1. Try a passphrase—combine unrelated words, like BlueBicycle$Rockets.
  1. Use a password manager—apps like iCloud Keychain or 1Password store your passwords securely.

When Should You Change Mac Password?

Here are the best times to update your Mac password:

  • After sharing it with someone.
  • If your Mac was lost or stolen.
  • When you suspect hacking or malware.
  • If you haven’t updated in over 6 months.

Being proactive keeps your Mac secure and your personal information safe.

Extra Security Tips for Your Mac

change Mac password

Updating your password is important, but you can take security even further:

  • Enable FileVault—Encrypts your files so no one can read them without your password.
  • Turn on Two-Factor Authentication—adds another step to verify your identity.
  • Avoid public Wi-Fi without a VPN—hackers love unsecured networks.
  • Keep macOS updated—security patches close vulnerabilities.

Conclusion

change Mac password

Knowing how to change Mac password is one of the simplest and most effective ways to protect your computer. It takes just a few minutes but adds a huge layer of safety against unwanted access.

By following the steps in this guide, creating a strong password, and updating it regularly, you’ll keep your files and personal information much safer. Pair this with other security features like FileVault and two-factor authentication for maximum protection.

Stay proactive, and your Mac will stay secure!

FAQs About Changing Your Mac Password

Q1: How often should I change Mac password?

A: Every 3–6 months or immediately if you suspect it’s been compromised.

Q2: Will changing my password log me out of other devices?

A: No, it only affects your Mac login. iCloud, email, and apps have their own passwords.

Q3: Can I use Touch ID instead of a password?

A: Yes, but you’ll still need a password as a backup. Set it up in System Settings > Touch ID & Password.

Q4: What if I can’t reset with Apple ID?

A: Make sure your Apple ID is linked to your account in Users & Groups > Password.

Q5: Is a password hint necessary?

A: No, but if you add one, make it vague—just enough to jog your memory without revealing the answer.

🔑 Key Takeaway: Changing your Mac password regularly is a small step that makes a big difference in your security. Follow this guide whenever you need to change Mac password and keep your digital world safe.

5 Easy Steps How to Change iCloud Password Quickly

How to Change iCloud Password: An Easy and Secure Guide for Everyone

Keeping your Apple account safe is essential. Your iCloud password is like a master key that protects your photos, emails, contacts, and more. If you suspect someone else knows it or it’s simply been a while, learning how to change iCloud password is the smartest step. The good news? It’s quick and easy! In this guide, you’ll learn how to update your password on your iPhone, iPad, Mac, and even through a web browser.

For more details, explore my previous blog on this topic: How to reset mac password

Why You Should Change Your iCloud Password

how to change iCloud password

Think of your iCloud password as the lock to your digital home. Changing it regularly helps keep hackers out. You should consider updating it if:

  • You shared it with someone (even accidentally).
  • You logged into iCloud on a public or shared computer.
  • You received an Apple alert about suspicious activity.
  • It’s been over a year since your last password update.

A strong, unique password is your first line of defense. Knowing how to change iCloud password keeps your account safe.

How to change iCloud password using iPhone or iPad

how to change iCloud password

(You will need your device passcode for this method.)

Here’s how to do it directly from your iPhone or iPad:

  1. Open Settings—Tap the grey gear icon on your home screen.
  1. Tap Your Name—Located at the very top of the menu.
  1. Go to “Password & Security” and enter the passcode if asked.
  1. Select “Change Password”—it’s near the top.
  1. Enter Your Device Passcode—The same one you use to unlock your device.
  1. Create New Password—Use strong letters, numbers, and symbols.
  1. Confirm the Password—Re-enter it to avoid mistakes.
  1. Tap “Change“—your new password is ready.

Your device will update your account automatically. Other devices linked to your Apple ID will prompt you for the new password.

How to Change iCloud Password on Mac

how to change iCloud password

(You will need your Mac login password.)

To update it from your Mac:

  1. Click the Apple Menu—top left of your screen.
  1. Select “System Settings” or “System Preferences.”
  1. Click Your Name (Apple ID)—Found near the top.
  1. Choose Password & Security from the left panel.
  1. Click “Change Password” beside the password option.
  1. Enter Your Mac Password—This verifies it’s really you.
  1. Type Your New iCloud Password—Make it unique and strong.
  1. Verify and click “Change—Done”!

Your Mac will keep you signed in, but your other Apple devices will soon request the updated login.

How to Change iCloud Password Using a Web Browser

Best if you can’t use your Apple devices.

Follow these steps:

  1.  Visit appleid.apple.com using Safari, Chrome, or Firefox.
  1. Sign In—Use your Apple ID email and current iCloud password.
  1. Verify Your Identity—Enter the code sent to your trusted device or phone number.
  1. Go to the Security Section—look for “Security” in your account settings.
  1. Click “Change Password“—enter your current password.
  1. Enter a New Password—Strong, unique, and not used elsewhere.
  1. Confirm and Save – Click “Change Password” to finish.

When using a public computer, remember to sign out afterward.

Forgot Your Old iCloud Password? Here’s What to Do

how to change iCloud password

If you forget your password, reset it

  •  On iPhone/iPad via Settings → Your name → Sign-In & Security → Change Password → “Forgot Password?”

and follow the prompts.

  • On Mac: Click “Forgot Password?” when prompted during the password change process.
  • On the Web: Go to appleid.apple.com and click “Forgot Apple ID or password?”, enter your details, and follow the recovery steps.

Apple may need a few days to verify you.

Pro Tips for a Strong iCloud Password

how to change iCloud password

When learning how to change iCloud password, it’s not just about updating it—it’s about making it better. Follow these tips:

  • Length Matters—Use at least 12 characters.
  • Mix It Up—Combine uppercase, lowercase, numbers, and symbols.
  • Stay Unique—Don’t reuse passwords from other accounts.
  • Avoid Personal Details – Don’t use names, birthdays, or easy guesses.

FAQs About Changing iCloud Password

1. How often to change iCloud password?

 Once a year is a good habit, but change it immediately if you suspect suspicious activity.

2. Will changing my iCloud password log me out of all devices?

 The device where you change it stays logged in, but others will require the new password soon.

3. Why is my device asking for my old password after a change?

 Restart your device or sign out and sign back in with the new password.

4. Can I change my iCloud password without the old one?

 Only through the “Forgot Password?” recovery method, which requires identity verification.

Final Thoughts

Knowing how to change iCloud password is a simple yet powerful way to safeguard your photos, messages, documents, and other personal data. Whether you do it on an iPhone, Mac, or through the web, the process is straightforward. Just remember to choose a password that’s strong, unique, and different from your other accounts—and keep it updated regularly to stay ahead of potential security threats.

5 Easy Ways: How to Safely Reset Your Mac Password Today

How to Safely Reset Your Mac Password: A Simple Step-by-Step Guide

Have you ever sat in front of your Mac, eager to start your work, and suddenly realized you’ve forgotten your password? It happens to many of us, and it can feel frustrating and stressful. The good news is that Apple has built-in tools that make the process of recovery simple. You don’t need to panic or worry about losing your files. This guide will show you how to safely reset your Mac password without stress and in clear, simple steps.

We know that technical terms can sometimes be confusing, so we’ve kept the language friendly and easy to understand. Whether you use your Mac for study, business, or fun, these methods will help you get back into your account safely.

For more details, you can read this blog : Japan password 

Why Learn How to Safely Reset Your Mac Password?

how to safely reset your Mac password

Your Mac holds valuable files, projects, and memories. When you forget your password, it can feel like you’ve lost access to everything. That’s why knowing how to safely reset your Mac password is important. You’ll not only get back into your account but also do it in a secure way, making sure your data stays safe.

Before You Start: Things You’ll Need

Resetting your password is easier when you have a few things prepared:

  • A stable internet connection – Some reset methods may require access to Apple’s servers.
  • Your Apple ID and password – If your account is linked with an Apple ID, this is the simplest recovery method.
  • Patience – The process takes a little time. Rushing may cause mistakes.

Having these ready will make the process of how to safely reset your Mac password much smoother.

Method 1: Reset with Your Apple ID (The Easiest Way)

how to safely reset your Mac password

The first method you should try is using your Apple ID. If you’ve enabled the option to reset your password through Apple ID, this is quick and straightforward.

Steps:

  1. On the login screen, type the wrong password three times.
  1. It will say, “Forgot password? Reset with Apple ID.”
  1. Click the arrow next to the message.
  1. Enter your Apple ID and password.
  1. Follow the on-screen instructions to set a new Mac password.
  1. Restart Mac and log in with new password.

This method is secure and easy, making it the simplest way for anyone wondering how to safely reset your Mac password.

Note: If you don’t see the Apple ID option, it means this feature wasn’t enabled. Don’t worry—you can use the other ways below.

Method 2: Reset with Another Admin Account

how to safely reset your Mac password

If you share your Mac and there’s another admin account on it, you can use that account to reset your own. This method is just as safe and requires no extra tools.

Steps:

  1. Log in to the other admin account.
  1. Open System Settings (or Preferences on older macOS).
  1. Go to Users & Groups.
  1. Select your locked account and choose Reset Password.
  1. Enter new password, confirm it, and add clue.

Then restart Mac and log in with new password. This is another secure way for users looking for how to safely reset your Mac password without losing files.

Method 3: Reset with macOS Recovery Mode

how to safely reset your Mac password

If the first two options don’t work, you can use macOS Recovery Mode. This is the most powerful method and works even when you can’t log into any account.

Steps:

  1. Shut down your Mac.
  1. Turn on Mac and hold Command (⌘) + R until Apple logo shows.
  1. In the macOS Utilities window, choose Terminal from the top menu.
  1. Type resetpassword and press Return.
  1. The Reset Password window will open.
  1. Select your startup disk and then choose the locked account.
  1. Set new password, confirm it, and add clue.
  1. Click Save, then restart your Mac.

Now, you can log back in with your new password. If you ever wondered how to safely reset your Mac password when nothing else works, this is the method that will help you.

After Resetting: What Happens Next

how to safely reset your Mac password

Once you’ve successfully changed your password, a few things may come up:

  • Keychain Warning – Since your login password changed, your keychain (where saved passwords are stored) may no longer match. The safest option is to create a new keychain and re-enter passwords when needed.
  • Update Passwords Elsewhere – If you used the same password for other accounts (which isn’t recommended), update them to keep your information secure.

By completing these steps, you’ll not only know how to safely reset your Mac password but also how to keep your digital security strong.

FAQs: How to Safely Reset Your Mac Password

Q1: Will resetting my password delete my files?

No. Resetting your password will not delete files, apps, or photos. It only changes the login key.

Q2: What if none of these methods work?

If you can’t access your account even after trying all methods, FileVault encryption might be enabled. In this case, contact Apple Support for help.

Q3: What if Recovery Mode doesn’t start?

Make sure you’re pressing Command (⌘) + R right after the startup chime. If it still doesn’t work, you may need a bootable installer or professional service.

Q4: How can I avoid this problem in the future?

Enable “Reset password with Apple ID.” Use a memorable but secure password and store it safely in a password manager.

Conclusion: You’re Back in Control

how to safely reset your Mac password

Forgetting your password can feel like a major setback, but Apple has provided several tools to help you recover. Whether you use your Apple ID, another admin account, or Recovery Mode, you now know how to safely reset your Mac password with confidence.

Remember:

  • Apple ID reset is the fastest method.
  • Admin accounts make recovery simple.
  • Recovery Mode is always your backup option.

Now that you’re back in control, consider writing down your password in a safe place or storing it in a password manager. With these tips, you’ll never feel stuck again when it comes to how to safely reset your Mac password.

3 Easy Tips to Create a Strong Japan Password for Safety

Japan Password: Your Simple Guide to Safer Online Logins

Introduction: Why Passwords Matter in Japan

In today’s digital world, passwords are your first line of protection against hackers and online thieves. Whether you are logging into online banking, shopping sites, or social media, a japan password plays a key role in keeping your data safe. The problem is, many people still use weak passwords or repeat the same one for different accounts. This guide will help you understand how to create secure, memorable passwords without making it complicated.

For more details, explore my previous blog on this topic: Change WiFi password

What Makes a Strong Japan Password?

japan password

A strong password is not just about adding random characters—it’s about making it long, unique, and hard to guess. Here’s how to create one that works:

  • Length matters: Aim for 12 or more characters.
  • Mix it up: Use upper and lower case letters, numbers, and symbols (like !, @, or #).
  • Skip personal info: Don’t use your name, birth date, or common words.
  • Passphrases work well: Combine random words like Coffee!River28? Easy to remember, hard to guess.

Tip: For extra safety, change your passwords every 3–6 months, especially for important accounts like email or banking.

Common Password Mistakes in Japan

japan password

Many users in Japan unintentionally put their online safety at risk. Common mistakes include:

  • Using the same password for different accounts.
  • Choosing simple patterns such as abcd1234 or yamada2025.
  • Skipping two-factor authentication (2FA), which adds an extra step of protection.

Quick Fix: Use a password manager like LastPass, Bitwarden, or 1Password. These tools store all your passwords securely and can generate new, strong ones for you.

How to Create a Memorable (But Secure) Japan Password

japan password

You don’t need a jumble of nonsense to stay secure. Instead, try these creative and easy methods:

  • Turn a phrase into a password: Take a favorite saying like “I love sushi in Tokyo!” and turn it into ILsushiT0ky0!.
  • Use acronyms: “My best friend Ken is 30 years old” could become MBFKi30yo!.
  • Add Japan-inspired elements: Something like MountFuji@2025 or Sakura🌸Rain! can be unique and personal.

Safety Check: Use free online tools like Kaspersky Password Checker or NordPass Strength Test to see how strong your password really is.

What to Do If You Forget Your Japan Password

japan password

Losing a password can be stressful, but it’s easy to recover if you follow these steps:

  1. On the login page, click “Forgot Password?”.
  1. Follow the steps in your email or phone.
  1. Set a new and unique password.

Important: Never share a password reset code with anyone, even if they claim to be “support staff.” Always enable backup recovery options such as a second email or phone number for extra safety.

Why Updating Your Japan Password Is Important

Cyber threats are always changing. Hackers develop new tricks every year, and old passwords are easier to crack over time. By updating your passwords regularly, you close the door to possible security breaches. For sensitive accounts like banking, update every 3–6 months; for less critical accounts, once a year is fine.

Conclusion: Lock Down Your Digital Life

japan password

Your japan password is like the key to your online home. If it’s strong, unique, and updated often, you protect yourself from most cyber threats. Make it a habit to:

  • Upgrade weak passwords
  • Enable two-factor authentication
  • Store passwords securely

By doing these simple things, you can keep your online life safe and stress-free.

FAQs About Japan Passwords

Q1: How often should I change my passwords?

Every 3–6 months for important accounts. Once a year is enough for less sensitive ones.

Q2: Are Japanese websites safer than international ones?

Not always. Check for “https\://” and a padlock 🔒 before typing your password.

Q3: Should I write down my passwords?

Only if stored safely, like in a locked drawer. A password manager is a better option.

Q4: What is 2FA, and do I need it?

Two-factor authentication adds another step, like a text code. Always use it for important accounts.

Q5: Can I use emojis in my passwords?

Some sites allow it, but not all. If you’re unsure, stick to letters, numbers, and symbols.

How to Change WiFi Password Easily: A Quick and Secure Guide

How to Change WiFi Password Easily: A Quick and Secure Guide

In today’s world, a strong internet connection is a must. But keeping that connection safe is just as important. Learning how to change WiFi password is a basic but powerful step in protecting your network from unwanted users and threats.

For more details, explore my previous blog on this topic:  How to reset voicemail password

Why Should You Change Your WiFi Password?

change WiFi password

Your WiFi is like the key to your digital home. If too many people know it — or if it’s easy to guess — it can cause big problems. Others could:

  • Slow down your internet by using your connection.
  • Access your private data like photos, bank info, or documents.
  • Using your network for illegal stuff can get you in trouble.

That’s why experts suggest you change WiFi password regularly — every few months. It’s an easy way to keep your home network safe and fast.

Step-by-Step Guide to Change WiFi Password

change WiFi password

Here’s a simple guide anyone can follow — even if you’re not tech-savvy.

What You’ll Need

  • Your WiFi router
  • A device (phone, tablet, or computer)
  • Your current router login details (usually found on the back or bottom of the router)

Step 1: Connect to the Router

  • Turn on your device (laptop, phone, etc.).
  • Connect to your WiFi network or plug your device directly into the router using a cable.

Step 2: Find the Router’s IP Address

change WiFi password

You’ll need your router’s IP to log in. Here’s how to find it:

Windows:

  • Open Command Prompt
  • Type ipconfig
  • Look for Default Gateway (e.g., 192.168.1.1)

Mac:

  • Go to System Settings > Network
  • Click your WiFi > Advanced or Details
  • Find “Router” — that’s your IP address

Router Sticker:

  • Most routers have their IP printed on a sticker (e.g., 192.168.0.1, 192.168.1.1)

Step 3: Log In to the Router

change WiFi password
  • Open your web browser
  • Type the router’s IP in the address bar and press Enter.
  • You’ll see a login screen — enter the admin username and password

(These are often “admin” / “admin” or “admin” / “password” unless changed)

Step 4: Go to Wireless Settings

  • Once logged in, look for a section like Wireless, WiFi, or Security
  • Find the box that shows your current password (called “Password,” “Passphrase,” or “Network Key”)

Step 5: Change WiFi Password

  • Delete the old password and type the new one.
  • Make sure to save the changes (click Save, Apply, or Confirm)
  • Wait 1-2 minutes while your router reboots

Step 6: Reconnect Your Devices

  • On each device (phones, laptops, smart TVs), go to WiFi settings
  • Pick your network again and type the new password.
  • Repeat for every device in your home

Tips for a Strong WiFi Password

change WiFi password

Here’s how to make sure your new password is strong and safe:

  • Use capital, small letters, numbers, and symbols.

Example: River!Sky88Blue

  • Don’t use easy passwords like names, birthdays, or “12345678”.
  • 📏 Keep it long — at least 12 characters is best
  • 📝 Write it down and store it in a safe place (but not on your router!)

Troubleshooting Common Problems

change WiFi password

❓ “I forgot my router login info.”

  • Press the router’s reset button for 10 seconds.
  • This will reset it to factory settings. You’ll need to set up the WiFi again.

❓ “I can’t open the router page.”

  • Make sure you’re connected to your WiFi
  • Try typing http:// before the IP address (e.g., http://192.168.1.1)
  • Restart the router and try again

❓ “My device won’t connect after I change WiFi password”

  • On the device, go to WiFi settings and “Forget” the network
  • Then reconnect using the new password
  • If that doesn’t work, restart your device

Conclusion

change WiFi password

Learning how to change WiFi password is a small step with big benefits. It keeps your internet safe from hackers, speeds up your connection by blocking unwanted users, and gives you peace of mind.

Make it a habit to update your WiFi password every 3-6 months. It only takes a few minutes, but it protects your entire digital life.

FAQs: Change WiFi Password

Q1: Will everyone be disconnected if I change the WiFi password?

Yes — all devices must connect again with the new password.

Q2: How often should I change it?

Experts recommend every 3 to 6 months, or immediately if you suspect a breach.

Q3: Can I do it from my smartphone?

Yes! Just follow the same steps using your phone’s browser.

Q4: What if I don’t know my router’s IP address?

Check the label on your router or look in your network settings.

Q5: Is it safe to write down my password?

Yes — just keep it somewhere safe and hidden, not taped to the router.

If you’re serious about online security, make it a routine to change WiFi password regularly and encourage your friends or family to do the same. It’s quick, simple, and one of the best ways to stay safe online.

how to reset voicemail password

How to Reset Voicemail Password: Easy Step-by-Step Guide

Introduction

Forgetting your voicemail password can be a real hassle. It might stop you from checking important messages when you need them most. The good news? Learning how to reset voicemail password is quick and easy.

This simple guide explains everything you need to know to reset your voicemail password — for all major mobile carriers. Whether you’re using AT&T, Verizon, T-Mobile, or others, we’ve got you covered.

For more details, explore my previous blog on this topic: Kinnser login and password

Why you may need to reset your voicemail code

 how to reset voicemail password

There are a few common reasons why someone would need to reset their voicemail password:

  • You forgot the current password
  • Someone else may know it
  • Your phone carrier requests a reset
  • You want to keep your voicemail more secure

Resetting the password helps protect your private messages and keeps your voicemail safe from unauthorized access.

How to Reset Voicemail Password for Major Carriers

 how to reset voicemail password

Now, let’s go over how to reset voicemail password on popular U.S. carriers. The steps are fast and simple.

1. AT&T Users

From Your AT&T Phone:

  • Dial “1” or *86 to access voicemail
  • Press * during the voicemail greeting
  • Enter your current password (if asked)
  • Press # and follow the steps to change it.

Online Method:

  • Log in to your AT&T account
  • Go to My Devices
  • Choose your phone
  • Click Voicemail Password, then follow the steps to reset it

2. Verizon Users

Using Your Verizon Phone:

  • Dial *611 and speak to a customer service rep
  • Or, dial *86, then press *
  • Enter the default password (often 000000)
  • Follow the steps to set a new voicemail password.

3. T-Mobile and Sprint Users

Call Directly:

  • Dial 805-637-7243 from your T-Mobile phone
  • Enter your mobile number when asked
  • Follow the voice instructions to reset the password

Online Method:

  • Log in to your T-Mobile account
  • Go to the Profile section
  • Click Voicemail Password
  • Choose and confirm your new password

4. Other Carriers (Metro, Cricket, etc.)

Call Customer Service:

  • Dial 611 or the customer care number for your carrier
  • Talk to support and ask for a voicemail reset.

Use the Carrier’s App:

  • Open your carrier’s official app (like MyCricket)
  • Go to voicemail settings
  • Choose the option to change or reset the password

Forgot Your Current Password?

Don’t worry if you forgot the old one. Here’s how to reset voicemail password without knowing your current code:

Option 1: Call Support

Dial 611 or the support number from your carrier. Once they verify your identity, they can help reset it for you.

Option 2: Try Default Passwords

Use these commonly used defaults:

  • 0000
  • 1234
  • Last 4 digits of your phone number

Once you gain access, create a new password right away.

How to Create a Strong New Voicemail Password

 how to reset voicemail password

After learning how to reset voicemail password, make sure your new code is strong and secure. Follow these simple tips:

  • Avoid easy codes like “1234” or your birth year.
  • Use 6–8 digits for better protection
  • Change it every few months for added safety
  • Don’t use the same password as your phone or apps

Some carriers even allow letters, so try mixing things up if that’s available.

Still Can’t Reset It?

 how to reset voicemail password

If the usual steps aren’t working, here are some extra things to try:

  • Restart Your Phone: A simple reboot might solve temporary issues
  • Update Carrier Settings: Go to phone settings and check for carrier updates
  • Visit a Carrier Store: Customer support agents can reset voicemail passwords for you quickly in-store

Knowing how to reset voicemail password using multiple methods ensures you’re never locked out of your messages.

Conclusion

Resetting your voicemail password doesn’t have to be difficult. Whether you use AT&T, Verizon, T-Mobile, or another service, the process is simple when you follow the right steps. With this guide, you now know exactly how to reset voicemail password safely and easily.

Staying connected is important — and keeping your voicemail secure is part of that. Use a strong password and change it often to keep messages safe.

FAQs: How to Reset Voicemail Password

Q1: Can I reset my voicemail password online?

Yes! Most major carriers like AT&T, T-Mobile, and Verizon let you reset it through your online account or mobile app. Just go to the voicemail section under “Account Settings.”

Q2: Why does my carrier want me to change my password?

It’s for your own safety. Regularly resetting your password reduces the risk of voicemail hacking or unauthorized access.

Q3: What is the default voicemail password?

Usually, it’s one of the following:

  • 0000
  • 1234
  • The last 4 digits of your mobile number

Change the default password immediately to protect your account.

Q4: Will my old voicemails be deleted if I reset the password?

No, resetting the voicemail password does not delete your saved messages. All your voicemail recordings will still be there.

Q5: Can I use my phone’s lock screen passcode as my voicemail password?

No. Your voicemail password is managed by your carrier, not your phone’s operating system. You’ll need to follow the carrier’s process to reset it.

factory reset Chromebook without password

Factory Reset Chromebook Without Password: Easy Step-by-Step Guide

Introduction

factory reset Chromebook without password

Can’t get into your Chromebook because you forgot the password? Don’t worry — you can factory reset Chromebook without password and get back in. This guide will show you easy steps using built-in tools, no tech experience needed.

For more details, explore my previous blog on this topic: How to hack WiFi password

Why You Might Need to Reset Without a Password

factory reset Chromebook without password

There are many situations where this is useful:

  • You forgot your login password.
  • You bought a second-hand Chromebook and it still has the previous owner’s account.
  • A family member changed the password.
  • Giving your Chromebook to someone else?
  • You’re facing glitches or slow performance.

Doing a factory reset Chromebook without password clears everything and lets you start fresh, like a new device.

⚠️ Important Things to Know Before Resetting

factory reset Chromebook without password

1. Back Up Your Files

Resetting will erase everything on your Chromebook’s local storage. If you have any photos, documents, or downloads, move them to:

  • Google Drive
  • A USB flash drive
  • An external hard drive

2. Stay Plugged In

Make sure your Chromebook is charged or plugged into power.

3. You’ll Lose the Following:

  • Installed apps
  • Offline files
  • Saved settings
  • Remembered passwords

Anything stored only on the device will be deleted. But files saved in your Google Account (like Google Drive) will stay safe.

Step-by-Step: How to Factory Reset Chromebook Without Password

factory reset Chromebook without password

You don’t need a password for this. Just follow these simple steps:

1. Turn Off Your Chromebook

Hold the Power button and shut it down completely.

2. Enter Recovery Mode

Do this carefully:

  • Press and hold Esc + Refresh (🔄) keys.
  • While holding them, press the Power button once.
  • Release all three buttons when you see a yellow screen with an exclamation mark.

This is the Chromebook Recovery Mode.

3. Begin the Reset

  • Press Ctrl + D on your keyboard.
  • When it asks if you want to turn off OS verification, press Enter.

This disables secure boot and starts the reset process.

4. Confirm and Complete the Reset

  • Press Spacebar to turn OS verification back on.
  • This will trigger the factory reset process.
  • Wait around 5 to 10 minutes while your Chromebook erases everything and restarts.

5. Set Up Your Chromebook

Once it restarts:

  • Follow the on-screen instructions.
  • Connect to Wi-Fi.
  • Sign in with your Google Account or create one.

Congratulations! You’ve successfully completed a factory reset Chromebook without password.

What Happens After the Reset?

factory reset Chromebook without password

Your device will now behave as if it’s brand new:

  • All accounts, passwords, and data are gone.
  • It will ask for Wi-Fi and a Google Account login.
  • Downloads and offline files are permanently deleted.
  • Your settings are reset to default.

You can now use it with any Google account — just like the first time you bought it.

When Should You Use This Method?

This method to factory reset Chromebook without password is best for:

  • Forgotten passwords
  • Resetting a Chromebook you bought used
  • Removing an old account
  • Cleaning it up before giving it away
  • Fixing software bugs or slow performance

It’s a quick way to solve login or software issues without needing advanced tools.

Troubleshooting Tips

factory reset Chromebook without password

If something goes wrong, try these:

Recovery Mode Not Starting?

Make sure you:

  • Press and hold Esc + Refresh first, then tap Power.
  • Hold them long enough until the yellow screen appears.

Still Stuck?

Try restarting the process:

  • Press Esc + Refresh + Power again.

Reset Keeps Failing?

Sometimes, you might need a recovery USB:

  • Use another computer and go to Google’s Recovery Site.
  • Follow the instructions to create a recovery drive.

Usually though, this isn’t needed.

Conclusion

Forgetting your login doesn’t mean you’ve lost your Chromebook. Using Recovery Mode, you can factory reset Chromebook without password and start over. Just remember to back up your files first, follow the simple steps (Esc + Refresh + Power, then Ctrl + D), and then go through the setup like new.

It’s an easy, reliable way to fix login problems, clean up your device, or hand it off to someone else.

FAQs: Factory Reset Chromebook Without Password

Q1: Will a reset remove viruses or malware?

Yes. A full reset deletes all apps and files, removing any malware.

Q2: Can I get my files back after the reset?

No. All local files are deleted. Only items saved in Google Drive or another backup will be safe.

Q3: What if my Chromebook is from a school or work?

Contact your IT department. Many managed devices block manual resets.

Q4: Does this method work on all Chromebook models?

Yes. It works on all models using ChromeOS.

Q5: Will a reset make my Chromebook faster?

Usually, yes! It removes clutter and fixes software issues.

Q6: Can I skip backing up if my files are in Google Drive?

Yes. Files in Drive are safe and won’t be erased during the reset.