10 Easy Ways: How to Protect Your WiFi from Hackers in 2025

How to Protect Your WiFi from Hackers: Your Simple Guide to Digital Safety

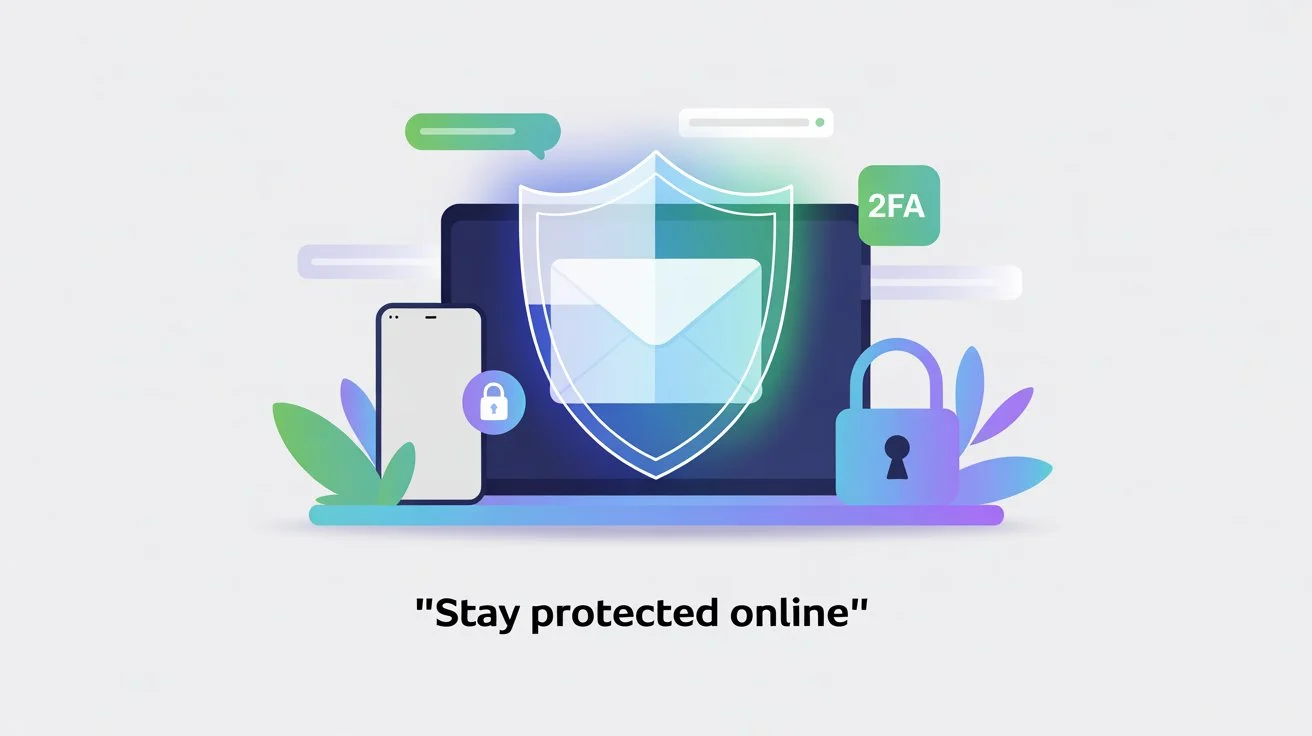
In today’s digital world, learning how to protect your WiFi from hackers is just as important as locking the doors of your home. From working online and paying bills to chatting with friends and streaming shows, we depend on WiFi for almost everything. But just like leaving your door wide open invites trouble, leaving your WiFi unprotected makes it easy for hackers to sneak in.

Good news: Protecting your WiFi from hackers is easy. You don’t need to be a tech expert. By following some easy steps, you can create a strong digital shield around your network and keep your personal data safe.

This guide will explain why WiFi security matters and show you 10 simple steps on how to protect your WiFi from hackers.

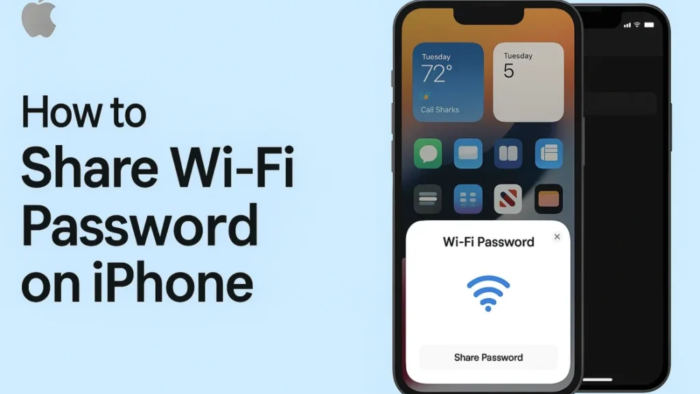
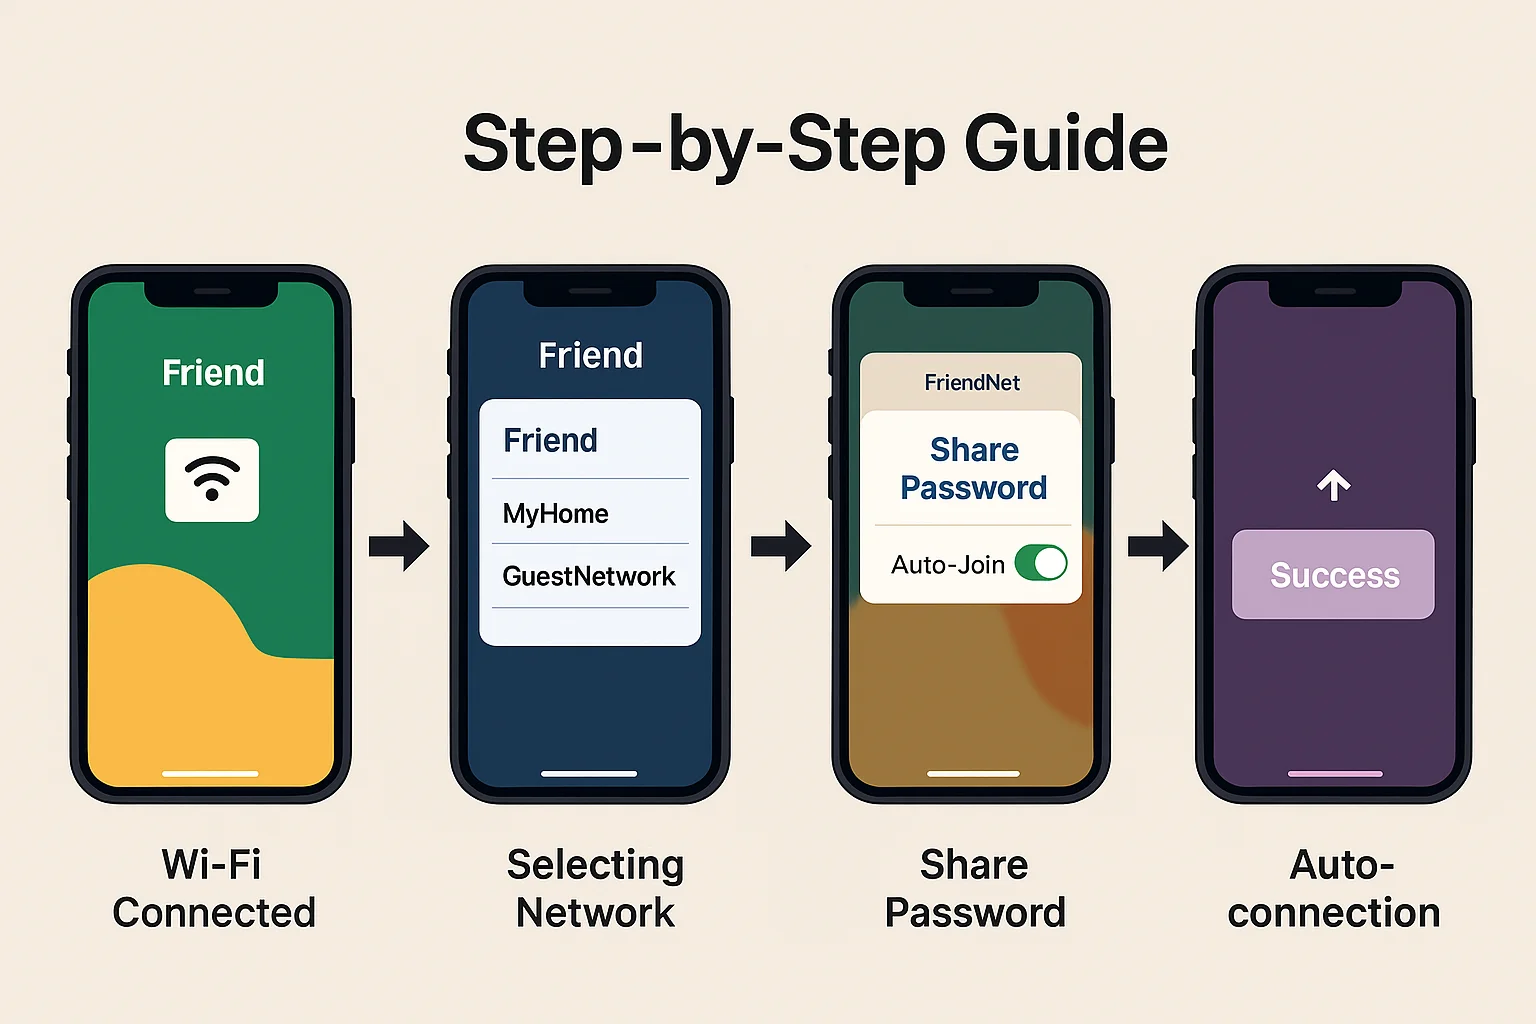
For more details, you can read this blog :  How to share Wi-Fi password on iPhone

Why Should You Care About WiFi Security?

how to protect your WiFi from hackers

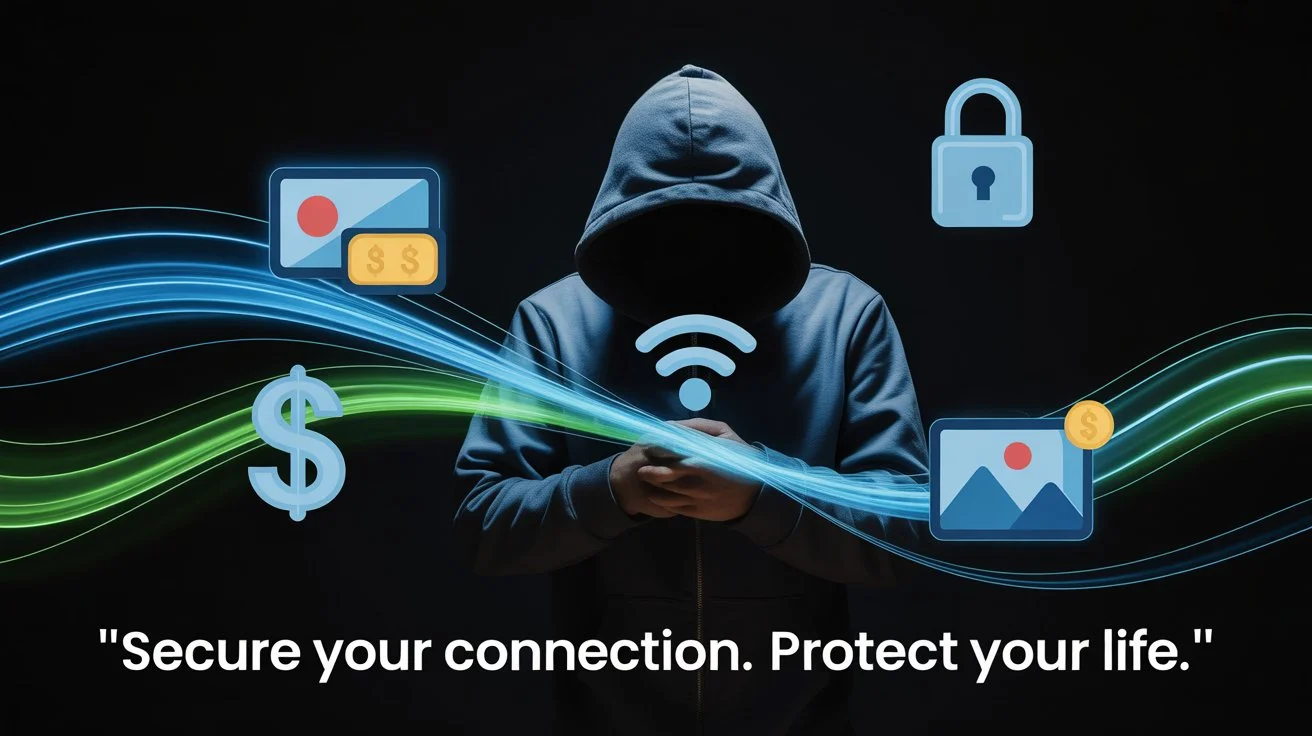
Before learning how to protect your WiFi from hackers, it’s important to understand why it matters. If a hacker gets access to your network, the risks are serious:

  • They can steal private details such as passwords, bank account numbers, and photos.
  • They can use your internet for illegal activities, leaving you responsible.
  • They steal bandwidth and slow your internet.
  • They can install harmful software (malware) on your devices.

Protecting your WiFi is not just about speed—it’s about protecting your identity, money, and privacy.

10 Simple Steps on How to Protect Your WiFi from Hackers

Here are ten easy yet powerful ways to improve your WiFi security. Each step makes it harder for hackers to break in.

1. Change Your Router’s Default Login

how to protect your WiFi from hackers

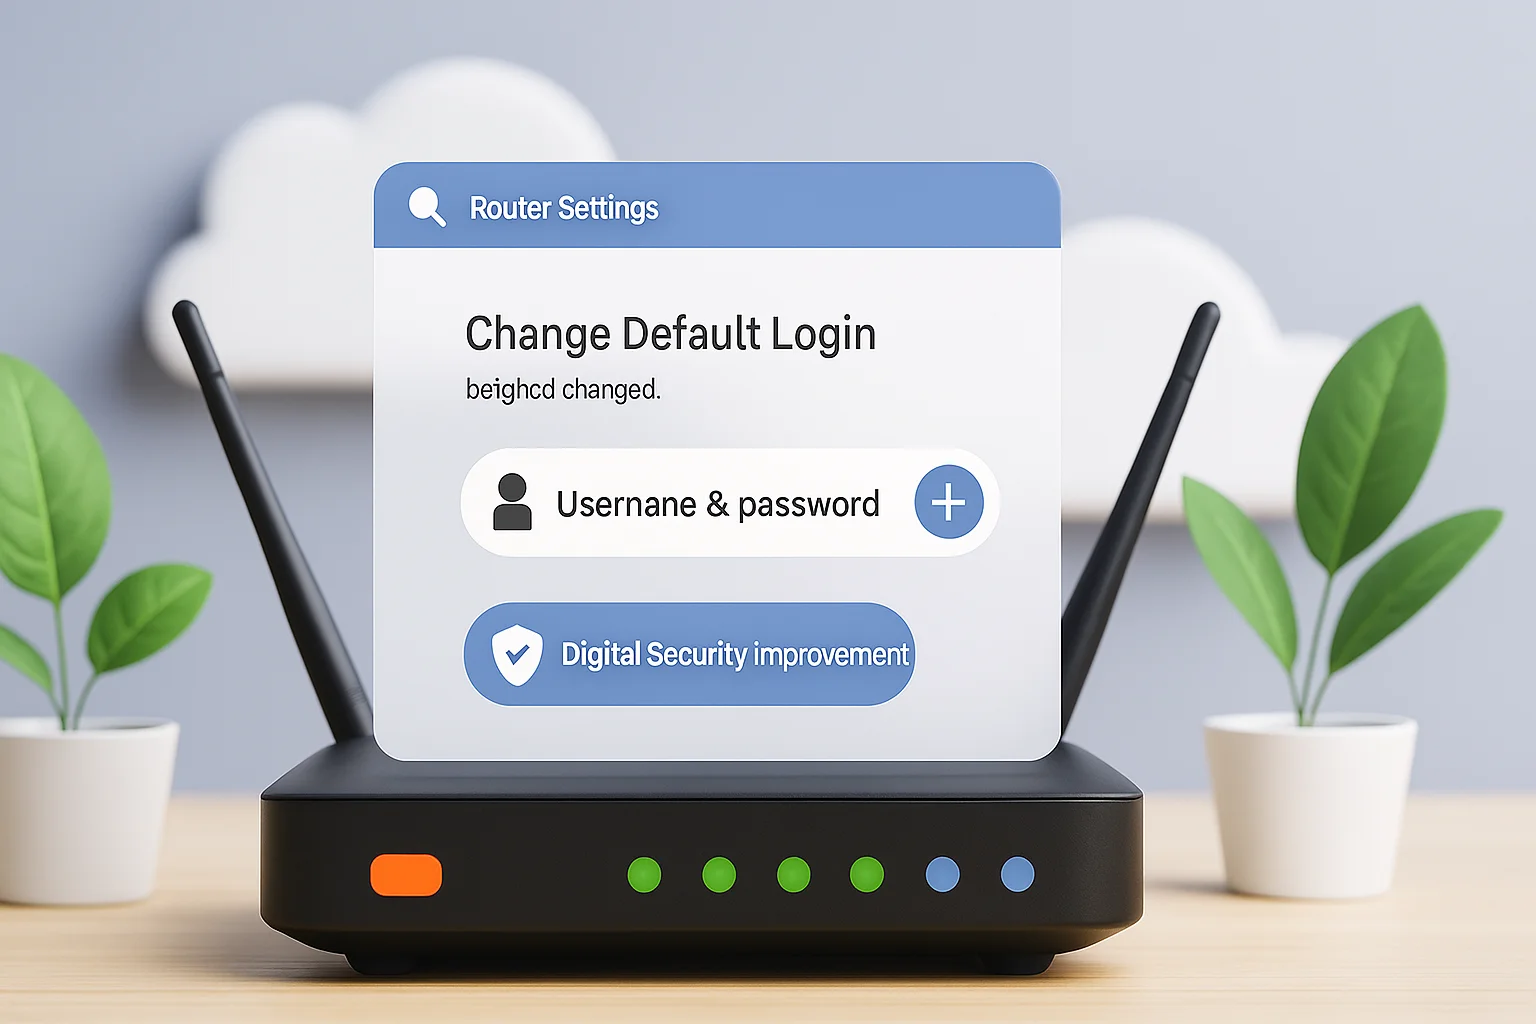
One of the first things to do when learning how to protect your WiFi from hackers is to change your router’s default login details. Most routers use a default login like “admin/admin,” which hackers already know.

What to do: Log in to your router’s settings (usually by typing 192.168.1.1 in your browser). Change username and password to strong, unique ones.

2. Use a Strong WiFi Password

how to protect your WiFi from hackers

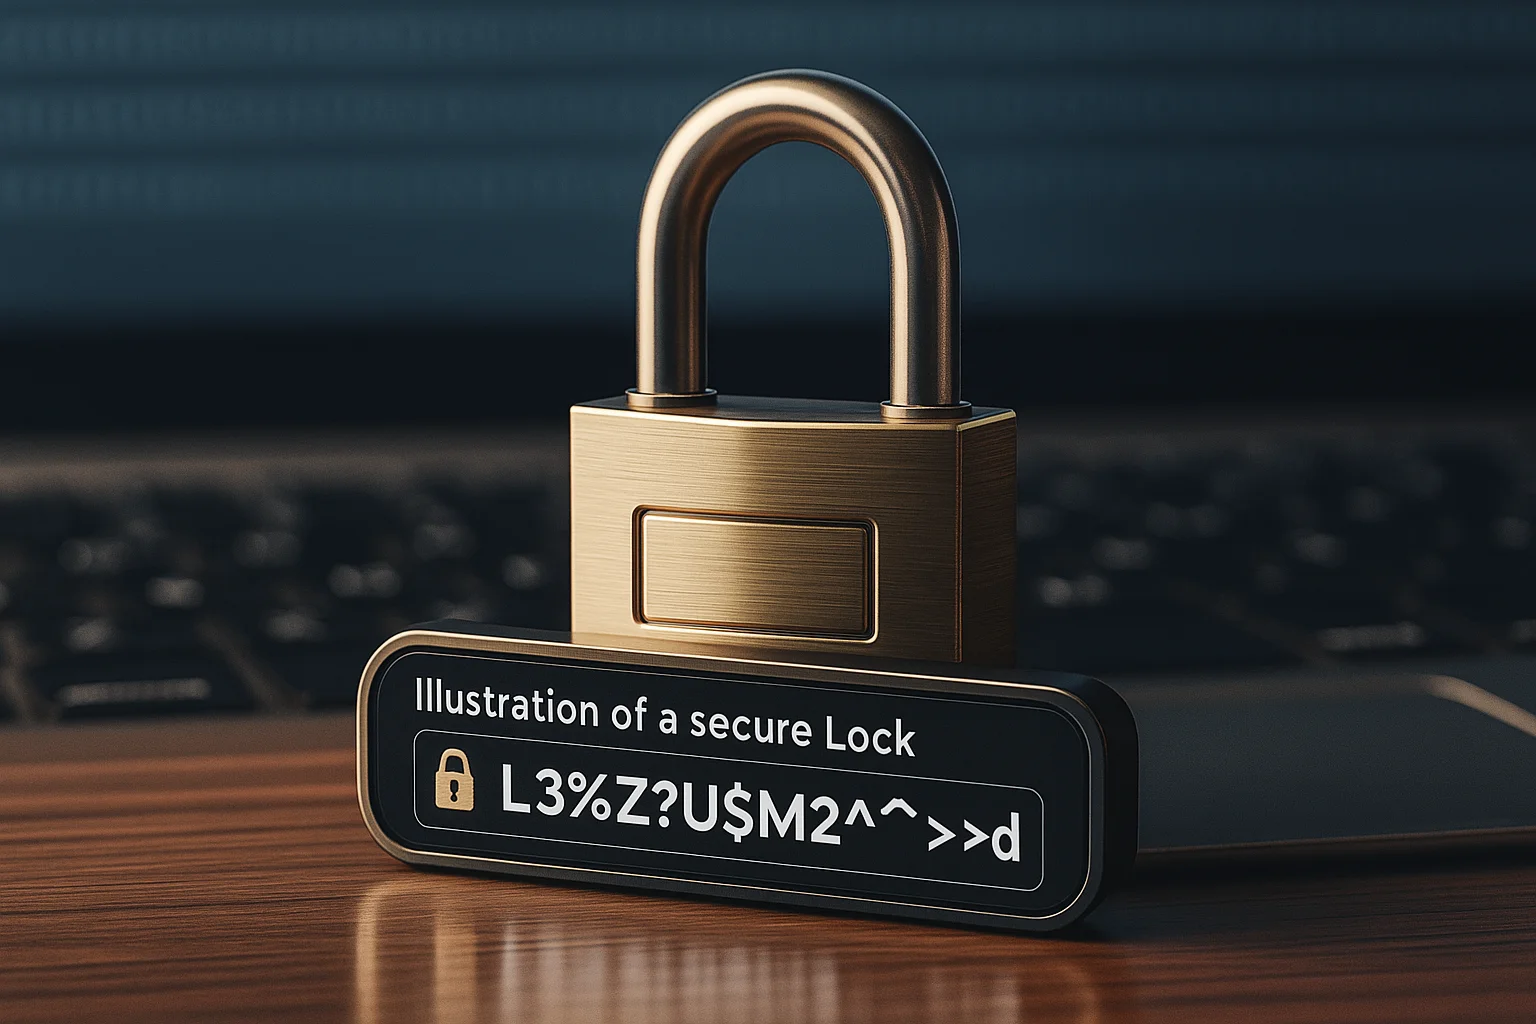
A strong password is like the main lock of your WiFi. Without it, learning how to protect your WiFi from hackers becomes impossible.

What to do: Create a password with at least 12 characters, mixing uppercase letters, lowercase letters, numbers, and symbols. Avoid simple passwords like your name, phone number, or address.

3. Change Your Network Name (SSID)

The default network name often tells hackers the brand and model of your router. This gives them clues to exploit weaknesses.

What to do: Rename your WiFi to something unique but neutral. Don’t use personal information like your family name or house number.

4. Turn On the Best Encryption (WPA3)

how to protect your WiFi from hackers

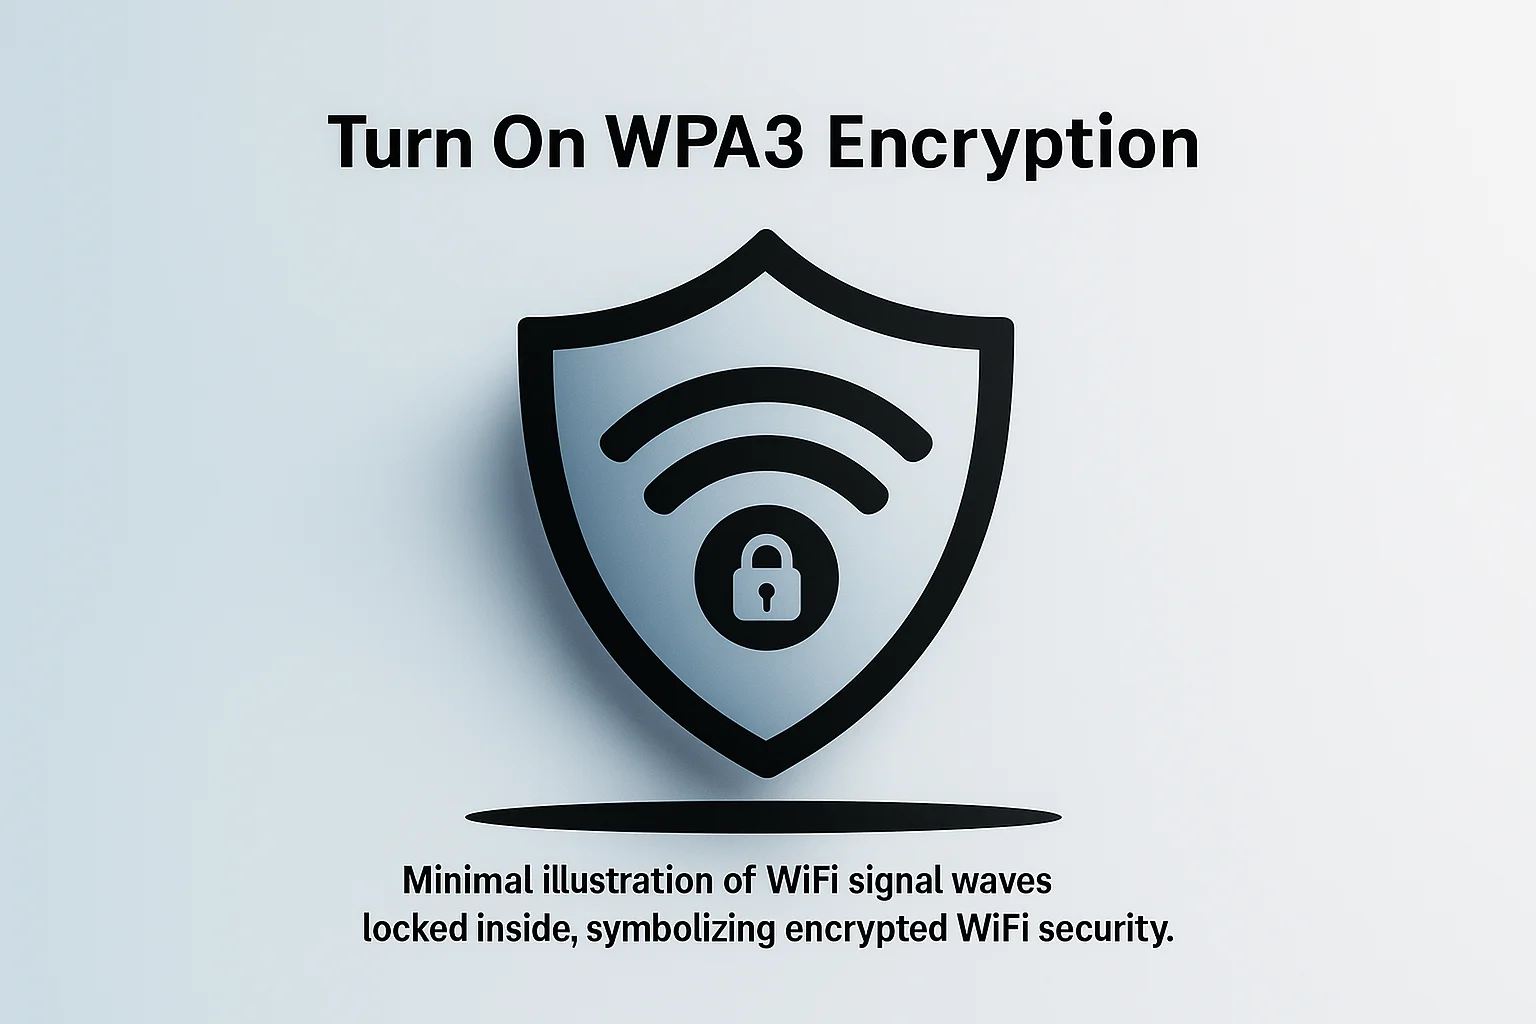
Encryption protects your data as it travels through the air. It ensures that only devices with the password can read your information.

What to do: In your router’s security settings, choose WPA3 (the most secure option). If it’s not available, use WPA2 (AES). Never use WEP—it’s outdated and unsafe.

5. Keep Your Router Updated

Software updates fix security flaws that hackers try to exploit. Many people forget this step when learning how to protect your WiFi from hackers, but it’s crucial.

What to do: Check for router firmware updates every few months. If your router has auto-updates, turn them on.

6. Turn Off Remote Management

Remote management allows anyone to change your router settings from outside your home network. While useful for some, it’s also a big security risk.

What to do: Disable “Remote Management” in your router’s settings unless you truly need it. This allows only devices inside your home to connect.

7. Enable Your Router’s Firewall

how to protect your WiFi from hackers

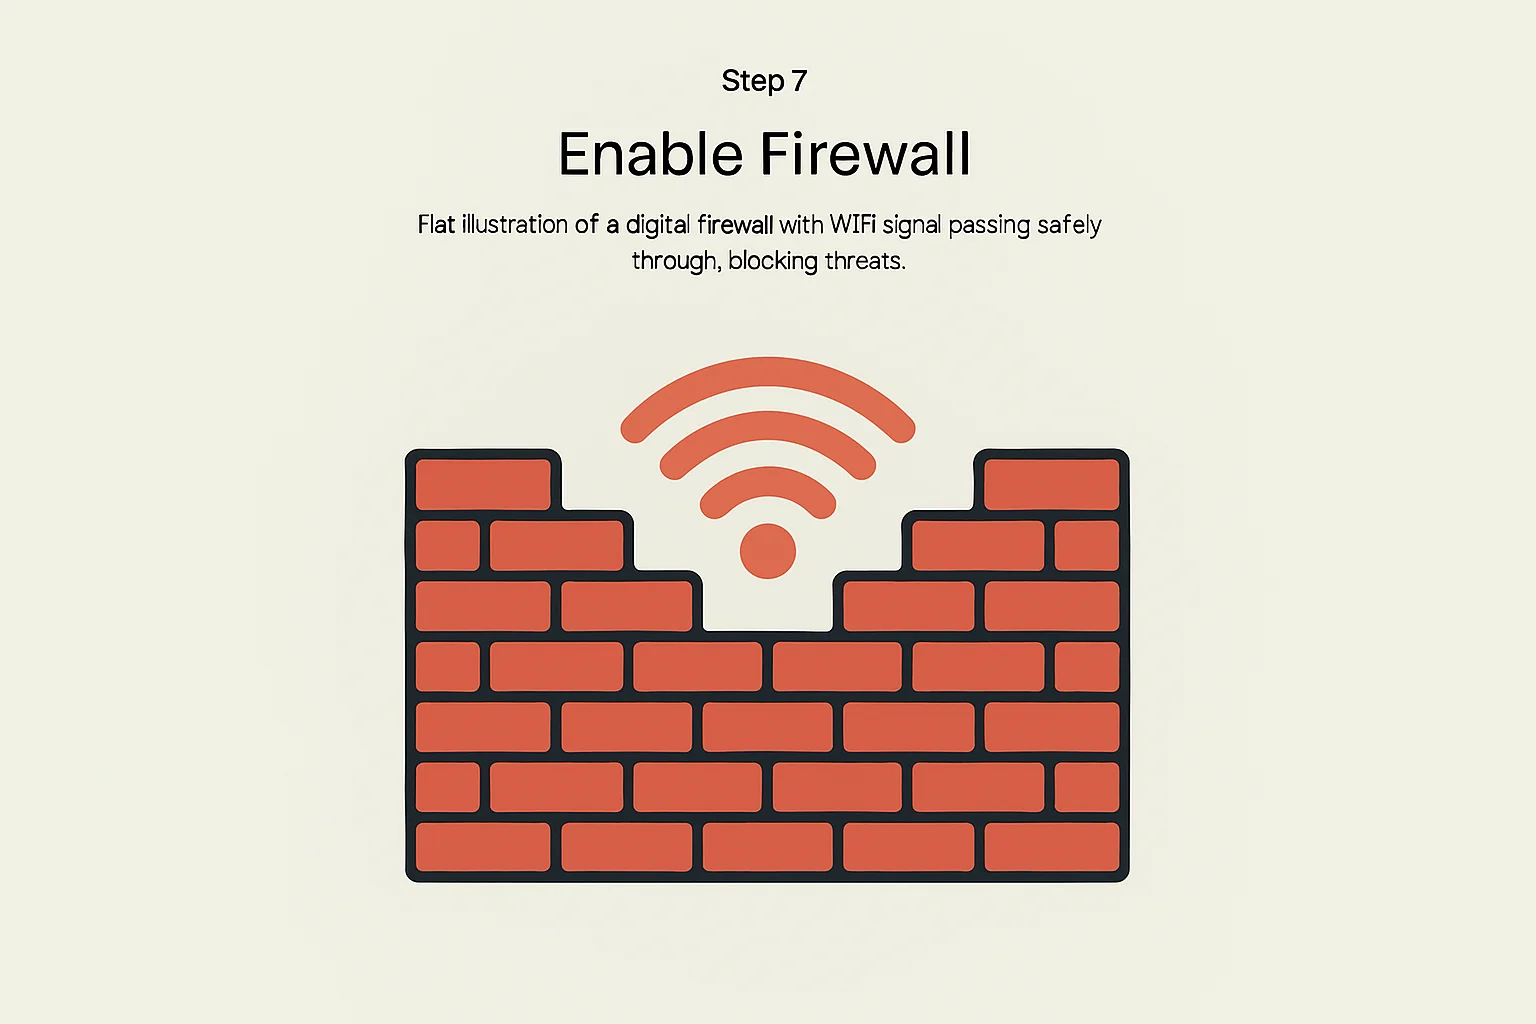
A firewall blocks suspicious or unwanted traffic before it reaches your devices.

Do this: Check router security settings and turn on the firewall. This adds another strong layer of protection.

8. Create a Guest Network for Visitors

how to protect your WiFi from hackers

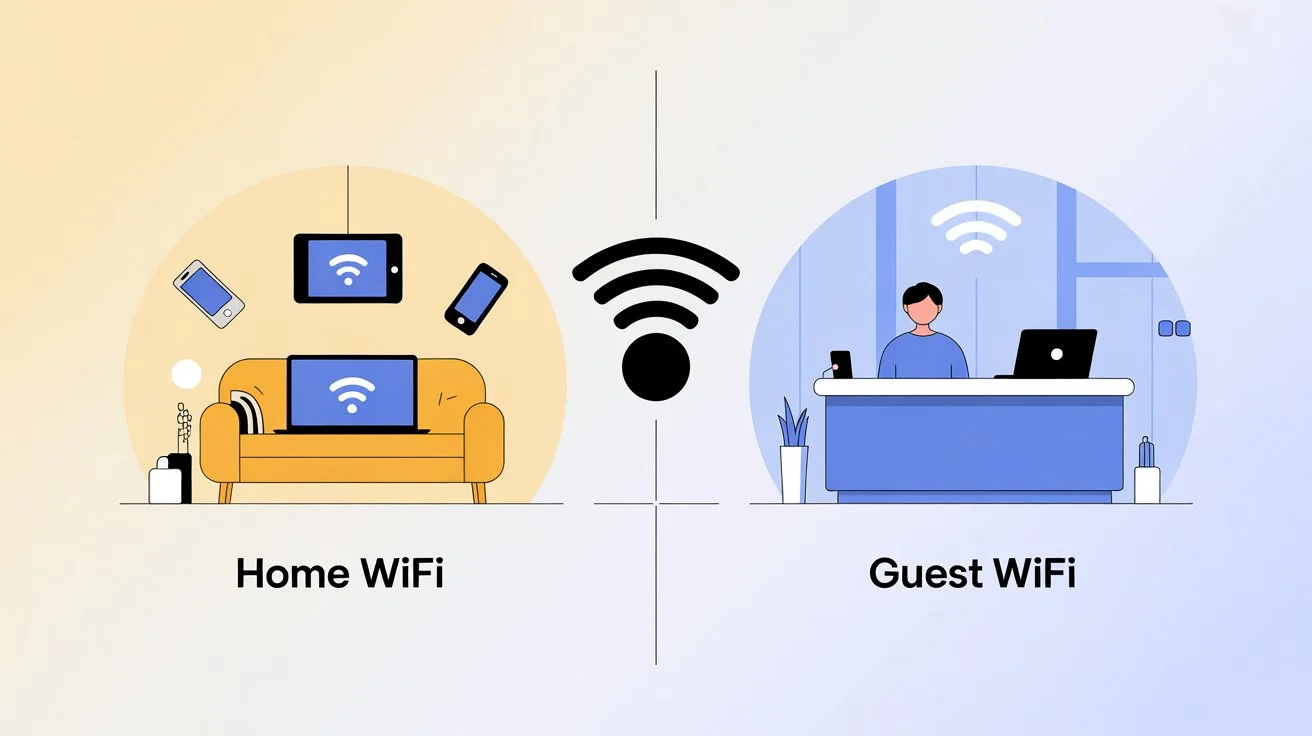
Sharing your main WiFi password with guests might expose your network to risks. Hackers can take advantage of it without you knowing.

Do this: Turn on the guest network on your router. This allows visitors to connect to the internet without entering your private network, where personal devices are stored.

9. Secure Your Smart Devices (IoT)

how to protect your WiFi from hackers

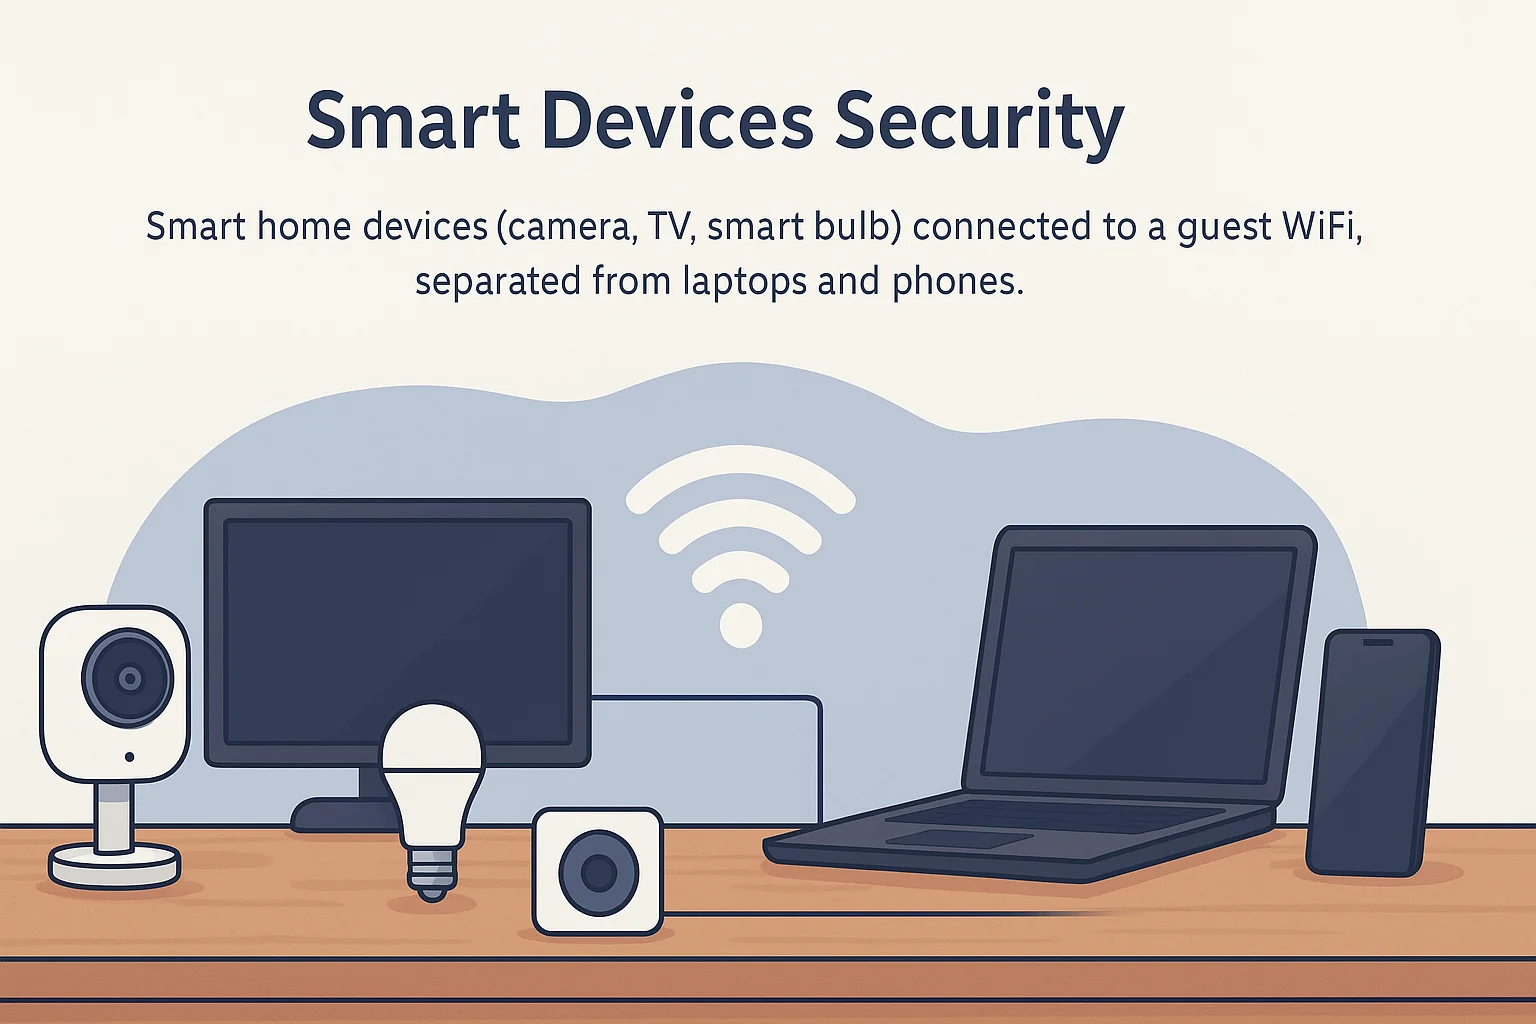
Smart devices like cameras, bulbs, and TVs often have weaker security than laptops or phones. Hackers can use them as entry points.

Do this: Connect smart devices to guest WiFi, not main WiFi. This way, even if one device is hacked, your personal data stays safe.

10. Turn Off WiFi When You’re Away

The simplest trick in how to protect your WiFi from hackers is turning it off when you don’t need it. If you’re on vacation or gone for days, why leave it running?

What to do: Unplug your router when you’re away for long periods. No WiFi means no hacking.

Conclusion: WiFi Security Is a Daily Habit

how to protect your WiFi from hackers

Learning how to protect your WiFi from hackers isn’t about being a tech genius—it’s about building smart habits. Start with the most important steps: changing your router login, setting a strong password, and enabling WPA3 encryption. Then move on to updates, firewalls, and guest networks.

Think of WiFi security like brushing your teeth: it’s small daily actions that prevent big problems later. By taking these steps, you can enjoy peace of mind knowing your online world is safe.

Frequently Asked Questions (FAQs)

Q1: How can I tell if my WiFi has been hacked?

Look for signs such as slower internet speed, strange devices connected to your network, or unexpected password requests.

Q2: Is public WiFi safe?

No, public WiFi is often insecure. Avoid logging into sensitive accounts like banking. If needed, use a VPN.

Q3: How often should I update my WiFi password?

For better protection, update it every 3–6 months, especially if you’ve shared it with visitors.

Q4: What is a VPN, and should I use it at home?

A VPN encrypts your internet traffic. It’s essential for public WiFi. At home, it adds extra safety but doesn’t replace a strong WiFi password.

Q5: My router is old. Should I upgrade?

Yes. If your router is over 4–5 years old and doesn’t support WPA3, it’s time for a new one. Modern routers come with better security features.

How to Share Wi-Fi Password on iPhone: An Easy Step-by-Step Guide

How to Share Wi-Fi Password on iPhone: An Easy Step-by-Step Guide

Introduction

Share Wi-Fi Password on iPhone

Have you ever been stuck trying to remember your Wi-Fi password when a friend comes over? Good news—you don’t have to anymore. Apple makes it easy to share your internet connection without typing anything. In this guide, you’ll learn exactly how to share Wi-Fi password on iPhone in just a few taps. It’s fast, secure, and super simple!

You can check my previous blog :  Radio Password for Honda

What You Need Before You Start

Share Wi-Fi Password on iPhone

Before you can share your Wi-Fi password, make sure these conditions are met. Apple’s built-in sharing tool only works if the following are true:

  • ✅ Apple devices only: Both you and the person you’re sharing with must have iPhones, iPads, or Macs.
  • ✅ Updated software: Your devices should be running iOS 11 or later, or macOS High Sierra or newer.
  • ✅ Bluetooth and Wi-Fi turned ON: Make sure both devices are on and ready to use.
  • ✅ Apple ID saved in contacts: You need to have the other person’s Apple ID email saved in your Contacts.
  • ✅ Devices nearby: Keep the two devices within 3 feet (about 1 meter) of each other.

Step-by-Step: How to Share Wi-Fi Password on iPhone

Share Wi-Fi Password on iPhone

Here are the simple steps to share Wi-Fi without ever typing the password:

Step 1: Connect to the Wi-Fi

Make sure your iPhone is connected to the Wi-Fi you want to share. If it isn’t, connect first.

Step 2: Ask Your Friend to Join the Network

Ask your friend to open their iPhone or iPad, go to Settings, tap Wi-Fi, and select your network. When the password box appears, they should just leave it open.

Step 3: Bring the Devices Close

With your iPhone unlocked, hold it near your friend’s device. A pop-up should show up on your screen saying that they want to join your Wi-Fi network.

Step 4: Tap “Share Password”

Tap “Share Password” when it pops up on your iPhone. Just like that, their device will auto-connect to the network without showing the password.

Step 5: Confirm Success

Ask your friend to check if they’re connected. They should now see a ✅ check mark next to the Wi-Fi name. That’s it—done in seconds!

Troubleshooting: When Sharing Doesn’t Work

If the password doesn’t share as expected, don’t worry. Try the following quick fixes:

  • 🔄Switch off Bluetooth and Wi-Fi on both devices, then turn them back on.
  • 📇 Double-check the saved contact: Make sure your friend’s Apple ID is correctly stored in your Contacts.
  • 🔄 Restart both iPhones.
  • 📲 Update iOS: Go to Settings > General > Software Update and install any available updates.
  • ⚙️ Reset network settings: If it still doesn’t work, go to Settings > General > Transfer or Reset iPhone > Reset Network Settings.

Why Use This Method?

Here’s why so many people use this method instead of manually typing the password:

  • 🔒 Secure: The password is shared through Apple’s secure system. It’s never shown or copied.
  • ⚡ Fast: No need to type long passwords like XyZ@123!Net_456.
  • 🧠 No memory needed: Even if you forget the password, your iPhone remembers it for you.

Conclusion

Now that you know how to share Wi-Fi password on iPhone, you don’t need to find notes or old messages anymore. Just follow the simple steps: unlock both devices, bring them close, and tap “Share Password.” Make sure your contacts are updated and your software is current, and you’ll never have to say “I forgot it” again.

Share Wi-Fi Password on iPhone

FAQs: All About iPhone Wi-Fi Sharing

Q1: Can I use this feature with Android devices?

A: No. This method works only between Apple products like iPhones, iPads, and Macs.

Q2: I don’t see the pop-up—what should I do?

A: Check these things:

  • Your friend’s Apple ID is saved in your Contacts.
  • Both devices have Bluetooth and Wi-Fi turned on.
  • The devices are close to each other, about 3 feet apart.

Q3: Will my friend see my actual password?

A: No. The password is encrypted and directly sent to their device—nothing is shown on the screen.

Q4: Can I share Wi-Fi if I’m not connected to it?

A: No. You need to be connected to the Wi-Fi before you can share it.

Q5: What if “Share Password” still doesn’t work?

A: Try restarting both phones and double-check that both are running iOS 11 or newer.

Final Note

Sharing your internet is no longer a chore. With this built-in Apple feature, you can connect friends and family in a few easy steps. Now you know exactly how to share Wi-Fi password on iPhone without typing anything at all—convenient, secure, and ha

Easy Guide to the Radio Password for Honda

Unlocking Your Honda Radio: Easy Guide to the Radio Password for Honda

Introduction

radio password for Honda.

If your Honda’s radio suddenly displays “CODE” or “ENTER CODE,” don’t panic! This security feature locks the radio when it loses power (like during a battery change). To unlock it, you need a unique radio password for HondaThis guide explains everything in simple steps—no jargon, just solutions.

You can check my previous blog: How to change email password on iPhone

Why Your Honda Radio Asks for a Password

radio password for Honda.

Honda radios have anti-theft protection. If the radio is disconnected from the car’s power (e.g., dead battery, repairs), it locks itself. You’ll see a message like “CODE” on the display. Entering the correct radio password for Honda is the only way to restore your music, news, or podcasts.

Finding Your Radio Password for Honda

radio password for Honda.

Here’s how to get your code:

  1. Check Your Honda’s Manual:
  • A small card with the code is often tucked in your owner’s manual booklet.
  1. Glove Compartment or Visor:
  • Sometimes dealers stick the code on a label inside the glove box or sun visor.
  1. Online Honda Portal:
  • Visit Honda Radio-Navi Code (official U.S. site).
  • Enter your radio’s serial number and vehicle details.
  1. Contact Your Dealer:
  • Call a Honda dealership with your VIN (Vehicle Identification Number) and proof of ownership. They’ll provide the code.

🔑 Note: Never pay for third-party websites claiming to give Honda codes—use only Honda’s official resources to avoid scams.

How to Enter Your Radio Password for Honda

radio password for Honda.

Follow these steps:

  1. Turn the ignition to “ON” (do not start the engine).
  1. Turn on the radio—you’ll see “ENTER CODE.”
  1. Press radio buttons 1 to 6 to enter the 5-digit code.
  • Example: Code “12345” = Press Preset 1 (once), Preset 2 (twice), Preset 3 (thrice), etc.
  1. Press the “❯❯” (seek) or “ENTER” button to confirm.
  1. If correct, the radio unlocks instantly!

⚠️ Warning: Enter the code wrong 10 times? The radio may lock permanently. If unsure, pause and double-check.

Lost Your Code? Try These Fixes

radio password for Honda.

Can’t find the radio password for Honda? Here’s what works:

Retrieve the Serial Number:

  • Remove the radio unit (requires tools). The serial number is on a sticker (example: “U1234F”).
  • Tip: YouTube tutorials show safe removal steps for your Honda model.

Dealer Assistance:

  • Take your license, car papers, and radio serial number to a Honda dealer.They’ll reset it.

Honda Customer Service:

  • Call Honda support (1-800-999-1009 in the U.S.) with your VIN and serial number.

Avoid Future Lockouts: 3 Pro Tips

radio password for Honda.
  1. Save Digitally: Take a photo of your code card and email it to yourself.
  1. Write It Down: Stick a note with the code in your manual or phone case.
  1. Pre-Battery Prep: Before replacing your battery, connect a memory saver device (sold at auto shops) to keep the radio powered.

Conclusion

A locked Honda radio can be annoying, but it’s easy to unlock with the right radio password for Honda. Always source your code from Honda (free!) via their website, dealer, or documents. Save it wisely, and you’ll never face silence on the road again.

FAQs About Honda Radio Passwords

Q1: Why did my Honda radio lock itself?

A: It’s an anti-theft feature. Power loss (e.g., dead battery) triggers it.

Q2: Is the radio password for Honda unique to my car?

A: Yes! Each code is tied to your radio’s serial number.

Q3: Can a Honda dealer unlock my radio without the code?

A: Yes—just bring your ID, car papers, and the radio’s serial number.

Q4: What if I buy a used Honda without the code?

A: Use the Honda portal or visit a dealer with your VIN and paperwork.

Q5: Will disconnecting the battery always lock the radio?

A: In most Honda models (2000+), yes. Use a memory saver to prevent this.

Q6: Can I disable this password feature?

A: No—it’s a permanent security function.

💡 Still stuck? You can call Honda support at 1-800-999-1009 (U.S.) for help.

radio password for Honda.

How to Change Email Password on iPhone: A Simple Step-by-Step Guide

How to Change Email Password on iPhone: A Simple Step-by-Step Guide

Introduction

change email password on iPhone

Keeping your email secure is super important. If you use an iPhone, updating your email password is easy! This guide shows you how to change email password on iPhone for any account (like Gmail, Yahoo, or Outlook). Follow these steps to stay safe and avoid login troubles.

So Now You can also check my previous blog: How to factory reset iPhone without password

For more information, insight blog

Why Update Your Email Password?

Your email gives access to your personal life. Hackers often target it to access bank accounts, social media, or private photos. Changing your password regularly:

  • Blocks unauthorized access
  • Protects sensitive information
  • Fixes login errors if you forgot your password

Before You Start: What You’ll Need

  • Your iPhone (with iOS 10 or later)
  • Your current email password
  • A new strong password (mix letters, numbers & symbols)
  • Internet connection

How to Change Email Password on iPhone

Follow these steps for any email provider (Gmail, Yahoo, Outlook, iCloud, etc.):

Step 1: Open iPhone Settings

change email password on iPhone
  • Tap the Settings app (gray gear icon).
  • Scroll down and select Passwords (or Mail > Accounts on older iOS).

Step 2: Select Your Email Account

  • Tap Accounts (or Passwords & Accounts).
  • Pick the email account to update (like Gmail or Outlook).

Step 3: Update Your Password

change email password on iPhone
  • Tap the email address under ACCOUNT.
  • Find the Password field and tap it.
  • Remove the old password and enter a new one.
  • Tap Done or Save in the top-right corner.

💡 Note: For iCloud accounts, go to Settings > [Your Name] > Password & Security > Change Password.

Troubleshooting Common Issues

change email password on iPhone

Problem: “Password incorrect” error after changing it.

Fix: Re-enter the new password. If it fails:

  1. Go to Settings > Mail > Accounts and tap Delete Account.
  1. Re-add it with your new password.

Problem: Can’t find the “Passwords” option.

Fix: On iOS 13 or earlier, go to Settings > Passwords & Accounts > [Your Account].

Problem: App asks for the password repeatedly.

Fix: Restart your iPhone or update iOS (Settings > General > Software Update).

After Changing Your Password

  • Test your email: Open the Mail app and send/receive a message.
  • Update other devices: Change the password on your iPad, Mac, or Android phone too.
  • Enable 2FA: Add extra security (Settings > Passwords > Security Recommendations).

Keep Your Email Secure: Extra Tips

change email password on iPhone
  1. Never reuse passwords across accounts.
  1. Change passwords every 3-6 months.
  1. Use Apple’s Password Manager (Settings > Passwords) to store strong passwords.
  1. Avoid public Wi-Fi for email access.

Conclusion

Learning how to change email password on iPhone takes less than 2 minutes, but protects your data for years. Whether it’s Gmail, Yahoo, or iCloud, updating your password stops hackers and keeps your inbox safe. Repeat these steps regularly to avoid security risks!

FAQs: Changing Email Password on iPhone

Q1: Will changing my email password log me out of other devices?

A: Yes! Update the password everywhere (laptop, tablet, etc.) to avoid sync errors.

Q2: Do I need to change my password on my email provider’s website too?

A: No. The iPhone steps above update your device only. If you want to change the actual password (e.g., for Gmail), visit your provider’s site first, then update it on your iPhone.

Q3: Why can’t I see the “Password” field for my iCloud account?

A: iCloud passwords are tied to your Apple ID. Open Settings > \[Your Name] > Password & Security > Change Password.

Q4: What if I forget my new password?

A: Reset it via your email provider’s website (e.g., Gmail.com “Forgot Password”), then repeat the iPhone steps above.

Q5: Does this work for work/school emails (like Microsoft 365)?

A: Yes! The steps are identical for Exchange or Office 365 accounts.

🔒 Remember: A strong password protects you. Update it today!

How to custom keyword finder for job

Unlock Your Dream Job: The Power of a Custom Keyword Finder for Job Search

Introduction

custom keyword finder for job

Finding the perfect job feels really hard—you keep searching, editing your resume, and hoping to get noticed. What if there was a simpler way? Enter the custom keyword finder for job search—a game-changing tool that helps you speak the language employers use. This guide breaks down how this tool works and why it’s your secret weapon for landing interviews.

You can check my previous blog: Keyword optimization by Garage2global

What is a Custom Keyword Finder for Job?

A custom keyword finder for job is a specialized tool that scans job descriptions to identify the exact words and phrases employers care about most. Unlike generic advice, it analyzes your target roles—like “digital marketing manager” or “senior software engineer”—and gives you a personalized list of keywords. These keywords become your cheat sheet for tailoring resumes and cover letters.

For example, if “Google Analytics,” “PPC campaigns,” and “ROI optimization” keep popping up in marketing job ads, the tool flags them as must-haves for your application.

Why You Absolutely Need This Tool

Job hunting without a custom keyword finder for job is like driving blind. Here’s why:

  1. Beats Applicant Tracking Systems (ATS): 75% of resumes get blocked by software and aren’t seen by anyone. These systems scan for specific keywords. If your resume doesn’t include the right keywords, you won’t get the job.
  1. Saves Time: Instead of guessing what matters, the tool does the heavy lifting. Focus on applying, not decoding job ads.
  1. Boosts Interview Chances: Using the right keywords proves you “get” the role. Hiring managers see your application as a perfect fit.

How a Custom Keyword Finder for Job Works (Simple Steps!)

custom keyword finder for job

Using this tool is as easy as 1-2-3:

  1. Input Your Target Job: Paste job descriptions or job titles you’re interested in.
  1. Scan & Analyze: The tool crunches the text and highlights high-priority keywords (skills, tools, certifications).
  1. Get Your Custom List: Receive a tailored report showing exactly which terms to use in your resume.

Pro Tip: Combine keywords naturally. Instead of stuffing “Python, SQL, Tableau,” write: “Improved data accuracy using Python and SQL, visualized in Tableau.”

Top Benefits You Can’t Ignore

custom keyword finder for job

Why does a custom keyword finder for job searches deliver results?

  • Personalization: Generic words like “team player” don’t work. This tool finds niche-specific terms (e.g., “TensorFlow” for AI jobs).
  • Competitive Edge: Applications with role-specific keywords are 70% more likely to get shortlisted.
  • Confidence Boost: Know you’re using language employers value.

Choosing the Right Custom Keyword Finder for Job

custom keyword finder for job

Not all tools are created equal. Look for:

Job-Specific Scans: Avoid generic keyword tools. Choose one built for careers.

ATS Compatibility: Prioritizes keywords tracked by systems like Workday or Taleo.

Simplicity: No tech skills needed. Clean reports > complex dashboards.

Free Options: Try Jobscan or SkillSyncer. For more features like trends, use paid tools like Teal.

Conclusion: Your Shortcut to Job Search Success

A custom keyword finder for job applications turns guesswork into strategy. By speaking the language of employers and ATS systems, you’ll stand out in crowded job markets. Stop sending generic resumes—start using personalized keywords to unlock interviews and land your dream role.

FAQs About Custom Keyword Finders for Job Search

Q1: Is this tool only for tech jobs?

Nope! It works for any field—healthcare, finance, education, or retail. Keywords matter everywhere.

Q2: How many job descriptions should I analyze?

Start with 5-10 ads for your target role. More data = sharper keywords.

Q3: Can I overuse keywords?

Yes! Keyword stuffing feels robotic. Use them naturally in context (e.g., “managed budget” vs. “budget budget budget”).

Q4: Are free keyword finders reliable?

They’re a great start, but paid tools often offer deeper analysis (like salary keywords or skill gaps).

Q5: How often should I update my keywords?

Every 3-6 months. Job trends shift fast!

How to Factory Reset iPhone Without Password: Step-by-Step Guide

How to Factory Reset iPhone Without Password: Step-by-Step Guide

Factory Reset iPhone Without Password

Losing access to your iPhone can feel overwhelming. Whether you forgot your passcode, bought a locked used phone, or your device is disabled, there’s a way out. You can factory reset iPhone without password using trusted methods. This guide will show you how—step by step—in simple language.

You can check my previous blog : iforgot.apple id password reset

🔍 Why Would You Need to Factory Reset?

Factory Reset iPhone Without Password

Here are common situations where a reset is needed:

  • You forgot your lock screen or Screen Time passcode.
  • Your iPhone is disabled after too many wrong tries.
  • You purchased a secondhand phone that is still locked.
  • You’re getting ready to sell, give away, or trade your phone but forgot the password.

⚠️ Important Before You Begin

Factory Reset iPhone Without Password

1. Resetting Erases Everything

Photos, apps, settings, and contacts will be deleted. If you can, back up your data using iCloud or iTunes before proceeding.

2. Apple ID is Still Required After Reset

Even if you reset the phone, Apple’s Activation Lock stays. You’ll need the original Apple ID and password used to set up the phone. This prevents stolen iPhones from being reused.

3. Keep iTunes or Finder updated

Make sure your computer has the latest version of iTunes (for Windows/macOS Mojave or earlier) or Finder (for macOS Catalina and above).

🔧 Method 1: Use iTunes or Finder

Best if you’ve used the computer to sync your iPhone before.

Step 1: Connect iPhone to Computer

Connect your phone to the computer with a Lightning cable, then launch iTunes or Finder.

Step 2: Enter Recovery Mode

Factory Reset iPhone Without Password

The steps depend on your iPhone model:

  • iPhone 8/SE (2nd gen) and newer: Press and quickly release Volume Up, then Volume Down. Keep holding the Side button until recovery mode shows up.
  • For iPhone 7/7 Plus: Hold the Volume Down and Side buttons at the same time.
  • iPhone 6s or earlier: Hold the Home and Side buttons together.

Step 3: Restore iPhone

Your computer will recognize that your iPhone is in recovery mode. Click on Restore. The system will download and install the newest version of iOS. This process usually takes 10–15 minutes. Your iPhone will restart as new.

☁️ Method 2: Use iCloud’s “Find My iPhone”

Use this if “Find My iPhone” is already enabled on your device.

Step 1: Visit iCloud.com

Go to iCloud.com and sign in with your Apple ID.

Step 2: Open Find My iPhone

Factory Reset iPhone Without Password

Click All Devices at the top. Then choose the iPhone to erase.

Step 3: Erase the iPhone

Click Erase iPhone, confirm your choice, and wait. The device must be connected to the internet to reset. Once done, the iPhone returns to factory settings.

This method is perfect for people who’ve lost their device or want to erase it remotely.

⚡ Method 3: Use Recovery Mode Without iTunes Sync

This is the most flexible method and works even if the phone was never synced before or Find My iPhone is turned off.

Step 1: Connect iPhone & Enter Recovery Mode

Use the same steps listed in Method 1 to enter recovery mode based on your iPhone model.

Step 2: Restore Using Computer

Factory Reset iPhone Without Password

When your device enters recovery mode, iTunes or Finder will show a message. Click Restore (not Update). This will erase your iPhone and install the newest version of iOS.

Make sure your internet connection is stable. Don’t unplug the phone until the reset is complete.

✅ What to Do After Resetting

Once your iPhone resets, you’ll see the Hello screen.

1. Set Up as New or Restore from Backup

Follow the on-screen steps. If you previously backed up your iPhone to iCloud or your computer, choose to restore.

2. Activation Lock

If the phone is linked to an Apple ID, you’ll need to enter that ID and password to continue. This is Apple’s security feature to prevent theft. If you’re not the original owner, contact them for the Apple ID.

3. Update iOS

Go to Settings > General > Software Update to check for and install the latest iOS version.

💡 Final Thoughts

Factory Reset iPhone Without Password

If you’re locked out, don’t stress. You can factory reset iPhone without password using iTunes, iCloud, or Recovery Mode. Just follow the correct steps based on your situation.

Here’s a quick summary:

  • Always back up your data when possible.
  • Remember your Apple ID credentials—they’re still needed.
  • Use Recovery Mode if you don’t have access to iCloud or a synced computer.
  • If you’re buying a secondhand iPhone, ask the seller to remove their Apple ID first.

Once reset, your iPhone will be ready for a fresh start.

❓ Frequently Asked Questions (FAQs)

Q1: Can I reset a disabled iPhone?

Yes. All three methods work even if the iPhone is disabled or says “iPhone Unavailable.” Just use a computer to enter recovery mode.

Q2: Is it possible to reset my iPhone without a computer or Apple ID?

No. You’ll need one of these:

A computer with iTunes or Finder for Recovery Mode reset.

An Apple ID login is required to access iCloud’s remote erase feature.

Q3: Does resetting remove the Apple ID?

No. The Apple ID stays linked due to Activation Lock. After the reset, you must enter the same Apple ID credentials that were used before.

Q4: Can I recover my data after the reset?

Only if you backed up your iPhone before resetting. If you don’t have a backup, all your data will be lost forever.

Q5: iTunes says “iPhone could not be restored.” What now?

Try these solutions:

Update iTunes or Finder to the latest version.

Use a different USB cable or computer port.

Double-check you’re entering Recovery Mode correctly.

If you follow these instructions carefully, you’ll be able to factory reset iPhone without password in no time. Whether you’re troubleshooting, clearing old data, or starting fresh, these safe methods can help you regain control of your device.

What Is a Keyword Shitter? The Fastest Way to Find Keywords"

Unlock SEO Success: What is a Keyword Shitter & How to Use It?

Introduction: Feeling Lost in the SEO Jungle?

You want people to visit your website, but standing out on Google feels confusing. You’ve heard that keywords are the key to visibility—but how do you find the right ones without spending hours? That’s where a keyword shitter comes in.

Don’t let the odd name fool you. This tool is a powerful way to quickly uncover hundreds or even thousands of keyword ideas. In this guide, you’ll learn what it is, how to use it, and how it fits into smart SEO strategies that actually work.

You can check my previous blog:  Keyword Optimization by Garage2global

1. What is a Keyword Shitter? (A Keyword Idea Machine!)

 keyword shitter

A keyword shitter is an online tool (usually free or low-cost) that generates massive lists of keyword suggestions based on a seed word. You enter one or more basic words (called seed keywords), and the tool “spits out” dozens, hundreds, or even thousands of variations.

How It Works:

  • Input a Seed: For example, you type in “home workouts.”
  • Tool Generates Variations: The tool will then create phrases like “home workouts for beginners,” “home workouts without equipment,” or “morning home workouts.”

These tools add common prefixes and suffixes to your word to generate variations people might be searching for.

Note: The term “keyword shitter” is slang. Many tools don’t use this phrase in their branding. Instead, look for names like “keyword generator” or “keyword expander.”

2. Why Use a Keyword Shitter? (Find Long-Tail Gold!)

 keyword shitter

Keyword tools that give you big lists might look messy at first. But hidden inside those long lists are gold nuggets that can power your SEO growth.

Benefits:

  • Find Long-Tail Keywords: These are longer, more specific search phrases like “cheap yoga mats for beginners.” These phrases are easier to rank for and attract people ready to take action—like buying or subscribing.
  • Understand Search Intent: You’ll see what people are actually searching for. Some users want to buy, others want to learn, and some are just comparing options. Seeing the actual phrases helps you meet their needs better.

Instead of guessing what your audience wants, use a keyword shitter to discover it.

3. How to Use a Keyword Shitter (Smart, Not Just Fast)

Getting a long keyword list is just step one. To use it for real results, you need to follow a clear process.

Step-by-Step Guide:

 keyword shitter
  1. Choose Your Seed Word

Think about your topic. For a page about gardening tools, start with seeds like “garden tools,” “planting kits,” or “buy garden tools online.”

  1. Run the Tool

Use a keyword shitter or another tool that gives keyword ideas. Let it generate as many phrases as possible.

  1. Export the List

Save the keyword list into Google Sheets or Excel.

  1. Clean and Filter

Go through the list and:

  • Remove irrelevant keywords (e.g., unrelated terms).
  • Group similar ideas (e.g., “buy garden shovel,” “purchase gardening spade”).
  • Spot search intent (look for terms like “cheap,” “best,” “how to,” or “reviews”).
  1. Check Data in Other Tools

A keyword shitter gives you raw ideas. But to know which ones are valuable, use tools like:

  • Google Keyword Planner
  • Ubersuggest
  • SEMrush
  • Ahrefs

These show:

  • Search volume means how many people look for it each month.
  • Keyword difficulty (how hard it is to rank)
  1. Choose the Right Ones

Prioritize keywords based on:

  • Relevance to your page
  • The intent behind the search
  • Realistic ranking potential
  • Actual search volume

4. Pro Tips for Smarter Keyword Research

 keyword shitter

To get the most from your keyword shitter, keep these best practices in mind:

  • Start Small: Don’t try to cover your whole site in one run. Work on one topic or webpage at a time.
  • Use Strong Seeds: Use clear, relevant seed words to get better keyword ideas.
  • Expect a Mess: The list will be rough. You get real SEO results when you sort the list properly.
  • Mix with Manual Research: Use your brain, too! A keyword shitter supports your ideas; it doesn’t replace thoughtful content planning.
  • Focus on Long-Tail Phrases: These are the easiest to rank for and often bring in high-converting visitors.

Conclusion: Your SEO Shortcut Tool

 keyword shitter

A keyword shitter might sound silly, but it’s a smart way to kick off your keyword research. It saves you time, helps you discover untapped long-tail phrases, and gives you insights into what your audience wants.

Remember: this tool is just the beginning. You need to clean the list, check real data, and choose the right keywords based on what your audience is searching for. When used correctly, it becomes a key part of a complete SEO strategy.

FAQs about Keyword Shitters

Q1: Is “Keyword Shitter” a real tool?

A: It’s a casual name people use in the SEO world. Many tools function this way, even if they don’t use the exact term. Look for “keyword generators” or “expander tools.”

Q2: Are these tools free?

A: Yes, many keyword shitter-style tools are free or have free versions. Look up “free keyword list generator” to begin.

Q3: Is using one bad for SEO?

A: No, not at all! The tool simply helps you find ideas. It’s what you do with those ideas—like targeting the right keywords and writing helpful content—that matters.

Q4: Do I still need other SEO tools?

A: Definitely. A keyword shitter gives you quantity. Tools like Google Keyword Planner give you quality by showing traffic, competition, and trends.

Q5: How often should I use one?

A: Use it when researching a new blog topic, product page, or content update. It’s perfect for idea generation—not something you use every day.

Q6: Will I rank just by using these keywords?

A: No. Ranking takes more than finding keywords. You also need:

Helpful content

Good user experience

On-page SEO (headings, tags, etc.)

Authority (backlinks)

Keywords are only the start.

5 Easy Steps for Keyword Optimization to Rank Higher Online

Keyword Optimization: The Ultimate Guide to Easily Being Found Online ✅

Introduction

Have you ever typed something into Google and wondered why certain websites appear at the very top? It’s not random or pure luck. In most cases, it’s the result of a process called keyword optimization.

Think of it this way: if your website were a physical shop, keyword optimization would be the bright sign outside your door. That sign tells people exactly what you sell. Without it, people might walk past without realizing you have exactly what they’re searching for. In the online world, keywords work like a sign.

This guide will explain keyword optimization in simple, step-by-step terms so you can attract the right audience and help your website get noticed.

For more details, you can read this blog : lastpass random password

What is Keyword Optimization, Really?

keyword optimization

At its core, keyword optimization means using the right words and phrases in your online content so search engines like Google understand what your page is about. These words and phrases are your “keywords.”

Keywords form a bridge between what a person is searching for and the content you’ve created. The goal isn’t to trick Google but to clearly explain your content’s value. When you use keyword optimization correctly, your content becomes relevant, useful, and easy for the right people to find.

Why is Keyword Optimization So Important?

keyword optimization

You could have the best product, a beautifully designed website, or a blog full of helpful tips. But if people can’t find you online, all of that effort goes to waste. This is where keyword optimization plays a big role.

Here are three reasons why it matters:

  • Connects You to Your Audience: It helps you use the same language your potential customers use. You might describe your product as a “premium organic soil enhancer,” but your audience might be searching for “best plant food.” Keyword optimization bridges that gap.
  • Brings Quality Traffic: By targeting the right words, you attract visitors who are genuinely interested in your content or products. This means more clicks from people who may actually become customers.
  • Builds Authority: When your content answers search queries effectively, Google begins to see your website as trustworthy. Over time, this builds credibility and can improve your rankings across many topics.

How to Do Keyword Optimization: A Simple 3-Step Plan

You don’t have to be a tech expert. Keyword optimization becomes easy with the right steps. Follow these three steps:

Step 1: Find the Right Keywords (Research)

keyword optimization

The first step is keyword research—discovering what your audience is typing into Google. You want keywords that people search for often, but are not so competitive that you can’t rank.

  • Think like your customer: What would you search for your service? Ask friends or family what words they’d use.
  • Use free tools: Try Google Keyword Planner and “related searches” on Google for ideas.
  • Aim for Long-Tail Keywords: These are longer, more specific phrases like “easy vegan pasta recipes for beginners” instead of “pasta recipes.” They’re easier to rank for and often attract more serious visitors.

Step 2: Place Keywords Wisely (Action)

keyword optimization

Once you’ve chosen your main keyword (say, “easy home gardening tips”), place it naturally in your content. Repeating it unnecessarily is outdated. Today’s search engines are smart.

Key places to use your keywords:

  • Title: This is the most important spot. Always add your main keyword here.
  • Headings: Break your article into sections and add keywords where they fit.
  • First Paragraph: Add keyword naturally in the first 100–150 words.
  • Body Text: Sprinkle it throughout, but keep it natural. Mix in related terms.
  • Image Alt Text: If you upload images, use alt text to describe them (e.g., “gardening tips for small pots”).

Step 3: Focus on User Intent (The Secret Sauce)

keyword optimization

Modern keyword optimization is about understanding why people are searching. This is called “user intent.”

Here are four main types of intent:

  1. Informational: They want to learn something (“how to prune tomato plants”).
  1. Navigational: They want a specific website (“Facebook login”).
  1. Commercial: They’re researching before buying (“best gardening gloves 2024”).
  1. Transactional: They’re ready to buy (“buy rosemary plant online”).

Your content should always match the searcher’s intent. If the intent is transactional, they want quick options to purchase—not a long history lesson. Matching intent ensures your content is helpful and satisfies the visitor’s needs.

Common Keyword Optimization Mistakes to Avoid

keyword optimization

Even though the basics are simple, people often make mistakes when trying to use keywords. Watch out for these:

  • Keyword Stuffing: Repeating the same phrase over and over makes content unreadable and hurts SEO. Always write for humans first.
  • Ignoring Audience Needs: Don’t just chase popular keywords. If you sell coffee mugs, ranking for “best coffee beans” will bring the wrong audience.
  • Not Updating Content: Search trends change. The words people used two years ago might not work today. Refresh old posts with new keywords to stay relevant.

Conclusion: Keyword Optimization is a Journey

keyword optimization

Think of keyword optimization as an ongoing journey, not a one-time task. Your audience changes, search engines update, and trends shift. That means your content needs to grow, too.

By doing research, placing your keywords wisely, and focusing on user intent, you set a strong foundation for SEO success. Remember: the ultimate goal is not just to show up in search results but to be the best answer to someone’s question. Start with one page, keep improving, and soon your website will begin to rise in the rankings.

Frequently Asked Questions (FAQs)

Q1: How many times should I use my keyword in a blog post?

There’s no exact number. Forget about “keyword density.” Instead, place your main keyword in the title, headings, and opening paragraph, then use it naturally where it makes sense.

Q2: What matters more—search volume or user intent?

User intent is always more important. A keyword with fewer searches but the right intent will bring better results than a high-volume keyword that doesn’t match your content.

Q3: Can I optimize old blog posts?

Yes! Updating older content with fresh keywords and improved information can boost traffic. It’s one of the easiest SEO wins.

Q4: Is keyword optimization the only part of SEO?

No. While it’s crucial, other factors matter—such as website speed, mobile-friendliness, and earning backlinks from trusted websites.

Your Guide to LastPass Random Passwords

Unlock Better Security: Your Guide to LastPass Random Passwords

🔐 Introduction: Why Strong Passwords Matter

Still using “123456” or “password”? You’re not alone—but you’re also not safe. Hackers rely on weak and reused passwords to break into accounts. That’s where a lastpass random password makes all the difference. It generates long, complex, and unique codes that are nearly impossible to guess. In this guide, you’ll learn how to use LastPass’s free tool to boost your digital security with ease.

You can check my previous blog : LassPass Generator

💡 What Is the LastPass Random Password Generator?

lastpass random password

The lastpass random password generator is a free tool built into LastPass—a trusted password manager used by millions. It instantly creates strong, unpredictable passwords using uppercase and lowercase letters, numbers, and symbols. For example, instead of “Fluffy123”, you’ll get something like “G7$g!9Lp@2qZ”.

Key Benefits:

  • Built into the LastPass vault, browser extension, and mobile app.
  • No need to come up with your own passwords—it does the hard work.
  • Passwords are tailored to fit the complex security rules of websites.

🔒 Why Use a LastPass Random Password?

lastpass random password

1. Stops Hackers Cold

Most attacks use “dictionary guessing”—trying common words. A lastpass random password is immune to this. Each one is completely different, so if one password gets exposed, the rest of your accounts remain protected.

2. No More Forgotten Passwords

Tired of memorizing dozens of logins? Let LastPass securely save and auto-fill your passwords whenever you need them.

3. Matches Any Site Requirement

Some sites require a 12-character password with symbols. No worries—LastPass generates passwords that fit the rules.

🧩 How to Create a LastPass Random Password (3 Easy Steps)

lastpass random password

✅ Step 1: Get LastPass

Sign up at LastPass.com and install its browser extension or mobile app.

✅ Step 2: Generate Your Password

Click the LastPass icon in your browser → Choose “Generate Secure Password.”

Adjust the length, symbols, and other options to fit your needs.

✅ Step 3: Save & Autofill

Click “Use Password” and LastPass will save it to your secure vault.

Next time you visit that site, LastPass autofills your credentials for you.

🚀 Top 4 Features of LastPass Random Passwords

lastpass random password

✅ 1. Customizable Length

Need extra strength? Go for 16, 20, or even 99 characters.

✅ 2. Character Control

Turn numbers, symbols, and uppercase letters on or off depending on site rules.

✅ 3. Pronounceable Passwords

Want something easier to type? Use the “pronounceable” option for still-secure, readable passwords like “CrispyLamp92!”

✅ 4. One-Click Updates

Use the “Security Dashboard” to replace weak or reused passwords in seconds.

🧠 Managing Your Random Passwords Like a Pro

lastpass random password

🔐 Store Passwords Securely

Each lastpass random password is safely encrypted right on your device. No one—not even LastPass—can read it without your master password.

🔄 Update Regularly

Use the built-in “Password Audit” to find weak spots and replace them with fresh, strong passwords.

📱 Sync on All Devices

LastPass works across phones, tablets, and computers. Log in once, and your passwords follow you everywhere.

🏁 Conclusion: Your Security Upgrade Starts Now

lastpass random password

Using a lastpass random password is a simple but powerful move. It locks down your digital life by creating strong passwords, storing them securely, and filling them in automatically. No stress, no guessing—just safe and seamless login experiences. Start protecting your accounts today and make strong passwords your everyday habit.

❓FAQs: LastPass Random Passwords

Q1: Is LastPass free to use?

A: Yes. The password generator is free. The Premium plan ($3/month) adds more features like emergency access.

Q2: Can hackers access my saved passwords?

A: Yes. LastPass uses AES-256 encryption. Your passwords stay private and unreadable without your master password.

Q3: What if I forget my master password?

A: You’ll need to use account recovery options like SMS or email. LastPass can’t reset it for you—by design.

Q4: Is the password generator available on mobile devices?

A: Absolutely. The LastPass app works on iOS and Android, with the same random password generator included.

Q5: Are these passwords really uncrackable?

A: Yes. A 12-character lastpass random password would take hundreds of years to crack by brute force. Longer ones? Even better.

💡 Pro Tip: Turn on Two-Factor Authentication (2FA) for an extra layer of protection. Even if someone gets your password, they won’t be able to log in without your approval.

iforgot.apple id password reset

Forgot Your Apple ID Password? Reset It Easily with iforgot.apple id password reset

Struggling to sign into your iPhone, iPad, or Mac? Don’t panic! Forgetting your Apple ID password is common—and fixable. Apple provides a simple and official recovery tool called iforgot.apple id password reset, which helps you regain access in just a few steps. This full guide explains everything step by step in easy words.

🔐 What is iforgot.apple id password reset?

iforgot.apple id password reset

Your Apple ID is your digital key to all things Apple—like iCloud, App Store, and Apple Music. If you forget your password, you could lose access to important services and data. That’s where iforgot.apple id password reset comes in.

It’s a free, secure Apple website that helps you reset your password without needing to install any apps. Simply visit iforgot.apple.com in any browser and follow the steps. Always use the official Apple site to stay safe!

You can check my latest blog : How to Password Protect an Excel File

📱 Step-by-Step Guide to Reset Your Apple ID Password

Here’s a simple way to reset your password with iforgot.apple id password reset:

iforgot.apple id password reset

1. Open the Reset Page

Visit iforgot.apple.com from any phone, tablet, or computer.

2. Enter Your Apple ID

Type the email linked to your Apple ID, then click “Continue.”

3. Choose a Reset Option

You’ll see two choices:

  • Email Authentication – Apple sends a reset link to your email or phone number you trust.
  • Answer Security Questions – If you set them earlier, answer them to verify your identity.

4. Follow the Prompts

  • For email: Look in your inbox or texts for the code Apple sent.
  • For security questions: Enter the correct answers.

5. Set a New Password

Once verified, create a strong new password. Combine uppercase letters, numbers, and special symbols (e.g., StrongPass@2025!). Confirm it, and click Reset Password.

✅ If you have two-factor authentication (2FA) enabled, you’ll need a trusted device or phone number to complete the process.

iforgot.apple id password reset

⚙️ Alternate Ways to Reset Your Apple ID Password

If iforgot.apple id password reset isn’t working for you, try these methods:

iforgot.apple id password reset

On iPhone or iPad

Go to Settings, tap your name, then Password & Security, and choose Change Password.

On Mac

System Preferences > Click Apple ID > Password & Security > Change Password

With Apple Support App

Download the Apple Support app through the App Store. Select Apple ID, then tap Reset Password.

🛡️ 3 Essential Tips to Keep Your Apple ID Safe

iforgot.apple id password reset

Avoid future lockouts with these simple habits:

1. Use a Password Manager

Apps like iCloud Keychain or 1Password store and create strong passwords, so you don’t have to memorize them.

2. Enable Two-Factor Authentication

Go to appleid.apple.com, open the Security section, and turn on 2FA. This adds an extra layer of protection.

3. Update Trusted Contacts and Info

Make sure your rescue email and trusted phone numbers are always up-to-date in your Apple ID settings. Review them at least once a year.

❗ What to Do If Nothing Works?

iforgot.apple id password reset

Still can’t reset your password using iforgot.apple id password reset? Don’t worry. Here are your options:

  • Contact Apple Support: Chat, call, or email them directly.
  • Visit an Apple Store: Apple Store with a valid ID to get help recovering your account.
  • Use Account Recovery Contact: If you set this up earlier, it can help verify your identity faster.

✅ Conclusion: You’re Just Minutes Away from Regaining Access

iforgot.apple id password reset

Forgetting your Apple ID password doesn’t have to mean losing access. With iforgot.apple id password reset, the fix is just a few clicks away. Visit the official site, follow the steps, and reset your password safely.

To prevent future issues, always use a secure password, enable 2FA, and make sure your contact info is current.

❓ Frequently Asked Questions (FAQs)

Q1: What if I don’t remember my Apple ID?

A: Go to iforgot.apple.com, select “Look it up,” and type your name and email. Apple will help you find it.

Q2: Can I reset my password without a trusted device or number?

A: Yes. Use the Account Recovery option at iforgot.apple id password reset. It may take a few days while Apple verifies your identity.

Q3: I didn’t get the reset email or code—what now?

  • Check your spam or junk folders.
  • Ensure your device is connected to the internet.
  • Wait up to 15 minutes—sometimes there’s a delay.

Q4: How often should I change my Apple ID password?

A: Only if you think someone may have hacked your account. Otherwise, every 1–2 years is a good security practice.

Q5: Will resetting my Apple ID log me out of all devices?

A: Yes, you’ll have to sign in again on all your devices with the new password.

🔒 Stay Safe, Stay Connected

Now you know how to use iforgot.apple id password reset to take control of your Apple account. Share this guide to help others avoid being locked out too!