factory reset Chromebook without password

Factory Reset Chromebook Without Password: Easy Step-by-Step Guide

Introduction

factory reset Chromebook without password

Can’t get into your Chromebook because you forgot the password? Don’t worry — you can factory reset Chromebook without password and get back in. This guide will show you easy steps using built-in tools, no tech experience needed.

For more details, explore my previous blog on this topic: How to hack WiFi password

Why You Might Need to Reset Without a Password

factory reset Chromebook without password

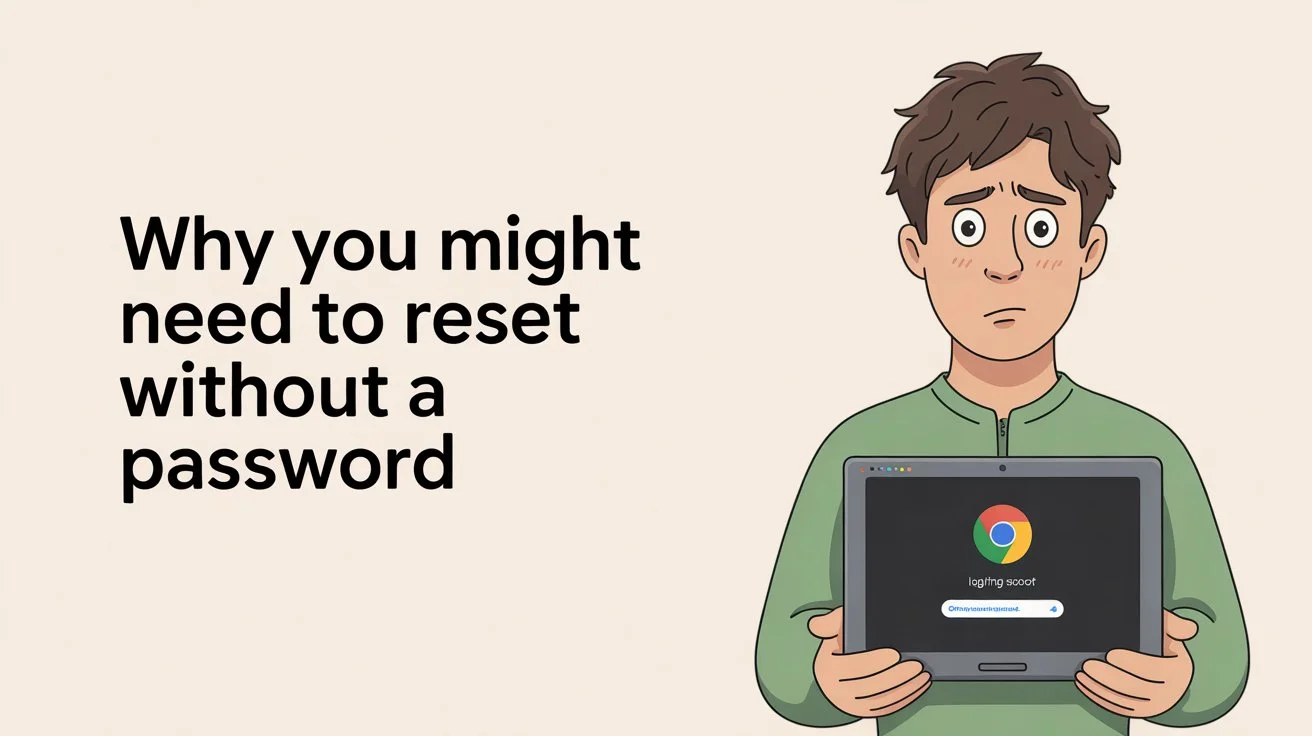
There are many situations where this is useful:

  • You forgot your login password.
  • You bought a second-hand Chromebook and it still has the previous owner’s account.
  • A family member changed the password.
  • Giving your Chromebook to someone else?
  • You’re facing glitches or slow performance.

Doing a factory reset Chromebook without password clears everything and lets you start fresh, like a new device.

⚠️ Important Things to Know Before Resetting

factory reset Chromebook without password

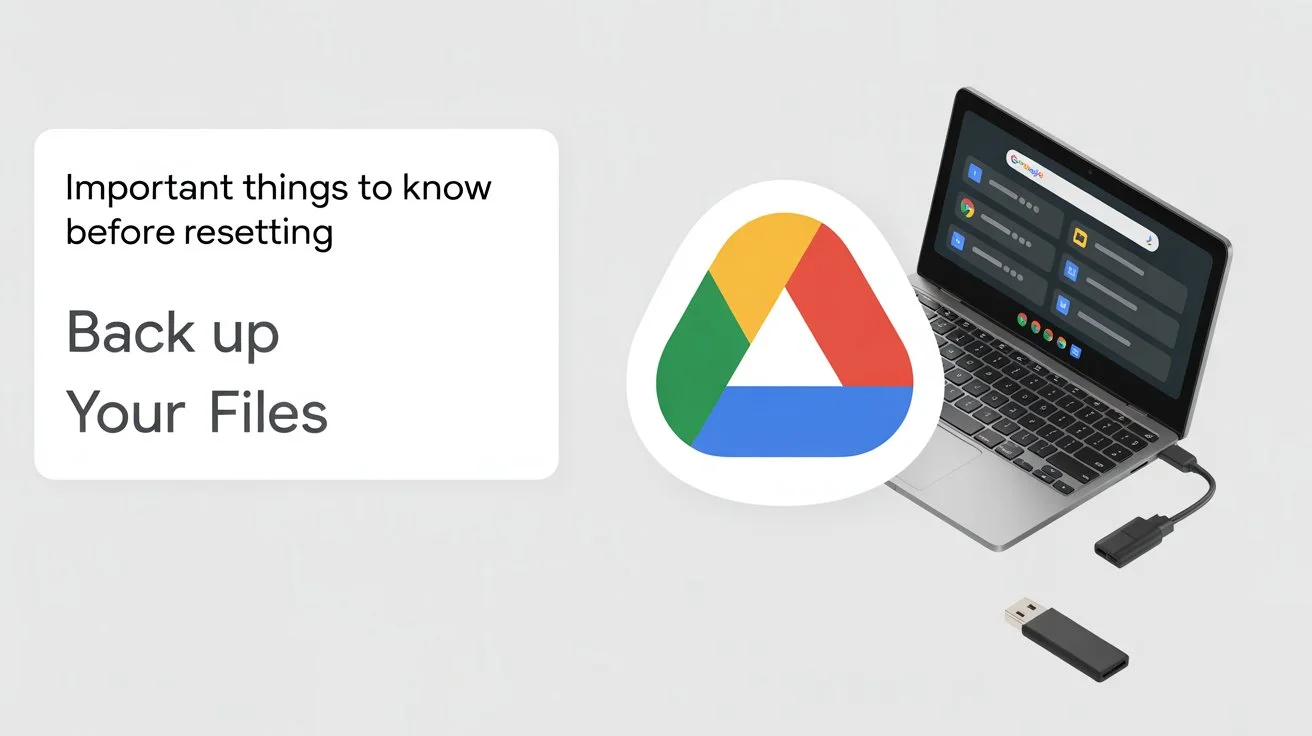
1. Back Up Your Files

Resetting will erase everything on your Chromebook’s local storage. If you have any photos, documents, or downloads, move them to:

  • Google Drive
  • A USB flash drive
  • An external hard drive

2. Stay Plugged In

Make sure your Chromebook is charged or plugged into power.

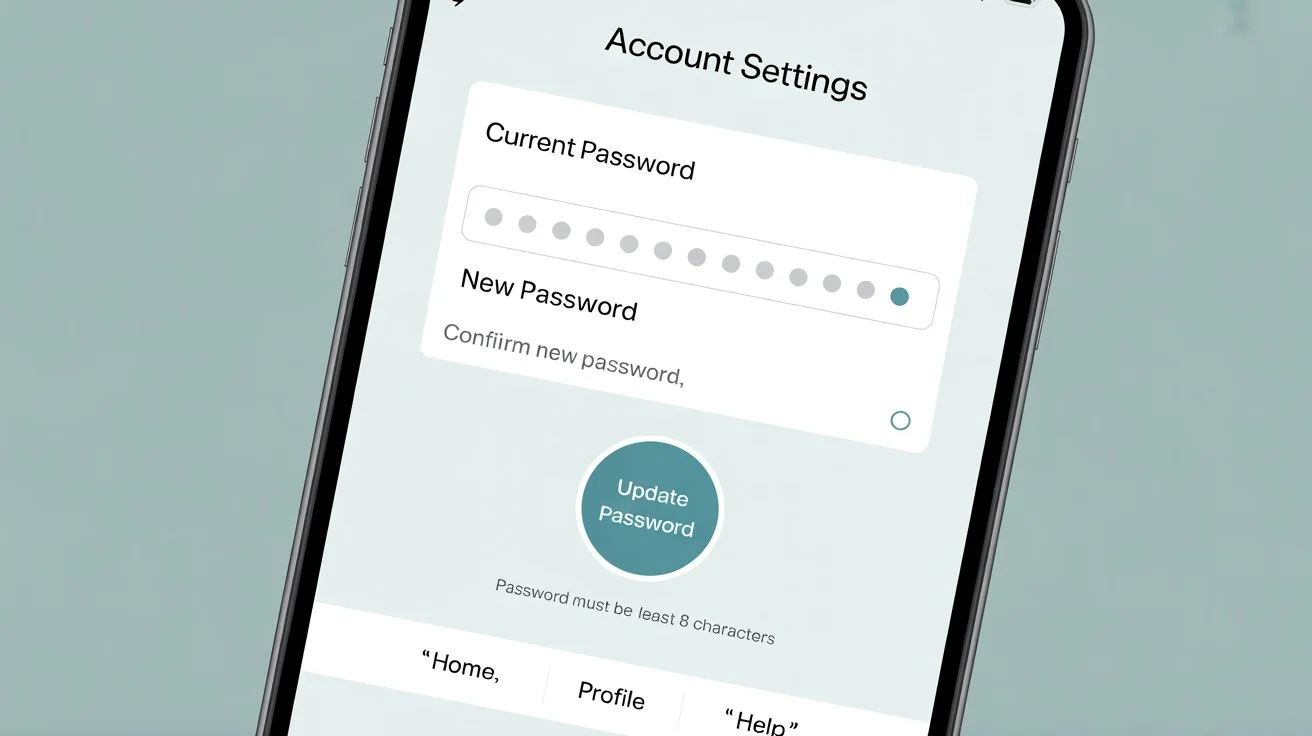
3. You’ll Lose the Following:

  • Installed apps
  • Offline files
  • Saved settings
  • Remembered passwords

Anything stored only on the device will be deleted. But files saved in your Google Account (like Google Drive) will stay safe.

Step-by-Step: How to Factory Reset Chromebook Without Password

factory reset Chromebook without password

You don’t need a password for this. Just follow these simple steps:

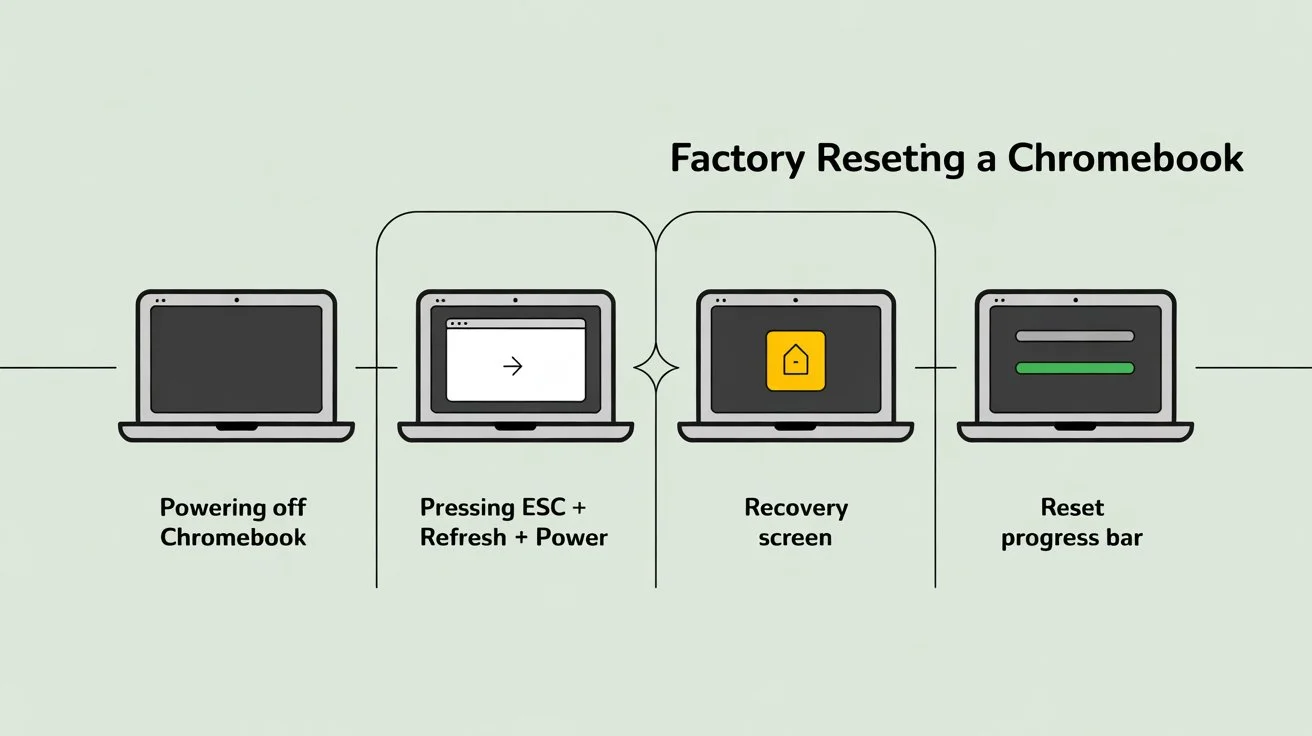
1. Turn Off Your Chromebook

Hold the Power button and shut it down completely.

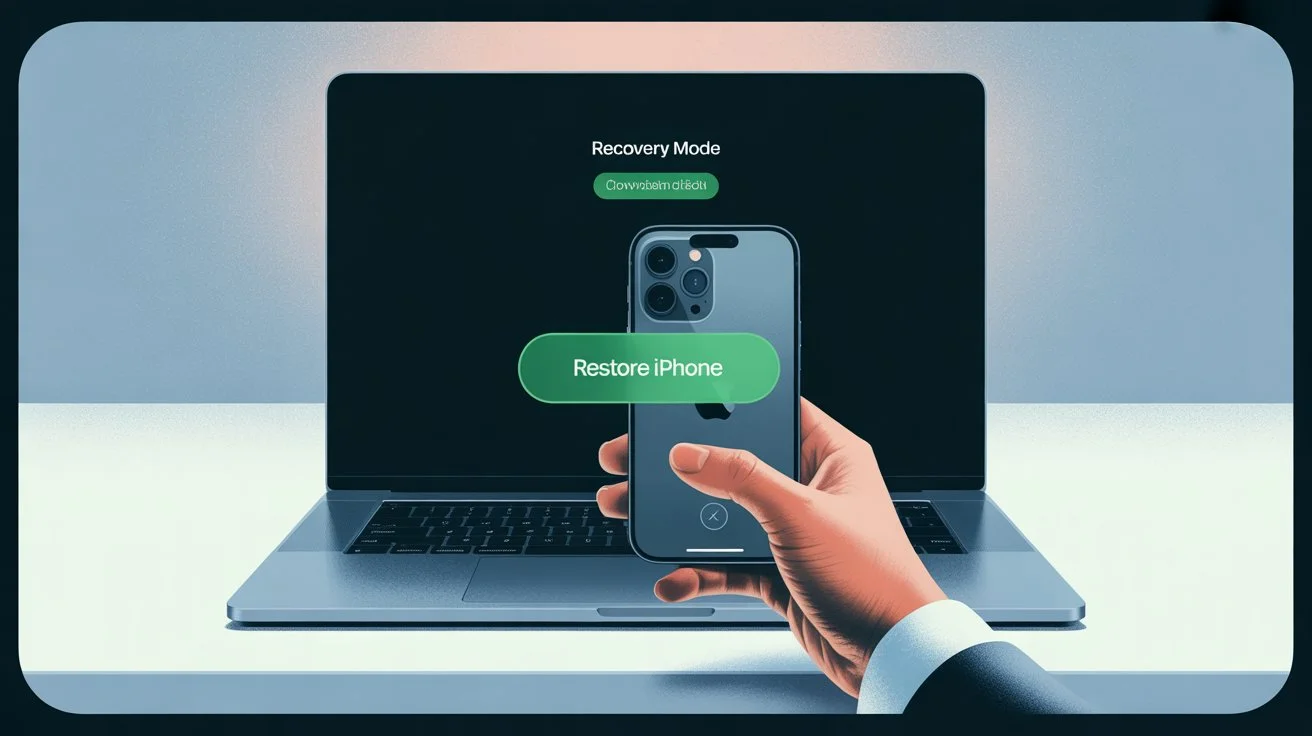
2. Enter Recovery Mode

Do this carefully:

  • Press and hold Esc + Refresh (🔄) keys.
  • While holding them, press the Power button once.
  • Release all three buttons when you see a yellow screen with an exclamation mark.

This is the Chromebook Recovery Mode.

3. Begin the Reset

  • Press Ctrl + D on your keyboard.
  • When it asks if you want to turn off OS verification, press Enter.

This disables secure boot and starts the reset process.

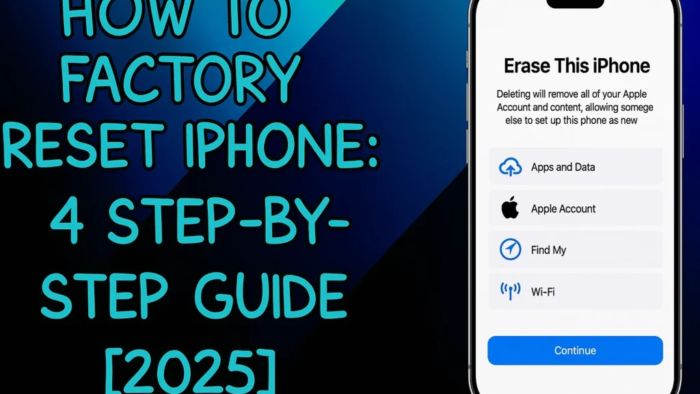
4. Confirm and Complete the Reset

  • Press Spacebar to turn OS verification back on.
  • This will trigger the factory reset process.
  • Wait around 5 to 10 minutes while your Chromebook erases everything and restarts.

5. Set Up Your Chromebook

Once it restarts:

  • Follow the on-screen instructions.
  • Connect to Wi-Fi.
  • Sign in with your Google Account or create one.

Congratulations! You’ve successfully completed a factory reset Chromebook without password.

What Happens After the Reset?

factory reset Chromebook without password

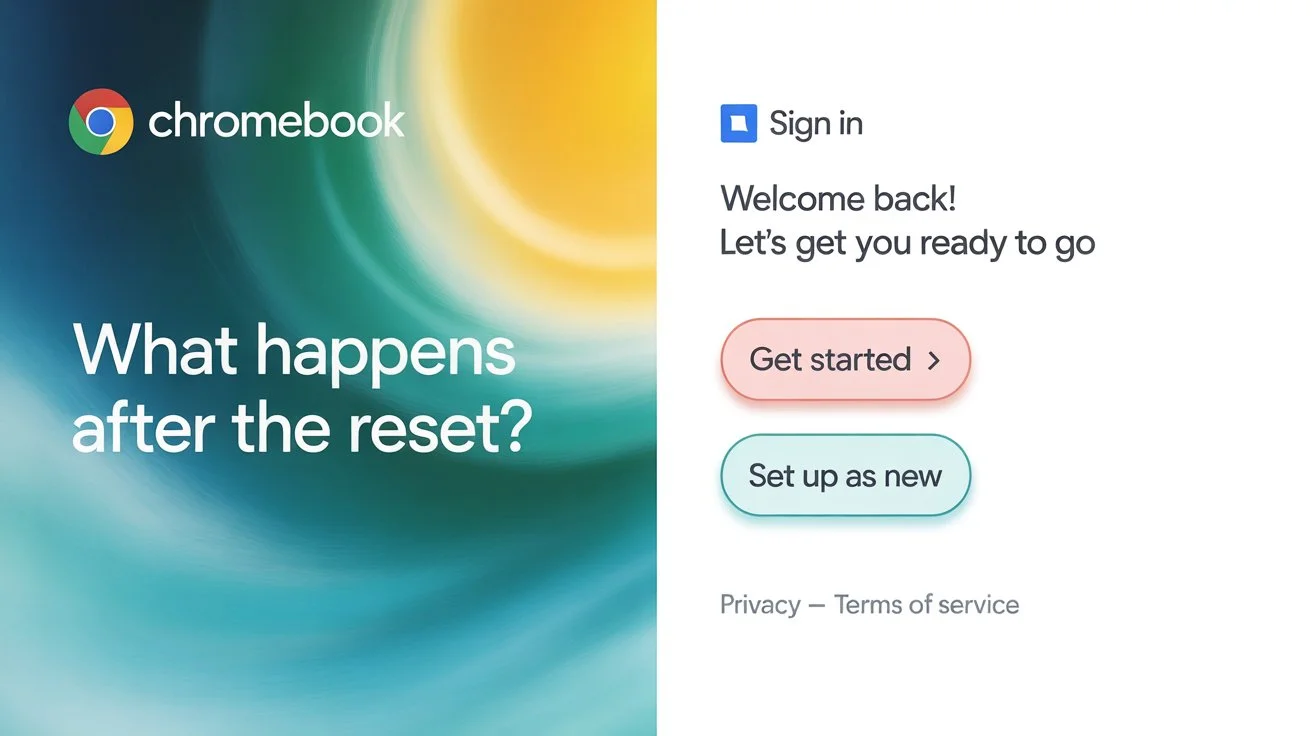
Your device will now behave as if it’s brand new:

  • All accounts, passwords, and data are gone.
  • It will ask for Wi-Fi and a Google Account login.
  • Downloads and offline files are permanently deleted.
  • Your settings are reset to default.

You can now use it with any Google account — just like the first time you bought it.

When Should You Use This Method?

This method to factory reset Chromebook without password is best for:

  • Forgotten passwords
  • Resetting a Chromebook you bought used
  • Removing an old account
  • Cleaning it up before giving it away
  • Fixing software bugs or slow performance

It’s a quick way to solve login or software issues without needing advanced tools.

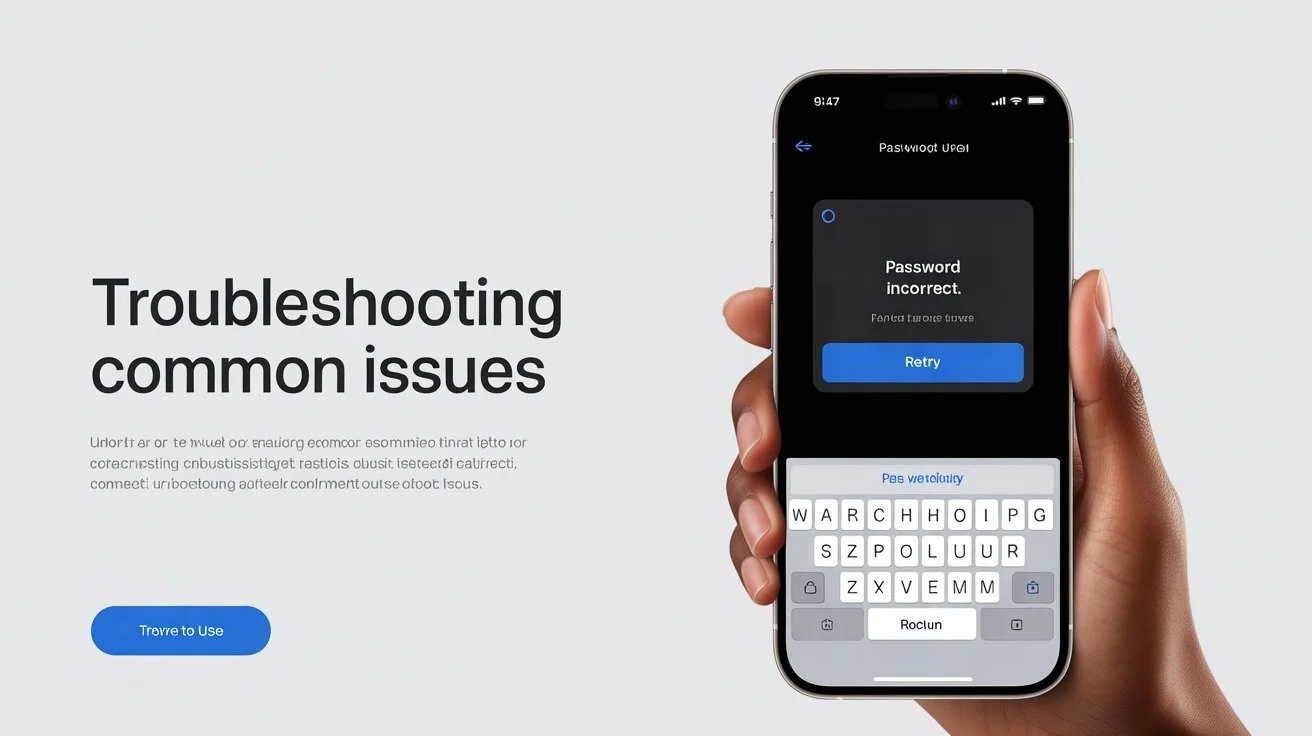
Troubleshooting Tips

factory reset Chromebook without password

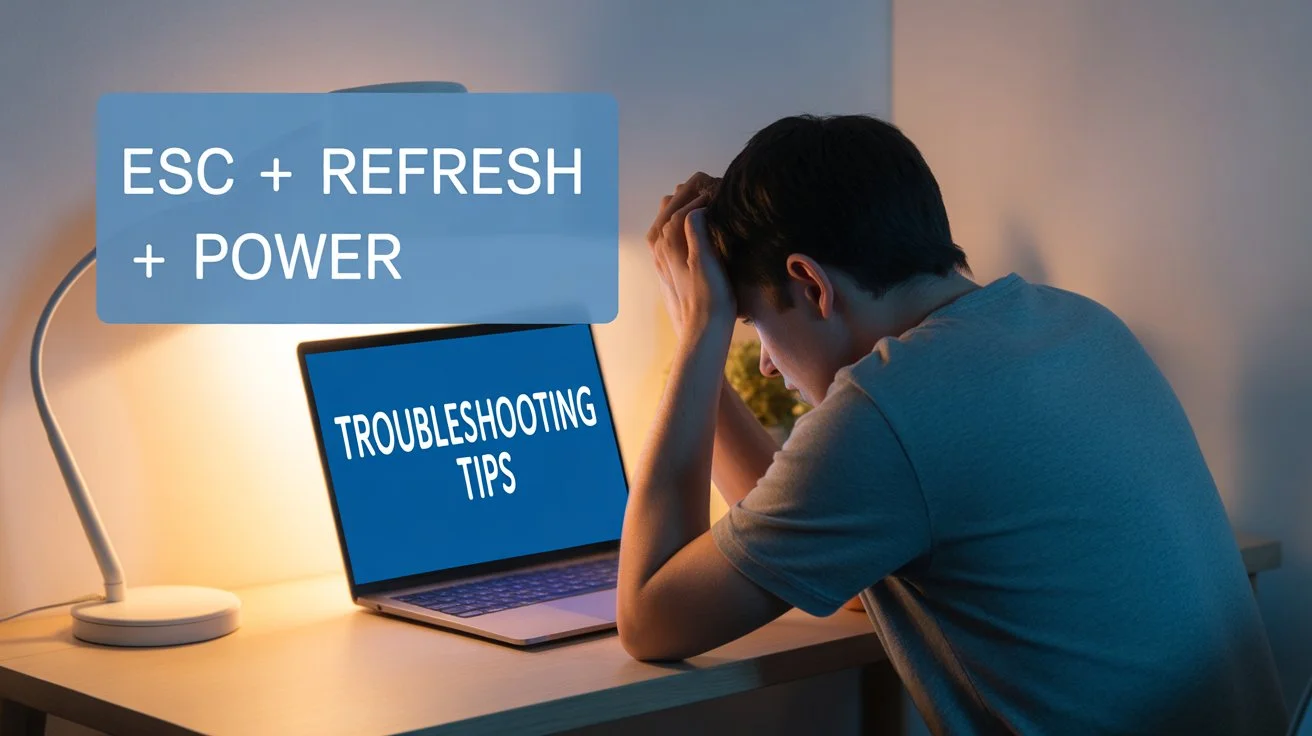
If something goes wrong, try these:

Recovery Mode Not Starting?

Make sure you:

  • Press and hold Esc + Refresh first, then tap Power.
  • Hold them long enough until the yellow screen appears.

Still Stuck?

Try restarting the process:

  • Press Esc + Refresh + Power again.

Reset Keeps Failing?

Sometimes, you might need a recovery USB:

  • Use another computer and go to Google’s Recovery Site.
  • Follow the instructions to create a recovery drive.

Usually though, this isn’t needed.

Conclusion

Forgetting your login doesn’t mean you’ve lost your Chromebook. Using Recovery Mode, you can factory reset Chromebook without password and start over. Just remember to back up your files first, follow the simple steps (Esc + Refresh + Power, then Ctrl + D), and then go through the setup like new.

It’s an easy, reliable way to fix login problems, clean up your device, or hand it off to someone else.

FAQs: Factory Reset Chromebook Without Password

Q1: Will a reset remove viruses or malware?

Yes. A full reset deletes all apps and files, removing any malware.

Q2: Can I get my files back after the reset?

No. All local files are deleted. Only items saved in Google Drive or another backup will be safe.

Q3: What if my Chromebook is from a school or work?

Contact your IT department. Many managed devices block manual resets.

Q4: Does this method work on all Chromebook models?

Yes. It works on all models using ChromeOS.

Q5: Will a reset make my Chromebook faster?

Usually, yes! It removes clutter and fixes software issues.

Q6: Can I skip backing up if my files are in Google Drive?

Yes. Files in Drive are safe and won’t be erased during the reset.

10 Easy Ways: How to Protect Your WiFi from Hackers in 2025

How to Protect Your WiFi from Hackers: Your Simple Guide to Digital Safety

In today’s digital world, learning how to protect your WiFi from hackers is just as important as locking the doors of your home. From working online and paying bills to chatting with friends and streaming shows, we depend on WiFi for almost everything. But just like leaving your door wide open invites trouble, leaving your WiFi unprotected makes it easy for hackers to sneak in.

Good news: Protecting your WiFi from hackers is easy. You don’t need to be a tech expert. By following some easy steps, you can create a strong digital shield around your network and keep your personal data safe.

This guide will explain why WiFi security matters and show you 10 simple steps on how to protect your WiFi from hackers.

For more details, you can read this blog :  How to share Wi-Fi password on iPhone

Why Should You Care About WiFi Security?

how to protect your WiFi from hackers

Before learning how to protect your WiFi from hackers, it’s important to understand why it matters. If a hacker gets access to your network, the risks are serious:

  • They can steal private details such as passwords, bank account numbers, and photos.
  • They can use your internet for illegal activities, leaving you responsible.
  • They steal bandwidth and slow your internet.
  • They can install harmful software (malware) on your devices.

Protecting your WiFi is not just about speed—it’s about protecting your identity, money, and privacy.

10 Simple Steps on How to Protect Your WiFi from Hackers

Here are ten easy yet powerful ways to improve your WiFi security. Each step makes it harder for hackers to break in.

1. Change Your Router’s Default Login

how to protect your WiFi from hackers

One of the first things to do when learning how to protect your WiFi from hackers is to change your router’s default login details. Most routers use a default login like “admin/admin,” which hackers already know.

What to do: Log in to your router’s settings (usually by typing 192.168.1.1 in your browser). Change username and password to strong, unique ones.

2. Use a Strong WiFi Password

how to protect your WiFi from hackers

A strong password is like the main lock of your WiFi. Without it, learning how to protect your WiFi from hackers becomes impossible.

What to do: Create a password with at least 12 characters, mixing uppercase letters, lowercase letters, numbers, and symbols. Avoid simple passwords like your name, phone number, or address.

3. Change Your Network Name (SSID)

The default network name often tells hackers the brand and model of your router. This gives them clues to exploit weaknesses.

What to do: Rename your WiFi to something unique but neutral. Don’t use personal information like your family name or house number.

4. Turn On the Best Encryption (WPA3)

how to protect your WiFi from hackers

Encryption protects your data as it travels through the air. It ensures that only devices with the password can read your information.

What to do: In your router’s security settings, choose WPA3 (the most secure option). If it’s not available, use WPA2 (AES). Never use WEP—it’s outdated and unsafe.

5. Keep Your Router Updated

Software updates fix security flaws that hackers try to exploit. Many people forget this step when learning how to protect your WiFi from hackers, but it’s crucial.

What to do: Check for router firmware updates every few months. If your router has auto-updates, turn them on.

6. Turn Off Remote Management

Remote management allows anyone to change your router settings from outside your home network. While useful for some, it’s also a big security risk.

What to do: Disable “Remote Management” in your router’s settings unless you truly need it. This allows only devices inside your home to connect.

7. Enable Your Router’s Firewall

how to protect your WiFi from hackers

A firewall blocks suspicious or unwanted traffic before it reaches your devices.

Do this: Check router security settings and turn on the firewall. This adds another strong layer of protection.

8. Create a Guest Network for Visitors

how to protect your WiFi from hackers

Sharing your main WiFi password with guests might expose your network to risks. Hackers can take advantage of it without you knowing.

Do this: Turn on the guest network on your router. This allows visitors to connect to the internet without entering your private network, where personal devices are stored.

9. Secure Your Smart Devices (IoT)

how to protect your WiFi from hackers

Smart devices like cameras, bulbs, and TVs often have weaker security than laptops or phones. Hackers can use them as entry points.

Do this: Connect smart devices to guest WiFi, not main WiFi. This way, even if one device is hacked, your personal data stays safe.

10. Turn Off WiFi When You’re Away

The simplest trick in how to protect your WiFi from hackers is turning it off when you don’t need it. If you’re on vacation or gone for days, why leave it running?

What to do: Unplug your router when you’re away for long periods. No WiFi means no hacking.

Conclusion: WiFi Security Is a Daily Habit

how to protect your WiFi from hackers

Learning how to protect your WiFi from hackers isn’t about being a tech genius—it’s about building smart habits. Start with the most important steps: changing your router login, setting a strong password, and enabling WPA3 encryption. Then move on to updates, firewalls, and guest networks.

Think of WiFi security like brushing your teeth: it’s small daily actions that prevent big problems later. By taking these steps, you can enjoy peace of mind knowing your online world is safe.

Frequently Asked Questions (FAQs)

Q1: How can I tell if my WiFi has been hacked?

Look for signs such as slower internet speed, strange devices connected to your network, or unexpected password requests.

Q2: Is public WiFi safe?

No, public WiFi is often insecure. Avoid logging into sensitive accounts like banking. If needed, use a VPN.

Q3: How often should I update my WiFi password?

For better protection, update it every 3–6 months, especially if you’ve shared it with visitors.

Q4: What is a VPN, and should I use it at home?

A VPN encrypts your internet traffic. It’s essential for public WiFi. At home, it adds extra safety but doesn’t replace a strong WiFi password.

Q5: My router is old. Should I upgrade?

Yes. If your router is over 4–5 years old and doesn’t support WPA3, it’s time for a new one. Modern routers come with better security features.

How to Share Wi-Fi Password on iPhone: An Easy Step-by-Step Guide

How to Share Wi-Fi Password on iPhone: An Easy Step-by-Step Guide

Introduction

Share Wi-Fi Password on iPhone

Have you ever been stuck trying to remember your Wi-Fi password when a friend comes over? Good news—you don’t have to anymore. Apple makes it easy to share your internet connection without typing anything. In this guide, you’ll learn exactly how to share Wi-Fi password on iPhone in just a few taps. It’s fast, secure, and super simple!

You can check my previous blog :  Radio Password for Honda

What You Need Before You Start

Share Wi-Fi Password on iPhone

Before you can share your Wi-Fi password, make sure these conditions are met. Apple’s built-in sharing tool only works if the following are true:

  • ✅ Apple devices only: Both you and the person you’re sharing with must have iPhones, iPads, or Macs.
  • ✅ Updated software: Your devices should be running iOS 11 or later, or macOS High Sierra or newer.
  • ✅ Bluetooth and Wi-Fi turned ON: Make sure both devices are on and ready to use.
  • ✅ Apple ID saved in contacts: You need to have the other person’s Apple ID email saved in your Contacts.
  • ✅ Devices nearby: Keep the two devices within 3 feet (about 1 meter) of each other.

Step-by-Step: How to Share Wi-Fi Password on iPhone

Share Wi-Fi Password on iPhone

Here are the simple steps to share Wi-Fi without ever typing the password:

Step 1: Connect to the Wi-Fi

Make sure your iPhone is connected to the Wi-Fi you want to share. If it isn’t, connect first.

Step 2: Ask Your Friend to Join the Network

Ask your friend to open their iPhone or iPad, go to Settings, tap Wi-Fi, and select your network. When the password box appears, they should just leave it open.

Step 3: Bring the Devices Close

With your iPhone unlocked, hold it near your friend’s device. A pop-up should show up on your screen saying that they want to join your Wi-Fi network.

Step 4: Tap “Share Password”

Tap “Share Password” when it pops up on your iPhone. Just like that, their device will auto-connect to the network without showing the password.

Step 5: Confirm Success

Ask your friend to check if they’re connected. They should now see a ✅ check mark next to the Wi-Fi name. That’s it—done in seconds!

Troubleshooting: When Sharing Doesn’t Work

If the password doesn’t share as expected, don’t worry. Try the following quick fixes:

  • 🔄Switch off Bluetooth and Wi-Fi on both devices, then turn them back on.
  • 📇 Double-check the saved contact: Make sure your friend’s Apple ID is correctly stored in your Contacts.
  • 🔄 Restart both iPhones.
  • 📲 Update iOS: Go to Settings > General > Software Update and install any available updates.
  • ⚙️ Reset network settings: If it still doesn’t work, go to Settings > General > Transfer or Reset iPhone > Reset Network Settings.

Why Use This Method?

Here’s why so many people use this method instead of manually typing the password:

  • 🔒 Secure: The password is shared through Apple’s secure system. It’s never shown or copied.
  • ⚡ Fast: No need to type long passwords like XyZ@123!Net_456.
  • 🧠 No memory needed: Even if you forget the password, your iPhone remembers it for you.

Conclusion

Now that you know how to share Wi-Fi password on iPhone, you don’t need to find notes or old messages anymore. Just follow the simple steps: unlock both devices, bring them close, and tap “Share Password.” Make sure your contacts are updated and your software is current, and you’ll never have to say “I forgot it” again.

Share Wi-Fi Password on iPhone

FAQs: All About iPhone Wi-Fi Sharing

Q1: Can I use this feature with Android devices?

A: No. This method works only between Apple products like iPhones, iPads, and Macs.

Q2: I don’t see the pop-up—what should I do?

A: Check these things:

  • Your friend’s Apple ID is saved in your Contacts.
  • Both devices have Bluetooth and Wi-Fi turned on.
  • The devices are close to each other, about 3 feet apart.

Q3: Will my friend see my actual password?

A: No. The password is encrypted and directly sent to their device—nothing is shown on the screen.

Q4: Can I share Wi-Fi if I’m not connected to it?

A: No. You need to be connected to the Wi-Fi before you can share it.

Q5: What if “Share Password” still doesn’t work?

A: Try restarting both phones and double-check that both are running iOS 11 or newer.

Final Note

Sharing your internet is no longer a chore. With this built-in Apple feature, you can connect friends and family in a few easy steps. Now you know exactly how to share Wi-Fi password on iPhone without typing anything at all—convenient, secure, and ha

Easy Guide to the Radio Password for Honda

Unlocking Your Honda Radio: Easy Guide to the Radio Password for Honda

Introduction

radio password for Honda.

If your Honda’s radio suddenly displays “CODE” or “ENTER CODE,” don’t panic! This security feature locks the radio when it loses power (like during a battery change). To unlock it, you need a unique radio password for HondaThis guide explains everything in simple steps—no jargon, just solutions.

You can check my previous blog: How to change email password on iPhone

Why Your Honda Radio Asks for a Password

radio password for Honda.

Honda radios have anti-theft protection. If the radio is disconnected from the car’s power (e.g., dead battery, repairs), it locks itself. You’ll see a message like “CODE” on the display. Entering the correct radio password for Honda is the only way to restore your music, news, or podcasts.

Finding Your Radio Password for Honda

radio password for Honda.

Here’s how to get your code:

  1. Check Your Honda’s Manual:
  • A small card with the code is often tucked in your owner’s manual booklet.
  1. Glove Compartment or Visor:
  • Sometimes dealers stick the code on a label inside the glove box or sun visor.
  1. Online Honda Portal:
  • Visit Honda Radio-Navi Code (official U.S. site).
  • Enter your radio’s serial number and vehicle details.
  1. Contact Your Dealer:
  • Call a Honda dealership with your VIN (Vehicle Identification Number) and proof of ownership. They’ll provide the code.

🔑 Note: Never pay for third-party websites claiming to give Honda codes—use only Honda’s official resources to avoid scams.

How to Enter Your Radio Password for Honda

radio password for Honda.

Follow these steps:

  1. Turn the ignition to “ON” (do not start the engine).
  1. Turn on the radio—you’ll see “ENTER CODE.”
  1. Press radio buttons 1 to 6 to enter the 5-digit code.
  • Example: Code “12345” = Press Preset 1 (once), Preset 2 (twice), Preset 3 (thrice), etc.
  1. Press the “❯❯” (seek) or “ENTER” button to confirm.
  1. If correct, the radio unlocks instantly!

⚠️ Warning: Enter the code wrong 10 times? The radio may lock permanently. If unsure, pause and double-check.

Lost Your Code? Try These Fixes

radio password for Honda.

Can’t find the radio password for Honda? Here’s what works:

Retrieve the Serial Number:

  • Remove the radio unit (requires tools). The serial number is on a sticker (example: “U1234F”).
  • Tip: YouTube tutorials show safe removal steps for your Honda model.

Dealer Assistance:

  • Take your license, car papers, and radio serial number to a Honda dealer.They’ll reset it.

Honda Customer Service:

  • Call Honda support (1-800-999-1009 in the U.S.) with your VIN and serial number.

Avoid Future Lockouts: 3 Pro Tips

radio password for Honda.
  1. Save Digitally: Take a photo of your code card and email it to yourself.
  1. Write It Down: Stick a note with the code in your manual or phone case.
  1. Pre-Battery Prep: Before replacing your battery, connect a memory saver device (sold at auto shops) to keep the radio powered.

Conclusion

A locked Honda radio can be annoying, but it’s easy to unlock with the right radio password for Honda. Always source your code from Honda (free!) via their website, dealer, or documents. Save it wisely, and you’ll never face silence on the road again.

FAQs About Honda Radio Passwords

Q1: Why did my Honda radio lock itself?

A: It’s an anti-theft feature. Power loss (e.g., dead battery) triggers it.

Q2: Is the radio password for Honda unique to my car?

A: Yes! Each code is tied to your radio’s serial number.

Q3: Can a Honda dealer unlock my radio without the code?

A: Yes—just bring your ID, car papers, and the radio’s serial number.

Q4: What if I buy a used Honda without the code?

A: Use the Honda portal or visit a dealer with your VIN and paperwork.

Q5: Will disconnecting the battery always lock the radio?

A: In most Honda models (2000+), yes. Use a memory saver to prevent this.

Q6: Can I disable this password feature?

A: No—it’s a permanent security function.

💡 Still stuck? You can call Honda support at 1-800-999-1009 (U.S.) for help.

radio password for Honda.

How to Change Email Password on iPhone: A Simple Step-by-Step Guide

How to Change Email Password on iPhone: A Simple Step-by-Step Guide

Introduction

change email password on iPhone

Keeping your email secure is super important. If you use an iPhone, updating your email password is easy! This guide shows you how to change email password on iPhone for any account (like Gmail, Yahoo, or Outlook). Follow these steps to stay safe and avoid login troubles.

So Now You can also check my previous blog: How to factory reset iPhone without password

For more information, insight blog

Why Update Your Email Password?

Your email gives access to your personal life. Hackers often target it to access bank accounts, social media, or private photos. Changing your password regularly:

  • Blocks unauthorized access
  • Protects sensitive information
  • Fixes login errors if you forgot your password

Before You Start: What You’ll Need

  • Your iPhone (with iOS 10 or later)
  • Your current email password
  • A new strong password (mix letters, numbers & symbols)
  • Internet connection

How to Change Email Password on iPhone

Follow these steps for any email provider (Gmail, Yahoo, Outlook, iCloud, etc.):

Step 1: Open iPhone Settings

change email password on iPhone
  • Tap the Settings app (gray gear icon).
  • Scroll down and select Passwords (or Mail > Accounts on older iOS).

Step 2: Select Your Email Account

  • Tap Accounts (or Passwords & Accounts).
  • Pick the email account to update (like Gmail or Outlook).

Step 3: Update Your Password

change email password on iPhone
  • Tap the email address under ACCOUNT.
  • Find the Password field and tap it.
  • Remove the old password and enter a new one.
  • Tap Done or Save in the top-right corner.

💡 Note: For iCloud accounts, go to Settings > [Your Name] > Password & Security > Change Password.

Troubleshooting Common Issues

change email password on iPhone

Problem: “Password incorrect” error after changing it.

Fix: Re-enter the new password. If it fails:

  1. Go to Settings > Mail > Accounts and tap Delete Account.
  1. Re-add it with your new password.

Problem: Can’t find the “Passwords” option.

Fix: On iOS 13 or earlier, go to Settings > Passwords & Accounts > [Your Account].

Problem: App asks for the password repeatedly.

Fix: Restart your iPhone or update iOS (Settings > General > Software Update).

After Changing Your Password

  • Test your email: Open the Mail app and send/receive a message.
  • Update other devices: Change the password on your iPad, Mac, or Android phone too.
  • Enable 2FA: Add extra security (Settings > Passwords > Security Recommendations).

Keep Your Email Secure: Extra Tips

change email password on iPhone
  1. Never reuse passwords across accounts.
  1. Change passwords every 3-6 months.
  1. Use Apple’s Password Manager (Settings > Passwords) to store strong passwords.
  1. Avoid public Wi-Fi for email access.

Conclusion

Learning how to change email password on iPhone takes less than 2 minutes, but protects your data for years. Whether it’s Gmail, Yahoo, or iCloud, updating your password stops hackers and keeps your inbox safe. Repeat these steps regularly to avoid security risks!

FAQs: Changing Email Password on iPhone

Q1: Will changing my email password log me out of other devices?

A: Yes! Update the password everywhere (laptop, tablet, etc.) to avoid sync errors.

Q2: Do I need to change my password on my email provider’s website too?

A: No. The iPhone steps above update your device only. If you want to change the actual password (e.g., for Gmail), visit your provider’s site first, then update it on your iPhone.

Q3: Why can’t I see the “Password” field for my iCloud account?

A: iCloud passwords are tied to your Apple ID. Open Settings > \[Your Name] > Password & Security > Change Password.

Q4: What if I forget my new password?

A: Reset it via your email provider’s website (e.g., Gmail.com “Forgot Password”), then repeat the iPhone steps above.

Q5: Does this work for work/school emails (like Microsoft 365)?

A: Yes! The steps are identical for Exchange or Office 365 accounts.

🔒 Remember: A strong password protects you. Update it today!

How to Factory Reset iPhone Without Password: Step-by-Step Guide

How to Factory Reset iPhone Without Password: Step-by-Step Guide

Factory Reset iPhone Without Password

Losing access to your iPhone can feel overwhelming. Whether you forgot your passcode, bought a locked used phone, or your device is disabled, there’s a way out. You can factory reset iPhone without password using trusted methods. This guide will show you how—step by step—in simple language.

You can check my previous blog : iforgot.apple id password reset

🔍 Why Would You Need to Factory Reset?

Factory Reset iPhone Without Password

Here are common situations where a reset is needed:

  • You forgot your lock screen or Screen Time passcode.
  • Your iPhone is disabled after too many wrong tries.
  • You purchased a secondhand phone that is still locked.
  • You’re getting ready to sell, give away, or trade your phone but forgot the password.

⚠️ Important Before You Begin

Factory Reset iPhone Without Password

1. Resetting Erases Everything

Photos, apps, settings, and contacts will be deleted. If you can, back up your data using iCloud or iTunes before proceeding.

2. Apple ID is Still Required After Reset

Even if you reset the phone, Apple’s Activation Lock stays. You’ll need the original Apple ID and password used to set up the phone. This prevents stolen iPhones from being reused.

3. Keep iTunes or Finder updated

Make sure your computer has the latest version of iTunes (for Windows/macOS Mojave or earlier) or Finder (for macOS Catalina and above).

🔧 Method 1: Use iTunes or Finder

Best if you’ve used the computer to sync your iPhone before.

Step 1: Connect iPhone to Computer

Connect your phone to the computer with a Lightning cable, then launch iTunes or Finder.

Step 2: Enter Recovery Mode

Factory Reset iPhone Without Password

The steps depend on your iPhone model:

  • iPhone 8/SE (2nd gen) and newer: Press and quickly release Volume Up, then Volume Down. Keep holding the Side button until recovery mode shows up.
  • For iPhone 7/7 Plus: Hold the Volume Down and Side buttons at the same time.
  • iPhone 6s or earlier: Hold the Home and Side buttons together.

Step 3: Restore iPhone

Your computer will recognize that your iPhone is in recovery mode. Click on Restore. The system will download and install the newest version of iOS. This process usually takes 10–15 minutes. Your iPhone will restart as new.

☁️ Method 2: Use iCloud’s “Find My iPhone”

Use this if “Find My iPhone” is already enabled on your device.

Step 1: Visit iCloud.com

Go to iCloud.com and sign in with your Apple ID.

Step 2: Open Find My iPhone

Factory Reset iPhone Without Password

Click All Devices at the top. Then choose the iPhone to erase.

Step 3: Erase the iPhone

Click Erase iPhone, confirm your choice, and wait. The device must be connected to the internet to reset. Once done, the iPhone returns to factory settings.

This method is perfect for people who’ve lost their device or want to erase it remotely.

⚡ Method 3: Use Recovery Mode Without iTunes Sync

This is the most flexible method and works even if the phone was never synced before or Find My iPhone is turned off.

Step 1: Connect iPhone & Enter Recovery Mode

Use the same steps listed in Method 1 to enter recovery mode based on your iPhone model.

Step 2: Restore Using Computer

Factory Reset iPhone Without Password

When your device enters recovery mode, iTunes or Finder will show a message. Click Restore (not Update). This will erase your iPhone and install the newest version of iOS.

Make sure your internet connection is stable. Don’t unplug the phone until the reset is complete.

✅ What to Do After Resetting

Once your iPhone resets, you’ll see the Hello screen.

1. Set Up as New or Restore from Backup

Follow the on-screen steps. If you previously backed up your iPhone to iCloud or your computer, choose to restore.

2. Activation Lock

If the phone is linked to an Apple ID, you’ll need to enter that ID and password to continue. This is Apple’s security feature to prevent theft. If you’re not the original owner, contact them for the Apple ID.

3. Update iOS

Go to Settings > General > Software Update to check for and install the latest iOS version.

💡 Final Thoughts

Factory Reset iPhone Without Password

If you’re locked out, don’t stress. You can factory reset iPhone without password using iTunes, iCloud, or Recovery Mode. Just follow the correct steps based on your situation.

Here’s a quick summary:

  • Always back up your data when possible.
  • Remember your Apple ID credentials—they’re still needed.
  • Use Recovery Mode if you don’t have access to iCloud or a synced computer.
  • If you’re buying a secondhand iPhone, ask the seller to remove their Apple ID first.

Once reset, your iPhone will be ready for a fresh start.

❓ Frequently Asked Questions (FAQs)

Q1: Can I reset a disabled iPhone?

Yes. All three methods work even if the iPhone is disabled or says “iPhone Unavailable.” Just use a computer to enter recovery mode.

Q2: Is it possible to reset my iPhone without a computer or Apple ID?

No. You’ll need one of these:

A computer with iTunes or Finder for Recovery Mode reset.

An Apple ID login is required to access iCloud’s remote erase feature.

Q3: Does resetting remove the Apple ID?

No. The Apple ID stays linked due to Activation Lock. After the reset, you must enter the same Apple ID credentials that were used before.

Q4: Can I recover my data after the reset?

Only if you backed up your iPhone before resetting. If you don’t have a backup, all your data will be lost forever.

Q5: iTunes says “iPhone could not be restored.” What now?

Try these solutions:

Update iTunes or Finder to the latest version.

Use a different USB cable or computer port.

Double-check you’re entering Recovery Mode correctly.

If you follow these instructions carefully, you’ll be able to factory reset iPhone without password in no time. Whether you’re troubleshooting, clearing old data, or starting fresh, these safe methods can help you regain control of your device.

Your Guide to LastPass Random Passwords

Unlock Better Security: Your Guide to LastPass Random Passwords

🔐 Introduction: Why Strong Passwords Matter

Still using “123456” or “password”? You’re not alone—but you’re also not safe. Hackers rely on weak and reused passwords to break into accounts. That’s where a lastpass random password makes all the difference. It generates long, complex, and unique codes that are nearly impossible to guess. In this guide, you’ll learn how to use LastPass’s free tool to boost your digital security with ease.

You can check my previous blog : LassPass Generator

💡 What Is the LastPass Random Password Generator?

lastpass random password

The lastpass random password generator is a free tool built into LastPass—a trusted password manager used by millions. It instantly creates strong, unpredictable passwords using uppercase and lowercase letters, numbers, and symbols. For example, instead of “Fluffy123”, you’ll get something like “G7$g!9Lp@2qZ”.

Key Benefits:

  • Built into the LastPass vault, browser extension, and mobile app.
  • No need to come up with your own passwords—it does the hard work.
  • Passwords are tailored to fit the complex security rules of websites.

🔒 Why Use a LastPass Random Password?

lastpass random password

1. Stops Hackers Cold

Most attacks use “dictionary guessing”—trying common words. A lastpass random password is immune to this. Each one is completely different, so if one password gets exposed, the rest of your accounts remain protected.

2. No More Forgotten Passwords

Tired of memorizing dozens of logins? Let LastPass securely save and auto-fill your passwords whenever you need them.

3. Matches Any Site Requirement

Some sites require a 12-character password with symbols. No worries—LastPass generates passwords that fit the rules.

🧩 How to Create a LastPass Random Password (3 Easy Steps)

lastpass random password

✅ Step 1: Get LastPass

Sign up at LastPass.com and install its browser extension or mobile app.

✅ Step 2: Generate Your Password

Click the LastPass icon in your browser → Choose “Generate Secure Password.”

Adjust the length, symbols, and other options to fit your needs.

✅ Step 3: Save & Autofill

Click “Use Password” and LastPass will save it to your secure vault.

Next time you visit that site, LastPass autofills your credentials for you.

🚀 Top 4 Features of LastPass Random Passwords

lastpass random password

✅ 1. Customizable Length

Need extra strength? Go for 16, 20, or even 99 characters.

✅ 2. Character Control

Turn numbers, symbols, and uppercase letters on or off depending on site rules.

✅ 3. Pronounceable Passwords

Want something easier to type? Use the “pronounceable” option for still-secure, readable passwords like “CrispyLamp92!”

✅ 4. One-Click Updates

Use the “Security Dashboard” to replace weak or reused passwords in seconds.

🧠 Managing Your Random Passwords Like a Pro

lastpass random password

🔐 Store Passwords Securely

Each lastpass random password is safely encrypted right on your device. No one—not even LastPass—can read it without your master password.

🔄 Update Regularly

Use the built-in “Password Audit” to find weak spots and replace them with fresh, strong passwords.

📱 Sync on All Devices

LastPass works across phones, tablets, and computers. Log in once, and your passwords follow you everywhere.

🏁 Conclusion: Your Security Upgrade Starts Now

lastpass random password

Using a lastpass random password is a simple but powerful move. It locks down your digital life by creating strong passwords, storing them securely, and filling them in automatically. No stress, no guessing—just safe and seamless login experiences. Start protecting your accounts today and make strong passwords your everyday habit.

❓FAQs: LastPass Random Passwords

Q1: Is LastPass free to use?

A: Yes. The password generator is free. The Premium plan ($3/month) adds more features like emergency access.

Q2: Can hackers access my saved passwords?

A: Yes. LastPass uses AES-256 encryption. Your passwords stay private and unreadable without your master password.

Q3: What if I forget my master password?

A: You’ll need to use account recovery options like SMS or email. LastPass can’t reset it for you—by design.

Q4: Is the password generator available on mobile devices?

A: Absolutely. The LastPass app works on iOS and Android, with the same random password generator included.

Q5: Are these passwords really uncrackable?

A: Yes. A 12-character lastpass random password would take hundreds of years to crack by brute force. Longer ones? Even better.

💡 Pro Tip: Turn on Two-Factor Authentication (2FA) for an extra layer of protection. Even if someone gets your password, they won’t be able to log in without your approval.

iforgot.apple id password reset

Forgot Your Apple ID Password? Reset It Easily with iforgot.apple id password reset

Struggling to sign into your iPhone, iPad, or Mac? Don’t panic! Forgetting your Apple ID password is common—and fixable. Apple provides a simple and official recovery tool called iforgot.apple id password reset, which helps you regain access in just a few steps. This full guide explains everything step by step in easy words.

🔐 What is iforgot.apple id password reset?

iforgot.apple id password reset

Your Apple ID is your digital key to all things Apple—like iCloud, App Store, and Apple Music. If you forget your password, you could lose access to important services and data. That’s where iforgot.apple id password reset comes in.

It’s a free, secure Apple website that helps you reset your password without needing to install any apps. Simply visit iforgot.apple.com in any browser and follow the steps. Always use the official Apple site to stay safe!

You can check my latest blog : How to Password Protect an Excel File

📱 Step-by-Step Guide to Reset Your Apple ID Password

Here’s a simple way to reset your password with iforgot.apple id password reset:

iforgot.apple id password reset

1. Open the Reset Page

Visit iforgot.apple.com from any phone, tablet, or computer.

2. Enter Your Apple ID

Type the email linked to your Apple ID, then click “Continue.”

3. Choose a Reset Option

You’ll see two choices:

  • Email Authentication – Apple sends a reset link to your email or phone number you trust.
  • Answer Security Questions – If you set them earlier, answer them to verify your identity.

4. Follow the Prompts

  • For email: Look in your inbox or texts for the code Apple sent.
  • For security questions: Enter the correct answers.

5. Set a New Password

Once verified, create a strong new password. Combine uppercase letters, numbers, and special symbols (e.g., StrongPass@2025!). Confirm it, and click Reset Password.

✅ If you have two-factor authentication (2FA) enabled, you’ll need a trusted device or phone number to complete the process.

iforgot.apple id password reset

⚙️ Alternate Ways to Reset Your Apple ID Password

If iforgot.apple id password reset isn’t working for you, try these methods:

iforgot.apple id password reset

On iPhone or iPad

Go to Settings, tap your name, then Password & Security, and choose Change Password.

On Mac

System Preferences > Click Apple ID > Password & Security > Change Password

With Apple Support App

Download the Apple Support app through the App Store. Select Apple ID, then tap Reset Password.

🛡️ 3 Essential Tips to Keep Your Apple ID Safe

iforgot.apple id password reset

Avoid future lockouts with these simple habits:

1. Use a Password Manager

Apps like iCloud Keychain or 1Password store and create strong passwords, so you don’t have to memorize them.

2. Enable Two-Factor Authentication

Go to appleid.apple.com, open the Security section, and turn on 2FA. This adds an extra layer of protection.

3. Update Trusted Contacts and Info

Make sure your rescue email and trusted phone numbers are always up-to-date in your Apple ID settings. Review them at least once a year.

❗ What to Do If Nothing Works?

iforgot.apple id password reset

Still can’t reset your password using iforgot.apple id password reset? Don’t worry. Here are your options:

  • Contact Apple Support: Chat, call, or email them directly.
  • Visit an Apple Store: Apple Store with a valid ID to get help recovering your account.
  • Use Account Recovery Contact: If you set this up earlier, it can help verify your identity faster.

✅ Conclusion: You’re Just Minutes Away from Regaining Access

iforgot.apple id password reset

Forgetting your Apple ID password doesn’t have to mean losing access. With iforgot.apple id password reset, the fix is just a few clicks away. Visit the official site, follow the steps, and reset your password safely.

To prevent future issues, always use a secure password, enable 2FA, and make sure your contact info is current.

❓ Frequently Asked Questions (FAQs)

Q1: What if I don’t remember my Apple ID?

A: Go to iforgot.apple.com, select “Look it up,” and type your name and email. Apple will help you find it.

Q2: Can I reset my password without a trusted device or number?

A: Yes. Use the Account Recovery option at iforgot.apple id password reset. It may take a few days while Apple verifies your identity.

Q3: I didn’t get the reset email or code—what now?

  • Check your spam or junk folders.
  • Ensure your device is connected to the internet.
  • Wait up to 15 minutes—sometimes there’s a delay.

Q4: How often should I change my Apple ID password?

A: Only if you think someone may have hacked your account. Otherwise, every 1–2 years is a good security practice.

Q5: Will resetting my Apple ID log me out of all devices?

A: Yes, you’ll have to sign in again on all your devices with the new password.

🔒 Stay Safe, Stay Connected

Now you know how to use iforgot.apple id password reset to take control of your Apple account. Share this guide to help others avoid being locked out too!

How to Password Protect an Excel File

🔒 How to Password Protect an Excel File (Simple Step-by-Step Guide)

Ever worry about someone opening your important Excel budget, client list, or project tracker? Adding a password is your best defense! This easy guide shows you how to password protect an Excel file using clear steps anyone can follow.

You can check my latest blog: Enter Password to Unlock (30 Attempts Remaining)

🛡️ Why You Need to Password Protect an Excel File

How to Password Protect an Excel File


Think about what’s inside your spreadsheets:

  • Personal Finances: Budgets, banking details, investments
  • Business Data: Sales reports, customer contacts, project costs
  • HR Information: Employee salaries, home addresses, and reviews
  • Confidential Projects: Research, product roadmaps, strategies

Without protection, anyone with access to your PC, email, or cloud folder can view this data. When you password-protect an Excel file, it’s like locking it with a digital key. Only those who know the password can open it, keeping your privacy and business safe.

📝 How to Password Protect an Excel File (Step-by-Step)


Don’t worry—it’s much easier than it sounds! These steps apply to Excel 2016, 2019, 2021, and Microsoft 365 versions.

✅ Step 1: Open Your File


Launch the Excel file you want to lock.

✅ Step 2: Click the File Tab


In the top-left corner, select File.

✅ Step 3: Go to “Info”


Choose “Info” from the left-hand menu.

✅ Step 4: Click “Protect Workbook”

Click on the Protect Workbook button. You’ll see a small dropdown.

✅ Step 5: Choose “Encrypt with Password”


From the list, pick “Encrypt with Password.”
📸 Visual Example: Navigate to File > Info > Protect Workbook (see image)

✅ Step 6: Enter a Strong Password


A pop-up appears. Type your password and click OK.
⚠️ Important: If you forget this password, Microsoft cannot recover it.

✅ Step 7: Confirm Your Password


Type it again exactly the same, then click OK.

✅ Step 8: Save the File


Hit Ctrl + S or click the save icon. Now, every time someone opens it (even you!), they’ll need the password.

🧠 Tips to Create a Strong Password

How to Password Protect an Excel File


A weak password defeats the purpose. Follow these tips to create a strong and secure password:

  • 🔀 Use a Mix of Characters: Combine uppercase and lowercase letters, numbers, and symbols.
  • 🔢 Longer is Stronger: Aim for 12+ characters.
  • ❌Avoid Easy Guesses: Stay away from “123456,” “password,” names, or birthdays.
  • 🚫 Don’t Reuse Passwords: Especially not from email or banking.
  • 🔐 Use a Passphrase: Like “My dog barks at 3 AM daily!” → “MdBa3@Md!”

😟 Forgot Your Password?

How to Password Protect an Excel File


This is the tough part: if you forget the password, you can’t open the file. Microsoft offers no recovery tools. Here’s what you can try:

  • 🔍 Check Notes/Password Managers: Maybe you saved it without realizing.
  • 💾 Look for Unprotected Versions: Older file copies or backups may help.
  • 🛠️ Use Third-Party Tools (With Caution): Only from trusted sources, and know they’re not always successful and may pose risks like malware.

✅ The Bottom Line: Secure Your Spreadsheets


Learning how to password protect an Excel file is one of the easiest yet most powerful ways to secure your data. Whether you’re working with private budgets or critical business plans, this one extra step adds serious protection.

➡️ Remember:

  • Use a strong, unique password
  • Never store the password in the same email or folder as the file
  • Use a password manager to keep track safely

Don’t wait for a data breach—password protect an Excel file now and keep your information safe.

❓ FAQs: Password Protecting Excel Files


🔐 Q1: Can I lock just parts of the Excel file?


A: Yes. Go to the Review tab > Protect Sheet or Protect Workbook.
This uses a separate password. People can open the file, but can’t edit protected cells without the sheet password.

🔐 Q2: Is Excel’s password protection actually secure?


A: Yes, if you’re using a newer version.
Excel 2013 and newer use AES-256 encryption, which is highly secure, as long as your password is strong. Older Excel formats (.xls) are weaker and easier to crack.

🔐 Q3: What if I email someone a protected file?


A: They’ll need to enter the password to open it. Never send the password in the same email—use a different channel, like a secure message or call.

🔐 Q4: Can I remove the password later?


A: Definitely! Open the file, and go to:
File > Info > Protect Workbook > Encrypt with Password
Delete the password so the box is empty, click OK, then save. Done!

🔐 Q5: Will a password stop someone from deleting the file?


A: No. The password only blocks access to file contents, not deletion, renaming, or moving. Use folder permissions or backups for protection against deletion.

✅ Final Tip

How to Password Protect an Excel File


Now you know exactly how to password protect an Excel file; take a moment to lock your important documents. It’s simple, fast, and protects what matters most.

fix enter password to unlock 30 attempts

How to Easily Fix Enter Password to Unlock 30 Attempts: Simple Guide for Everyone ✅

Have you ever picked up your iPhone and been surprised by a message saying “Enter Password to Unlock (30 Attempts)”? This can feel stressful and confusing, especially if you don’t know why it appeared. But don’t worry—it is not the end for your device. In fact, this message is a built-in security feature designed to protect your data.

In this complete guide, you’ll learn what this message means, why it happens, and step-by-step methods to fix enter password to unlock 30 attempts issue. By the end, you’ll also know how to prevent it in the future so you never feel stuck again.

For more details, you can read this blog : MyPageRank

What Does “Enter Password to Unlock (30 Attempts)” Mean?

fix enter password to unlock 30 attempts

When you see this message, it means someone tried to unlock your phone by entering the wrong passcode multiple times. iPhones are designed to block unlimited attempts because hackers or thieves could otherwise keep guessing.

The “30 attempts” message signals that your phone is locked for a set time. In most cases, you’ll see a countdown timer (like 1 minute, 5 minutes, or even longer). Sometimes, it may show “iPhone disabled, connect to iTunes” after too many wrong tries.

In short, your phone isn’t broken—it’s just locked for your safety. The good news is you can fix enter password to unlock 30 attempts with the right methods.

Why Does This Happen on iPhones?

fix enter password to unlock 30 attempts

There are a few common reasons why you might be facing this problem:

  • You forgot your passcode—the most common reason is simply forgetting your new or old passcode.
  • Children or friends tried unlocking it—sometimes, kids or friends may type wrong codes repeatedly.
  • Pocket or purse touches—Accidental touches in your pocket or bag can trigger failed attempts.
  • Software glitches—Rarely, your iPhone might think incorrect attempts were made due to a bug.

No matter the reason, follow the steps below to fix the 30 attempts issue calmly.

Simple Guide to Fix Enter Password to Unlock 30 Attempts

The right solution depends on whether you still remember your passcode or have completely forgotten it. Let’s go over both cases, step by step.

1. If You Remember the Passcode

fix enter password to unlock 30 attempts

If you suddenly recall your correct passcode, the process is straightforward.

  • Wait for the countdown timer to end.
  • When your phone allows, type the correct passcode carefully.
  • Don’t try before the timer ends, or the wait will get longer.

This is the simplest way to fix enter password to unlock 30 attempts if you still know your passcode.

2. If You Forgot the Passcode

If you cannot remember your passcode, you’ll need to erase your iPhone and set it up again. Unfortunately, there’s no backdoor, as Apple doesn’t store or reset your passcode. But don’t worry—if you have a backup, you can restore your data later.

Method 1: Use Find My iPhone (Best Way)

fix enter password to unlock 30 attempts

If “Find My iPhone” was enabled, you can erase your phone remotely:

  1. Go to icloud.com/find on another device or computer.
  1. Log in using your Apple ID and password.
  1. Select your locked iPhone from the device list.
  1. Click Erase iPhone.
  1. Confirm the erase. Your iPhone will reset to factory settings.

After erasing, you can set up your device as new or restore from an iCloud backup. This method is the quickest way to fix enter password to unlock 30 attempts when you can’t recall your passcode.

Method 2: Use Recovery Mode (Without Find My iPhone)

fix enter password to unlock 30 attempts

If “Find My iPhone” wasn’t enabled, you can reset using Recovery Mode:

  1. Turn off your iPhone.
  1. Put it in Recovery Mode:
  • iPhone 8 or later: Quickly press Volume Up, then Down. Hold the side button until you see Recovery Mode.
  • iPhone 7: Hold the volume down and side buttons until recovery mode shows.
  • iPhone 6s or earlier: Hold the Home and Side (or Top) buttons together.
  1. Connect the iPhone to the computer with the USB cable.
  1. Open Finder (Catalina+) or iTunes (Windows/Mojave).
  1. Select Restore when prompted.

This will erase your device and reinstall iOS. Then, restore from backup or set up as new. It’s a reliable way to fix enter password to unlock 30 attempts even if you never turned on Find My iPhone.

How to Prevent This Problem in the Future

fix enter password to unlock 30 attempts

Prevention is always better than fixing. Here are some simple steps to avoid lockouts:

  • Use Face ID or Touch ID—it’s faster and prevents failed tries.
  • Choose a memorable passcode – Pick something secure but not too complicated for you to forget.
  • Make regular backups – Use iCloud or a computer to save your data regularly.
  • Turn on Find My iPhone—this feature is essential for erasing or finding your device remotely.
  • Avoid pocket dials—use a phone case or shorten your auto-lock time to reduce accidental touches.

Following these tips ensures you won’t need to fix enter password to unlock 30 attempts again in the future.

Frequently Asked Questions (FAQs)

Q1: Will I lose my data when fixing this issue?

A: If you don’t have a backup, yes, data will be lost. But if you regularly back up, you can restore everything after erasing.

Q2: Can Apple unlock my phone without erasing it?

A: No. Apple doesn’t store your passcode and cannot bypass it. Only erasing and restoring works.

Q3: My phone says, “iPhone is disabled; connect to iTunes.” What does that mean?

A: It means the timer option is no longer available, and you must erase the phone using Recovery Mode or Finder.

Q4: Is my iPhone broken after too many attempts?

A: No, the phone is not broken. It is just locked by software. Erasing and restoring will fix it.

Q5: How can I stop accidental lockouts from my pocket?

A: Use a screen lock case, enable Face ID/Touch ID, and reduce your auto-lock time.

Conclusion

fix enter password to unlock 30 attempts

Seeing “Enter Password to Unlock (30 Attempts)” can be stressful, but it’s actually your iPhone protecting your information. Whether you wait for the timer, use Find My iPhone, or go through Recovery Mode, there are always ways to fix enter password to unlock 30 attempts safely.

The key is prevention: use Face ID/Touch ID, choose a memorable passcode, and always back up your device. With these habits, you won’t have to worry about getting locked out again.

So, the next time you or someone else accidentally triggers this lockout, stay calm—you now know exactly how to fix enter password to unlock 30 attempts without losing control of your phone.